Adobe Lightroom has long been a staple for photographers seeking a powerful photo editing and organizing software. However, its subscription-based pricing model and steep learning curve can be barriers for some users. Whether you’re a professional photographer, content creator, or someone just starting out, there are several worthy alternatives to Lightroom that offer great features without the hefty price tag.
Many of these alternatives not only deliver essential editing tools but also introduce innovative features such as AI-powered enhancements, mobile compatibility, and customizable workflows. Some focus on offering a streamlined, user-friendly interface, while others cater to professional photographers with more advanced features.
With so many options available, it’s important to choose the one that best aligns with your specific needs. This guide will help you navigate through the various Lightroom alternatives so you can find the perfect fit for your photography journey.
In this article, we’ll explore a range of options—from lightweight, browser-based tools to more robust editing software—each providing unique benefits depending on your editing needs and budget. Whether you’re looking for simplicity, creative flexibility, or advanced editing features, these 8 best Lightroom alternatives offer something for everyone.
If you’re interested in exploring AI photo editors, you can read our article about the 10 best AI photo editors for photographers.
Capture One
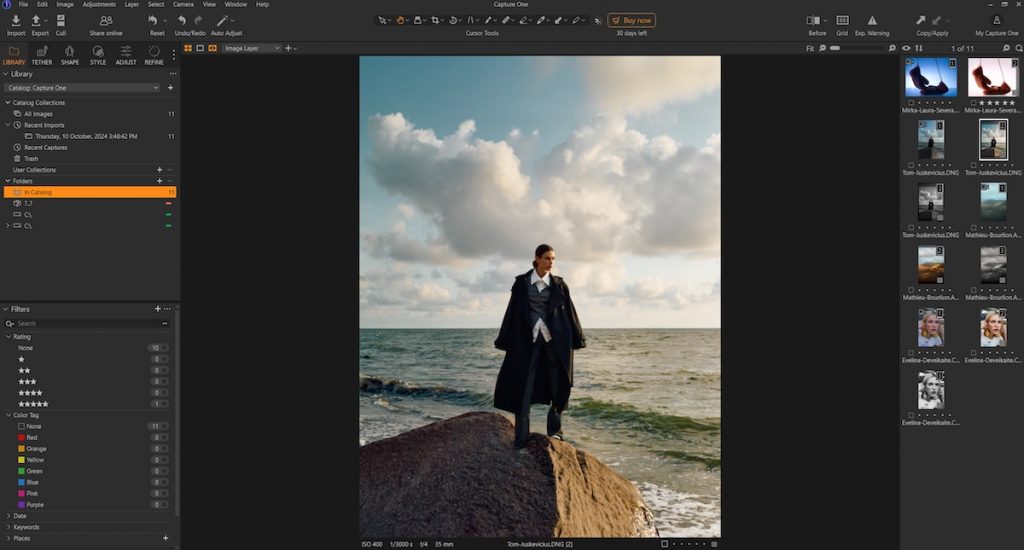
Capture One is a professional-grade photo editing software, available for both Windows and macOS, that has gained a reputation for its powerful tools and advanced capabilities—making it a top choice for high-end and studio photographers. Known for its exceptional color grading, tethered shooting, and layer-based editing, Capture One provides a high level of control over every aspect of the image editing process. Whether you’re working in a studio environment or editing complex images, Capture One offers a robust solution that enhances creative possibilities. In this overview, we’ll delve into the features that set Capture One apart and why it might be the ideal choice for serious photographers.
Both Capture One and Lightroom share a similarity in their steep learning curves, which can be daunting for new users. However, once mastered, each offers a powerful suite of features that photographers can fully take advantage of. Capture One, in particular, stands out with its exceptional tethered shooting feature, making it a top choice for studio photographers who prioritize real-time image previews and control during shoots.
If you’re transitioning from Adobe Lightroom to Capture One, the process is made easier with an importer tool that allows you to migrate your Lightroom files easily. Additionally, Capture One offers a customizable interface, enabling you to adjust the workspace to closely resemble your familiar Lightroom layout, helping to lower the learning curve.
If you’re seeking superior photo editing capabilities, Capture One stands out as the better option. Its color rendering and camera-specific profiles are finely tuned for each supported camera, resulting in images with greater detail and more accurate color fidelity. Compared to other RAW editors, including Lightroom—which often start with a more neutral color base—Capture One delivers a more refined and vibrant look straight out of the gate.
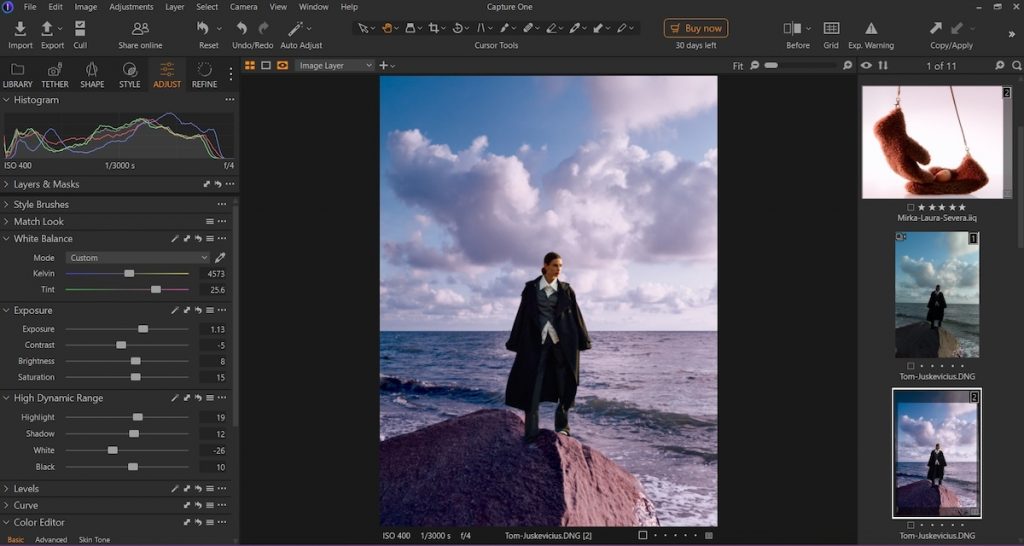
Capture One’s Color Balance tool is a powerful feature designed for photographers who want precise and creative control over their color grading. It allows you to pick any color from your image and define a specific range, making it easy to isolate and work with targeted hues.
Once a color range is selected, you can take your adjustments further by using the three-way color grading wheel, which lets you independently modify the tint in the shadow, midtone, and highlight areas. This layered approach not only gives you a high level of customization, but also helps achieve a more refined and cinematic look. Whether you’re correcting color casts or adding a creative mood, the Color Balance tool offers a flexible and intuitive way to shape the overall tone of your image.
Capture One allows you to edit using layers, providing a more advanced and flexible approach compared to Lightroom’s masking tools. While there are some limitations, such as the number of layers you can create and certain constraints with the masking functionality, the layer-based workflow still offers a significant advantage. It enables more precise control over individual adjustments, making it easier to fine-tune specific elements of your image without affecting the entire composition. This level of control can be especially useful for complex edits, helping photographers achieve a polished and professional result.
One of Lightroom’s advantages is its seamless integration with Photoshop. You can easily send a RAW file from Lightroom to Photoshop, where you can take advantage of additional plug-ins and work non-destructively using smart layers—allowing you to edit all the way back to the original RAW data. This tight integration streamlines the workflow for photographers who rely on both platforms. In contrast, Capture One doesn’t offer the same level of connectivity with Photoshop, and once you export an image for external editing, you lose the ability to revert to your original RAW adjustments within Capture One.
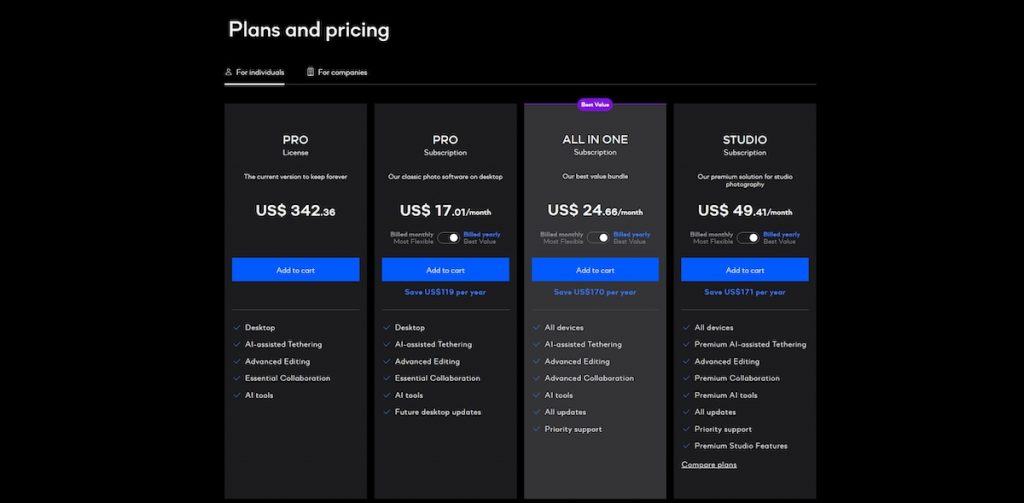
Pricing is another important factor to consider, and Capture One tends to be on the higher end. While Lightroom’s subscription includes not only the desktop version but also access to Lightroom Mobile and Photoshop, Capture One requires separate plans for additional features like mobile editing or multi-device use—leading to a higher overall cost.
In fact, for the price of a single Capture One subscription, you could gain access to multiple Adobe apps, like Lightroom and Photoshop, making Adobe’s Creative Cloud plan a more cost-effective option for many photographers.
Conclusion
In conclusion, both Capture One and Lightroom offer powerful tools for photographers, but they cater to slightly different needs and workflows. Capture One excels in tethered shooting, color grading, and detailed RAW processing, making it an ideal choice for studio and commercial photographers who demand precision and control. Its layer-based editing and advanced color tools provide a level of customization that surpasses Lightroom in certain areas.
However, Lightroom’s more affordable pricing, seamless integration with Photoshop, and broader ecosystem make it a practical and versatile option for many users. Ultimately, the best choice depends on your editing style, budget, and how much value you place on features like tethering, color control, and cross-platform flexibility.
ON1 Photo RAW 2025
ON1 Photo RAW is a feature-rich alternative to Adobe Lightroom that combines photo organization, RAW processing, layered editing, and creative effects—all in one powerful platform, available on Windows and Mac. Designed for photographers who want an all-in-one workflow, ON1 Photo RAW eliminates the need to switch between multiple programs like Lightroom and Photoshop. While the software offers professional-level tools and flexibility, it does come with a learning curve that’s similar to Lightroom. Still, for users willing to dive in, ON1 Photo RAW is a powerful Lightroom replacement that delivers both performance and creative control.
Both ON1 Photo RAW and Adobe Lightroom offer non-destructive editing, allowing photographers to experiment freely without permanently altering their original files. Every adjustment—whether it’s exposure, color grading, or retouching—is saved as a set of instructions rather than applied directly to the image. This workflow is ideal for maintaining image integrity, making it easy to revisit and revise edits at any time. Whether you’re working with layers in ON1 or using Lightroom’s Develop module, you can make extensive edits with the confidence that your original RAW files remain untouched.
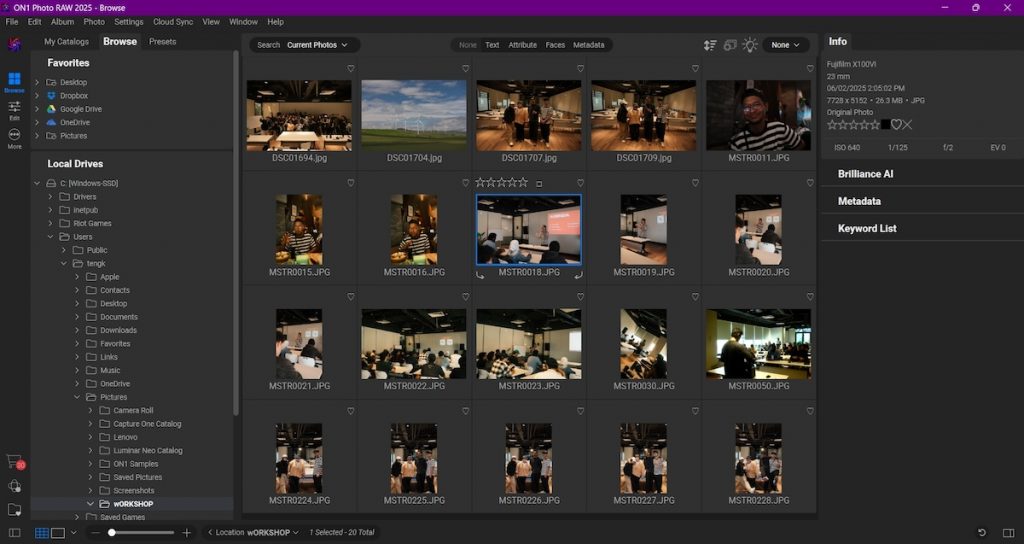
While ON1 Photo RAW offers a capable photo management and library system, it relies on a browser-based approach that may feel limiting compared to Lightroom’s more advanced cataloging features. You can locate images using keyword, date, and time searches, which makes organizing and finding photos fairly straightforward. However, the software lacks options for creating backups or utilizing the flexible catalog structure that many Lightroom users rely on. Additionally, some users may notice slower performance when loading large batches of images, which can impact overall workflow efficiency.

One of ON1 Photo RAW’s differentiating features is its advanced layer functionality, which goes beyond Lightroom’s masking tools. With ON1, photographers can create complex composites, manually blend exposures, and even swap skies—opening up creative possibilities typically found in dedicated image editors like Photoshop. The software comes loaded with a variety of backgrounds, textures, and graphic elements that make photo compositing easier and more dynamic. Users can also stack multiple filters, adjust blending modes, and fine-tune each layer to craft a unique, personalized editing style. This makes ON1 Photo RAW a strong choice for those who want powerful layer-based editing within a single application.

It also shines with its AI-powered tools, offering capabilities that, in some areas, surpass what Lightroom currently provides. The AI Portrait Retouch feature automatically detects multiple faces in a single image, allowing you to make targeted adjustments like skin smoothing, eye enhancement, and facial structure edits—all in one go. Another standout tool is the Super Select AI, which lets users click on any object or region in a photo to instantly apply a full range of adjustments, including tone, color, and effects. These intelligent features not only speed up the editing process but also give you greater precision and control with minimal effort.
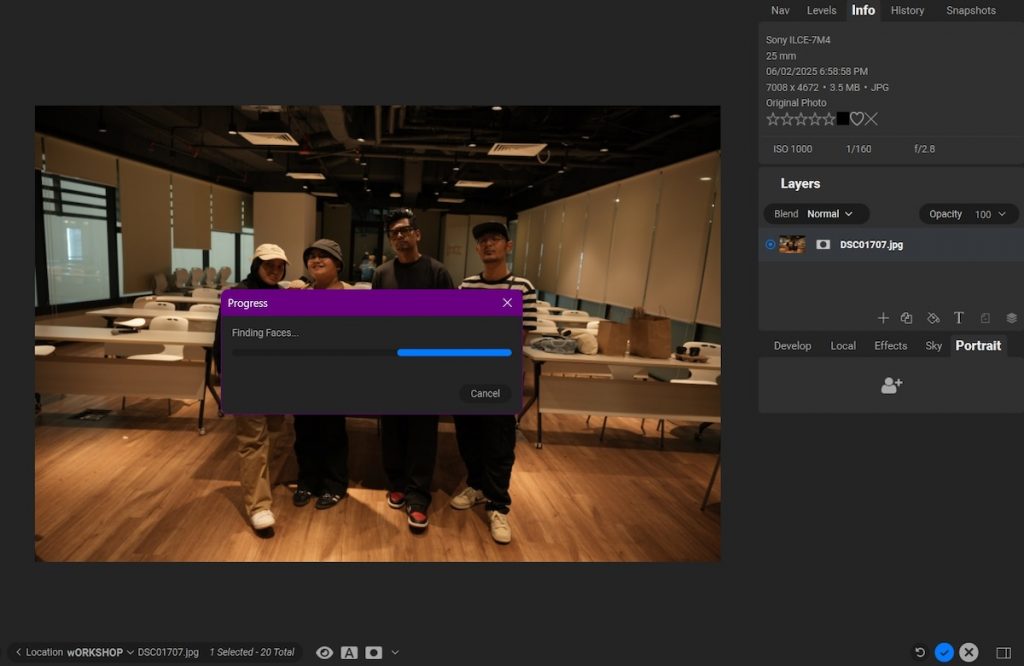
While ON1 Photo RAW delivers impressive AI-powered features, performance can be an issue, especially when using more processor-intensive tools like sky replacement. In one test, attempting to swap the sky in a photo that didn’t contain any visible sky caused the software to hang on a loading screen for an extended period before eventually stopping. This kind of sluggishness is not uncommon, particularly with complex AI operations, and may be influenced by the specs of the user’s machine. Combined with an interface that has a bit of a learning curve, the frequent appearance of pop-up loading dialogues can interrupt the editing flow, making performance optimization an important consideration for prospective users.

ON1 Photo RAW offers flexible pricing with both one-time purchase and subscription options. You can get full access to all features for just $53.99, with a 30-day money-back guarantee. For enhanced functionality, the Photo RAW Max upgrade allows you to use the software as a plugin in Adobe Photoshop and Lightroom, plus get 200GB of cloud storage for syncing and mobile app integration, all for a one-time payment of $107.99. Alternatively, a subscription plan starts at $4.50 per month (billed annually), offering another affordable way to access the software’s powerful tools.
Conclusion
In conclusion, ON1 Photo RAW is a strong alternative to Adobe Lightroom, offering a comprehensive set of tools for photo organization, RAW processing, and creative editing. With advanced features like layered editing, AI-powered tools, and non-destructive workflows, ON1 provides a lot of flexibility and control, making it an excellent choice for photographers looking for an all-in-one solution.
While the software does come with a steep learning curve and some performance issues, especially with more demanding AI tasks, its one-time purchase option and cloud integration provide great value. If you’re seeking a powerful, Lightroom-free editing experience with additional compositing capabilities and AI tools, ON1 Photo RAW is certainly worth considering.
Luminar Neo
Luminar Neo has emerged as a powerful alternative to traditional photo editing software, offering photographers a fresh approach to editing with advanced AI tools and a user-friendly interface. It’s available as a Windows and MacOS app, as well as a Photoshop, Lightroom and Photos plugin. Designed to streamline the editing process, Luminar Neo combines intuitive features with cutting-edge technology, making it a strong contender for those seeking efficiency and ease of use in their workflow. While Adobe Lightroom remains the industry standard for many professionals, Luminar Neo provides a simpler, faster, and more affordable option for those looking to take their editing to the next level.
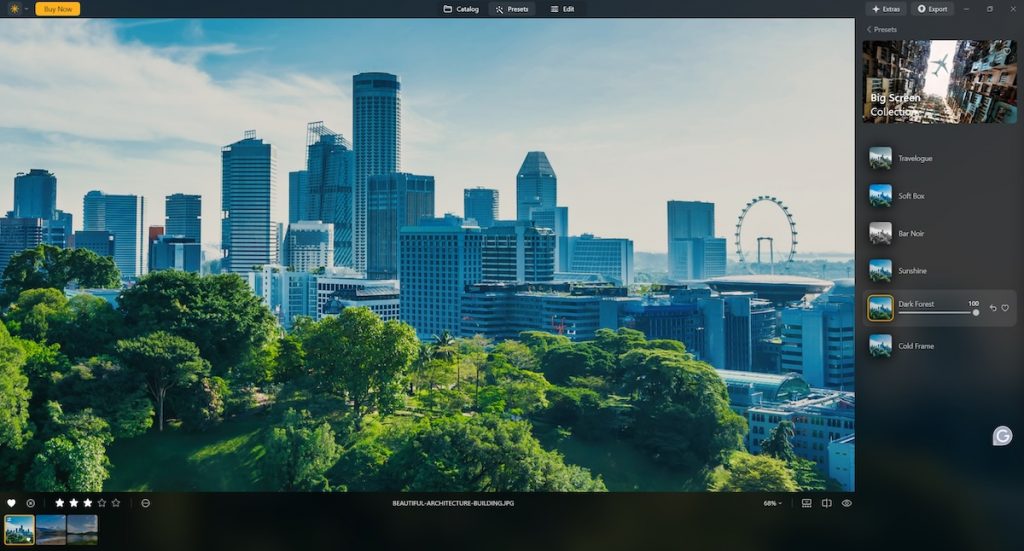
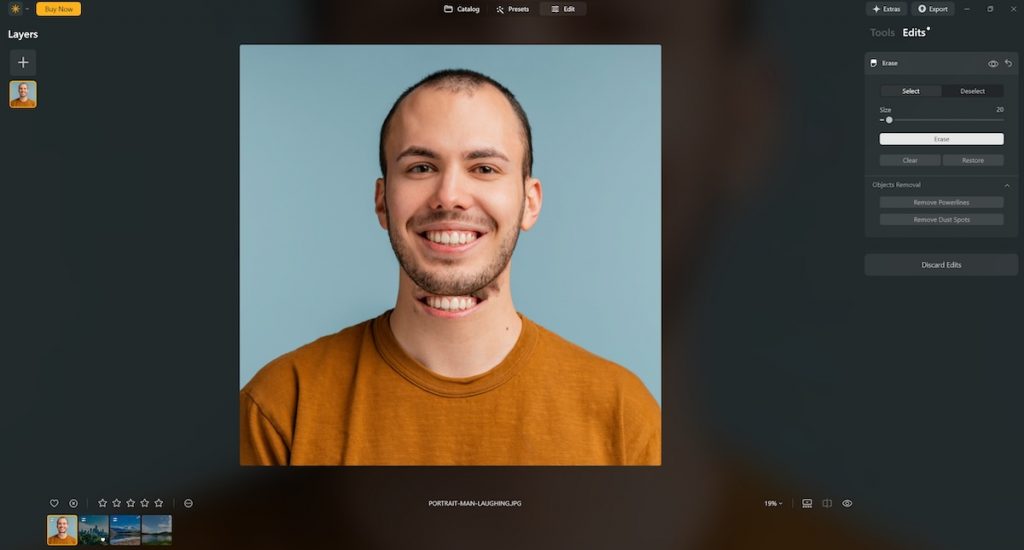
One of the most noticeable differences between Luminar Neo and Adobe Lightroom Classic is the ease of use. Luminar Neo is designed with a simple and intuitive interface that consists of three main sections: Catalog, Presets, and Edit. The tools and functionalities are straightforward, making it accessible for beginners and professionals alike.
One of its standout features is the AI-powered preset suggestion, called “For This Photo,” which analyzes the selected image and offers suitable preset options. Users can also preview these presets and adjust their intensity using a simple slider, streamlining the editing process significantly.
In contrast, Lightroom Classic has a much steeper learning curve, and its complex catalog system and extensive editing tools can be overwhelming for new users. While its powerful features make it an industry standard, the initial learning phase can be quite challenging compared to Luminar Neo’s more user-friendly approach.
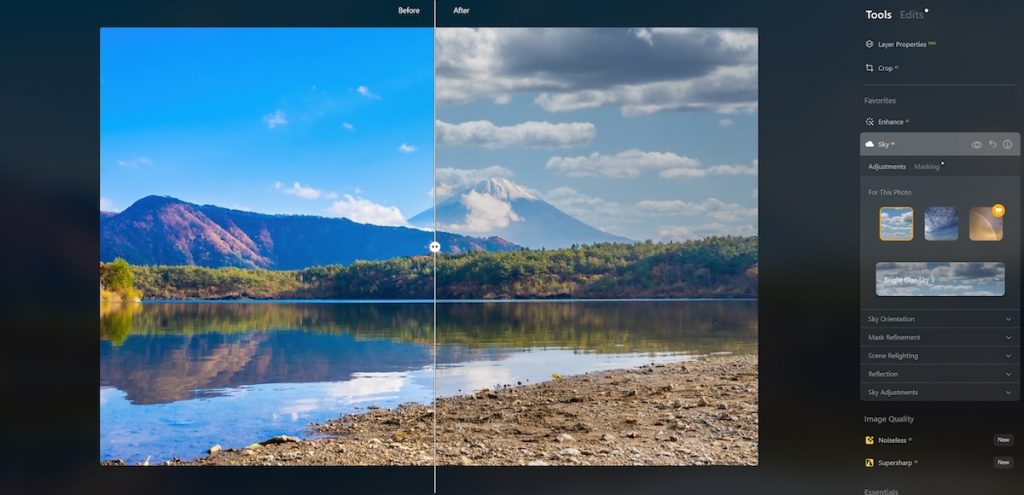
Both Luminar Neo and Lightroom Classic offer standard adjustment tools such as exposure, contrast, and color correction. However, Luminar Neo differentiates itself with AI-powered tools that make complex edits swift and effortless. Features like AI Sky Replacement provide realistic results within seconds, giving users the flexibility to adjust settings with an easy-to-use slider.
Lightroom Classic, on the other hand, has recently introduced AI-powered features through Adobe Firefly. Some of these tools outperform Luminar Neo, particularly the Generative Remove feature, which provides more precise and natural-looking results. For example, when attempting to remove facial hair, Lightroom’s AI seamlessly replaced the removed area with a natural skin tone and texture. In contrast, Luminar struggled with this task, sometimes generating unnatural replacements that required additional manual correction.
When it comes to performance, Luminar Neo offers a more streamlined experience, particularly in file management. Adding photos to the catalog is straightforward, as Luminar mirrors the user’s hard drive. If a file is removed or renamed outside of the software, the changes are reflected instantly within Luminar’s catalog without any issues.
Lightroom Classic requires more processing power and has historically been slower in handling large libraries. While Adobe has improved its performance over time, Lightroom still lags behind Luminar in responsiveness. Luminar feels much “lighter” in comparison, as its AI tools leverage the computer’s GPU instead of relying solely on the CPU. Some AI-powered adjustments in Luminar take a few seconds, while others can take close to a minute—but overall, it still operates more smoothly than Lightroom in many scenarios. However, Luminar does have its quirks—such as a bizarre instance where attempting to remove facial hair resulted in an extra mouth appearing on my subject’s face, something I have never encountered with Lightroom.
On the other hand, Lightroom Classic provides far more flexibility in terms of exporting options. Luminar Neo’s export window is quite basic, lacking the extensive customization options needed for professional workflows. If you require specific file formats, color profiles, or resolution settings for different types of image delivery, Lightroom is the better choice. Its robust export features make it ideal for those who need precise control over print quality and digital output.
Luminar Neo offers basic photo organization features, such as the ability to mark images as favorites or rejected and assign star ratings. However, for photographers working with large volumes of images, Lightroom Classic is superior. It provides advanced organizational tools, including collections, keyword tagging, and metadata-based searches, making it a powerful asset for professional workflows. This level of organization is essential for photographers who need to efficiently manage thousands of images across different projects.
Nick Dale emphasized Luminar Neo’s potential as an alternative to Lightroom, citing its AI-powered tools and similar editing environment. He also notes that “While Luminar Neo shares familiar keyboard shortcuts and a comparable workflow to Lightroom, it also brings its own quirks and interface differences that require some adaptation. For photographers interested in a more budget-friendly alternative without sacrificing core editing features, Luminar Neo is a promising option—particularly for those willing to learn its unique approach and embrace its innovative tools.”
Luminar Neo provides users with two pricing options: a monthly subscription or a one-time perpetual license. This flexibility makes it an attractive option for those who prefer to avoid recurring payments. On the other hand, Lightroom Classic is only available through a subscription model. While it includes access to Photoshop as part of Adobe’s Photography Plan, some users may find the lack of a one-time purchase option to be a drawback.
Conclusion
Luminar Neo stands out as an excellent alternative to Lightroom Classic, especially for those who prioritize ease of use, AI-powered editing, and performance. It offers a more intuitive interface, quicker workflow, and a flexible pricing model. However, Lightroom Classic remains the industry leader for professionals who require advanced file management, superior AI-powered features, and comprehensive export options. Ultimately, the choice between the two depends on your specific needs—whether you seek an easy-to-use, AI-driven editing experience or a feature-rich, professional-grade toolset.
DxO Photolab
DxO PhotoLab stands out as one of the most powerful Adobe Lightroom alternatives available today, especially for photographers who prioritize image quality and precise control over their edits. Compatible with both Windows and macOS, it’s developed by the image science experts at DxO and combines advanced RAW processing with smart correction tools that adapt to the unique characteristics of your camera and lens. Whether you’re a seasoned professional or an enthusiastic hobbyist, DxO PhotoLab offers a compelling suite of features—including exceptional noise reduction, intuitive local adjustments, and automatic optical corrections—that make it a strong contender for those looking to move beyond Adobe’s ecosystem.
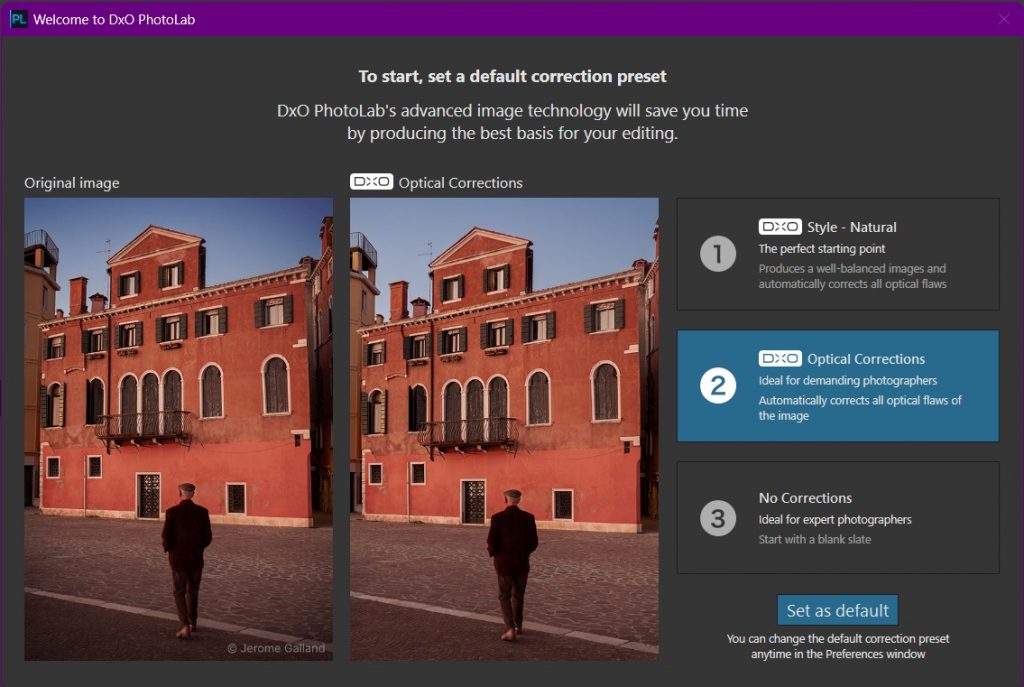
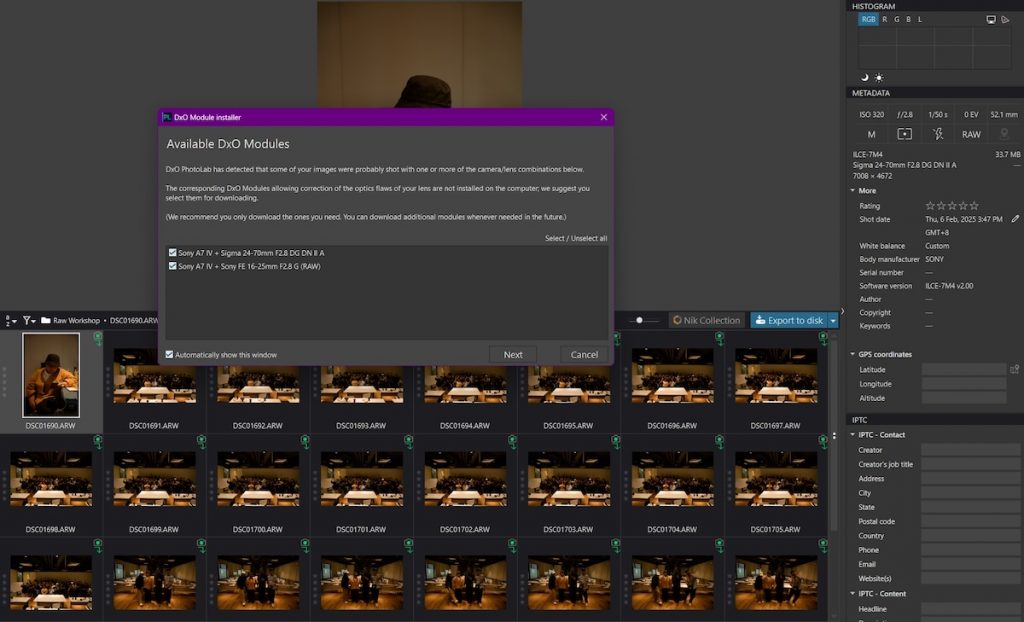
DxO PhotoLab excels in high-quality RAW processing, making it a top choice for photographers seeking the best Lightroom replacement. Its powerful RAW editing engine automatically applies lens correction based on an extensive, lab-tested database of camera and lens combinations—helping you achieve perfect sharpness, minimal distortion, and reduced chromatic aberration without manual tweaking. The software also includes precise camera profiles designed to bring out the full potential of your RAW files, ensuring accurate colors and optimal dynamic range. These intelligent tools not only save time but also deliver professional-level results straight out of the box.
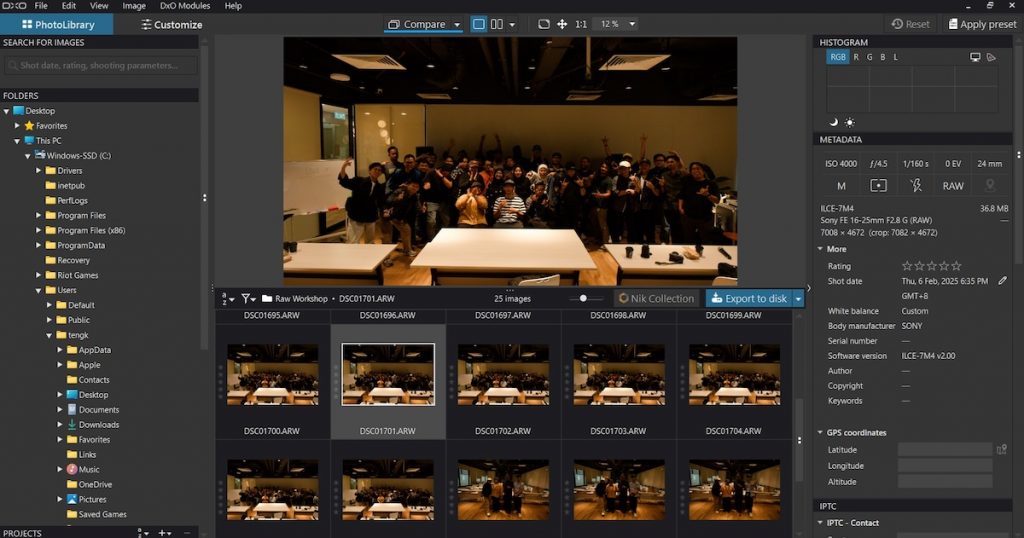
For photographers transitioning from Adobe Lightroom, DxO PhotoLab offers a familiar and customizable interface that makes the switch feel seamless. Its layout can be adjusted to closely mimic Lightroom’s workspace, reducing the learning curve for new users. In terms of functionality, DxO PhotoLab delivers a robust set of basic editing tools—including exposure, contrast, white balance, and tone curve adjustments—giving users full manual control over their images. This combination of user-friendly design and powerful editing features makes DxO PhotoLab a practical and efficient Lightroom alternative for both beginners and professionals.
DxO PhotoLab also includes intuitive file management tools that cater to both hobbyists and professional photographers. The software’s built-in search and filtering system makes organizing and locating images simple, with options to sort by date, rating, keywords, ISO, aperture, and other shooting parameters. While it does not include a full digital asset management (DAM) system like Lightroom, its streamlined approach is fast and efficient for most workflows. One limitation to note is that DxO PhotoLab only supports RAW files from cameras in its compatibility list, which can be a drawback for users with newer or niche models—but the list is consistently growing with each update.
When it comes to color editing, DxO PhotoLab sets itself apart from Lightroom with its powerful and precise HSL tools. At the heart of this is the DxO ColorWheel—a standout feature that offers more granular control over individual color ranges, allowing photographers to make highly targeted and refined adjustments. The interface is designed to make precision color edits easier, especially for those who want to fine-tune hues in specific areas without affecting the entire image. While Adobe Lightroom excels with its versatile global and local color grading tools, presets, and smooth workflow integration, DxO PhotoLab is the better choice for users seeking advanced control and accuracy in their color correction process. This makes it a compelling Lightroom alternative for professionals focused on color precision.
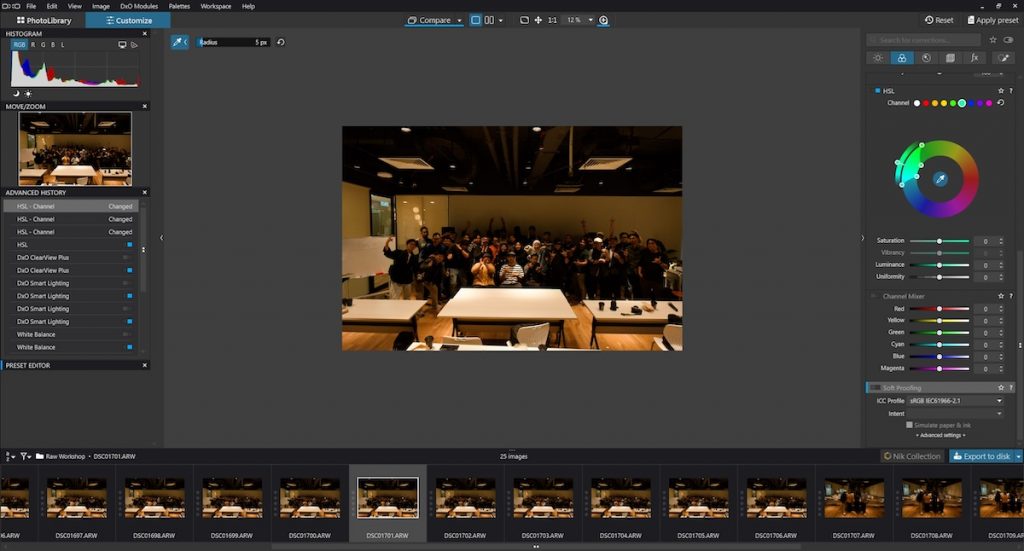
DxO PhotoLab is packed with advanced AI-powered tools that make it a powerful Lightroom alternative for photographers who want intelligent automation without sacrificing quality. Its DeepPRIME and DeepPRIME XD denoising algorithms are industry-leading, delivering exceptional noise reduction while preserving fine details in high-ISO images. ClearView Plus enhances contrast and removes haze with a single click, perfect for landscape and travel photography. For precise local adjustments, the intuitive U Point technology allows selective editing without complex masking. Combined with DxO’s automatic lens correction—powered by its massive optical module database—these AI tools streamline the editing process, enabling quick yet professional-grade results with minimal manual input.
One of the most appealing aspects of DxO PhotoLab as a Lightroom alternative is its pricing model. Unlike Adobe Lightroom, which requires a monthly subscription, DxO PhotoLab offers a one-time purchase license for $229.99. For existing users, upgrade pricing starts at just $109.99, making it a cost-effective option for those who already use older versions. This one-time payment structure is especially attractive to photographers who prefer to own their software outright and avoid ongoing subscription fees. With no recurring costs and access to powerful editing features, DxO PhotoLab delivers excellent long-term value for both casual users and professionals.
As photography blogger Rick puts it in his review, “DxO PhotoLab offers almost all the functionality you get from Lightroom, has a great and easy-to-use interface, and includes high-end features like DeepPRIME noise reduction and top-tier camera and lens profiles. And the best thing: you don’t need a subscription or be tied to online-only options.”
Conclusion
Overall, DxO PhotoLab is a powerful and well-rounded alternative to Adobe Lightroom, offering a blend of advanced features, intuitive design, and long-term value. From its industry-leading RAW processing and AI-powered tools to its customizable interface and precise color editing capabilities, DxO delivers professional-grade results without the need for a subscription.
While its file management may be slightly more limited and RAW support tied to compatible cameras, its continuous updates and expanding feature set make it a future-proof investment. Whether you’re a hobbyist seeking ease of use or a professional in need of precision, DxO PhotoLab stands out as a top contender for anyone looking to move beyond Lightroom.
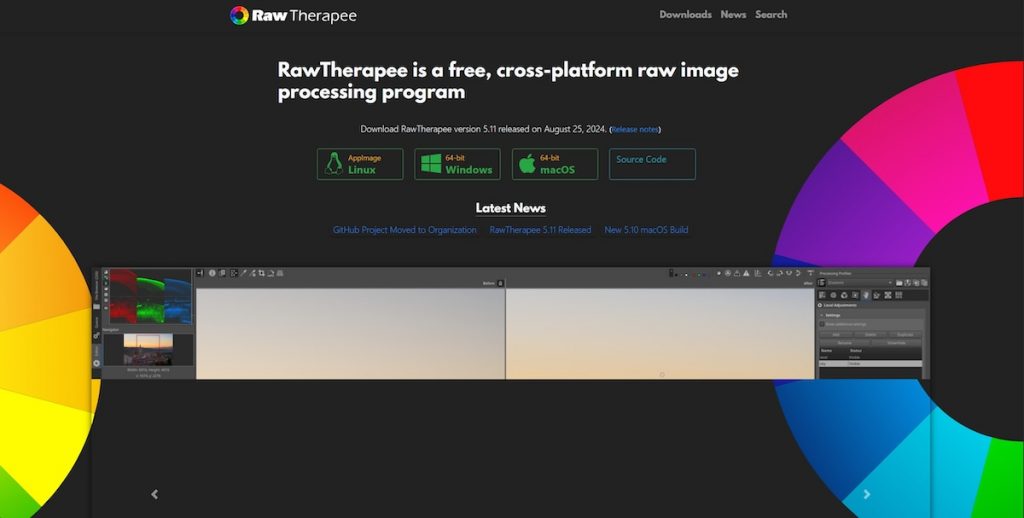
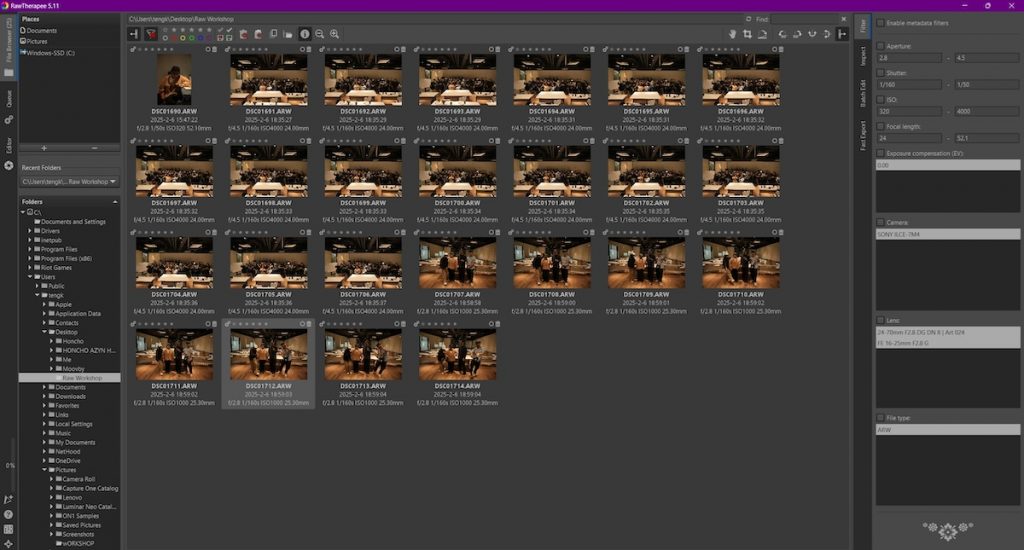
RawTherapee
For photographers seeking a cost-effective yet robust solution, RawTherapee stands out as a free photo editor and open-source alternative to Adobe Lightroom. It’s a RAW image processor available on Windows, macOS, and Linux, offering a comprehensive suite of tools tailored for both amateur and professional photographers.
RawTherapee’s interface is noticeably different from Adobe Lightroom, and for many users, it can feel clunky or unintuitive at first glance. Unlike Lightroom’s clean and streamlined design, RawTherapee’s layout is more technical and densely packed with options, which can overwhelm beginners. As a result, the learning curve is considerably steeper, requiring users to invest time in understanding the various tools and settings before they can take full advantage of the open-source software’s capabilities.
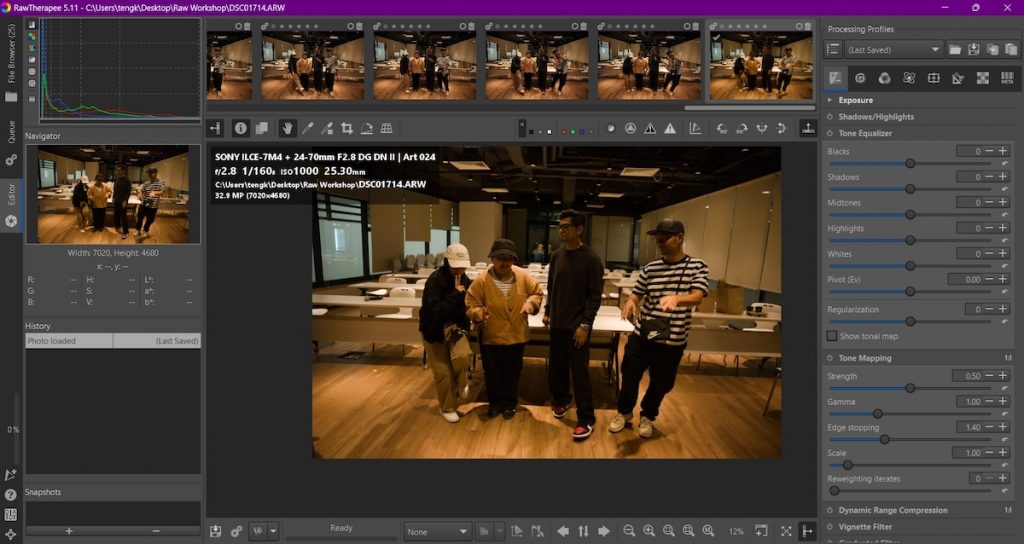
When it comes to RAW processing, both RawTherapee and Lightroom deliver excellent results, but their approaches differ. RawTherapee excels in its advanced demosaicing algorithms, multiple denoising methods, and precise color correction tools. Lightroom, on the other hand, integrates seamlessly with Adobe’s Creative Cloud and has a more intuitive interface, making it easier for beginners to grasp. However, RawTherapee’s tone mapping and lens correction features can deliver highly detailed and accurate edits for users who are willing to delve deeper into manual adjustments.
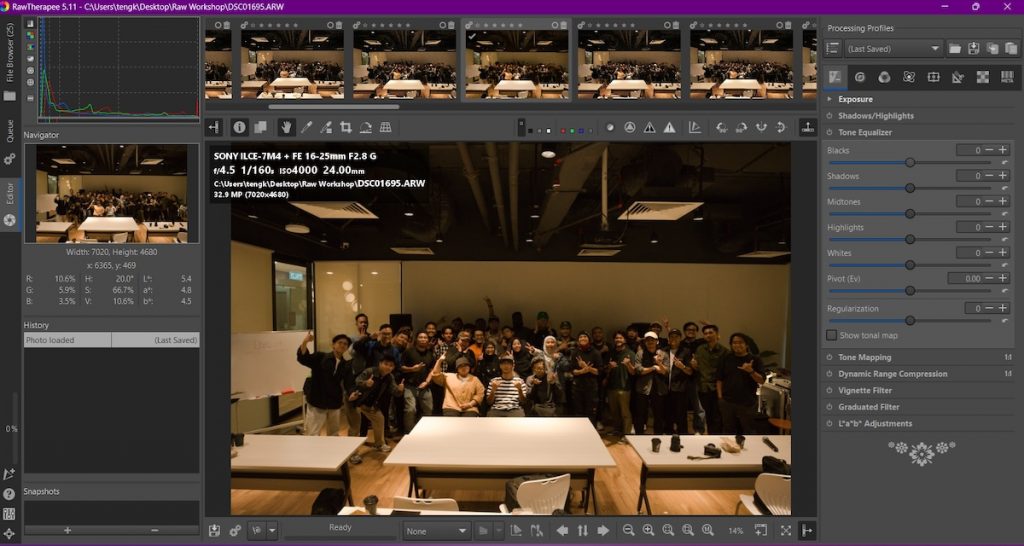
Lightroom stands out with its robust digital asset management (DAM) system, allowing users to organize, tag, and search through their entire photo library with ease. It provides an advanced folder and collection management system, making it ideal for large-scale photo libraries. In contrast, RawTherapee offers a more basic file management system. By selecting a folder, users can quickly access thumbnails and edit photos, but it lacks Lightroom’s advanced metadata tagging and organizational features.
One of the biggest draws of RawTherapee is that it is completely free, making it an attractive alternative for photographers on a budget. There are no subscription fees, and users have access to all the software’s features without paying a dime.
Conclusion
In conclusion, RawTherapee proves to be a solid free alternative to Adobe Lightroom, especially for photographers who prioritize image quality and manual control without the cost of a subscription. While it may lack Lightroom’s sleek interface and advanced organizational tools, RawTherapee makes up for it with powerful RAW processing capabilities, deep color correction options, and full access to all features at no cost. Despite its steeper learning curve, it offers a high level of customization and precision that can meet the needs of both hobbyists and professionals. For those willing to invest time in mastering its interface, RawTherapee delivers professional-level editing results—making it a compelling, budget-friendly Lightroom alternative.
Darktable
Darktable is a free and open-source alternative to Adobe Lightroom, designed for photographers seeking photo editing software without the subscription fees. Built by a community of developers and photographers, Darktable offers a comprehensive workflow for RAW image development, tethered shooting, and non-destructive editing. It’s particularly popular among Linux users but is also available on Windows and macOS, making it an accessible option across platforms. With its robust toolset and customizable interface, Darktable caters to serious hobbyists and professionals looking for a free yet capable editing environment.
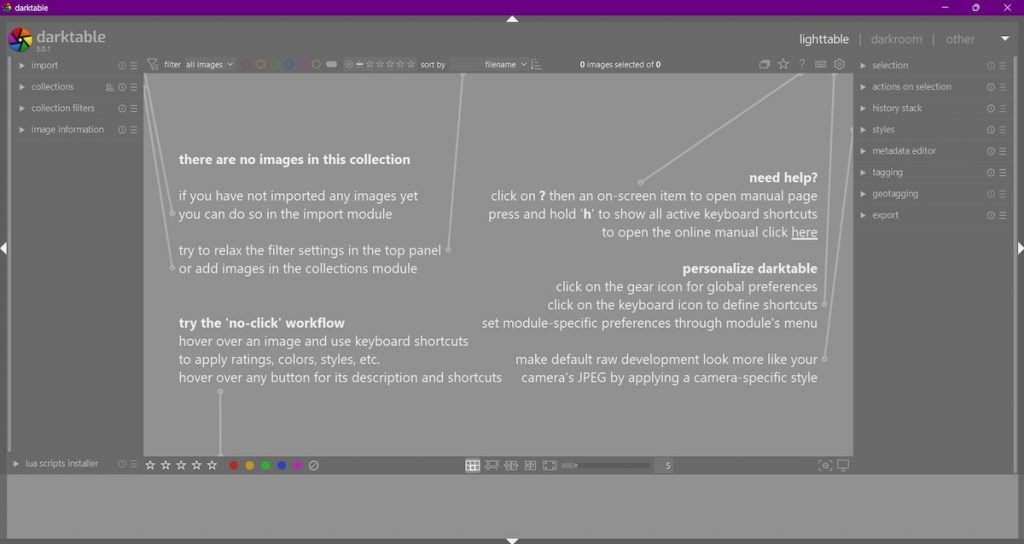
Darktable’s user interface is thoughtfully divided into three main sections, each tailored to a specific part of the photography workflow. The Lighttable view handles image organization, offering tools for color labeling, star rating, and managing your photo library efficiently. Moving into the Darkroom view, users gain access to the core editing modules, where powerful adjustments like exposure, contrast, color correction, and masking can be made in a fully non-destructive environment. The final section, Other, includes a range of additional tools such as a map module for geotagging images, a tethering interface for live camera control, and even a slideshow function for quick presentations. This logical layout makes Darktable both structured and flexible for different editing styles.
While Darktable’s interface may resemble Lightroom at first glance, its editing modules can feel overwhelming to new users. The software uses a unique system of modules that offer deep control but may require time and patience to master. This learning curve can be a hurdle for those transitioning from more user-friendly platforms. However, thanks to its open-source nature, Darktable boasts a strong community of users and contributors. There’s a wealth of support available in the form of Reddit forums, comprehensive documentation, and countless video tutorials—making it easier for newcomers to gradually unlock its full potential.

One of Darktable’s standout features is its extensive support for a wide range of RAW and HDR image formats. It can process RAW files from over 400 different camera models, ensuring compatibility with most gear used by professionals and enthusiasts alike. The software also includes LUT (Look-Up Table) support, which allows for cinematic color grading and stylized looks, expanding creative possibilities.
Conclusion
Overall, Darktable is a compelling free alternative to Adobe Lightroom, especially for photographers who value full control over their editing process and prefer open-source solutions. It may take some time to get comfortable with its interface and advanced modules, but the payoff is a highly customizable, professional-grade workflow with no cost attached.
With its wide RAW support, powerful tools, and active community, Darktable stands out as one of the best free alternatives to Lightroom for serious photographers. However, if you’re working with thousands of images and need the fastest, most streamlined performance for large-scale workflows, you might want to consider other Lightroom alternatives that are better optimized for high-volume processing.
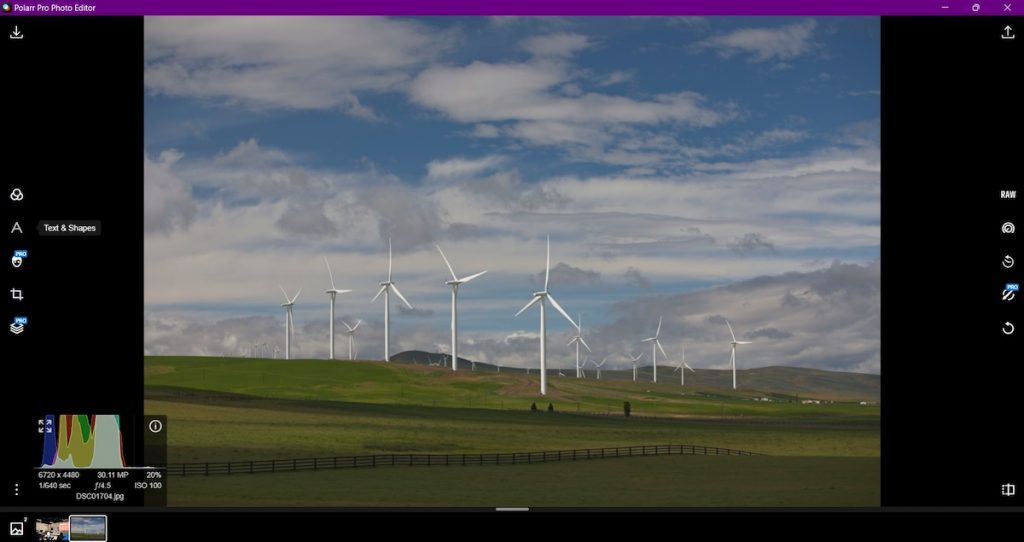
Polarr
Polarr is an online Lightroom alternative that offers a seamless experience across both its app and web-based platforms. One of its key strengths lies in maintaining identical interfaces and functionalities regardless of where it’s used, making it easy for users to switch between devices without a learning curve. This cross-platform consistency is especially appealing for photographers and casual editors who value flexibility and convenience without sacrificing control over their edits.

Polarr comes equipped with a wide range of editing tools that mirror much of what Lightroom offers, including exposure, contrast, HSL adjustments, curves, and more. However, it also introduces unique features that Lightroom lacks, such as custom filter creation, blending modes, and face detection-based enhancements. These additions give users creative options that go beyond traditional photo editing workflows, allowing for stylized results with minimal effort. Polarr’s toolset is designed to be both comprehensive and intuitive, catering to users who want depth without complexity.
It stands out for its user-friendly and straightforward design, making it accessible even to beginners. Each editing tool is represented by a clear, visually intuitive icon, helping users understand its function at a glance without needing to hover or guess. What’s more, Polarr allows users to customize the layout of the editing module by rearranging these icons to suit their workflow. This level of personalization not only streamlines the editing process but also enhances the overall user experience, making the software feel tailored to individual preferences.
However, it’s worth noting that Polarr’s online and browser-based setup comes with trade-offs—particularly in digital asset management. Unlike some other Lightroom alternatives that offer robust tools for organizing, tagging, and cataloging large photo libraries, Polarr lacks built-in DAM features. This can be a limitation for photographers who need to manage thousands of files efficiently. If organization and workflow management are high on your priority list, you may want to consider some of the other Lightroom alternatives featured in this article.
One of Polarr’s main limitations is its lack of native RAW file support, as it currently only handles JPEG images. While high-resolution JPEGs still allow for decent highlight and shadow recovery thanks to Polarr’s capable processing engine, it may fall short for photographers who rely heavily on RAW editing. However, Polarr is addressing this gap with its upcoming platform, Polarr Next—currently in beta—which offers browser-based batch RAW editing with an AI-powered workflow. Marketed as the first of its kind, Polarr Next signals a promising expansion of the platform for more advanced photo editors.

While Polarr does offer a free version, its functionality is quite limited—primarily covering basic tools like filters, text, cropping, color adjustments, vignette, and lighting. For users seeking more advanced capabilities such as retouching, selective adjustments, overlays, and custom effects, the Pro version is a better fit. At $47.99 per year, it’s a reasonably priced upgrade that unlocks the full potential of the platform without the subscription heft of Adobe’s ecosystem. For casual users, the free version might be enough—but serious editors will find real value in going Pro.
Conclusion
Overall, Polarr is a solid choice for users looking for a lightweight, cross-platform photo editor with a clean interface and powerful features. Its consistent experience across web and app, combined with creative tools and AI enhancements, makes it especially appealing to casual photographers and social media creators. While it may not cater to professional workflows that rely on RAW editing or extensive asset management, its affordability and ease of use make it a strong online alternative to Lightroom—for those seeking efficient, high-quality edits without the complexity of more advanced software.
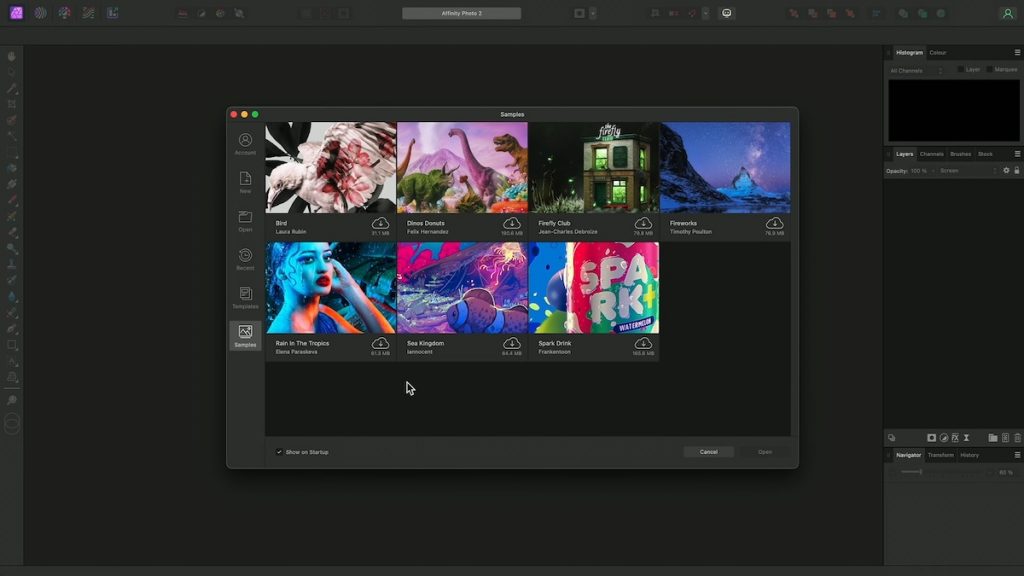
Affinity Photo 2
Developed by Serif, Affinity Photo offers a comprehensive set of editing features that rival Adobe’s offerings—without the need for Creative Cloud. It is one of the most compelling alternatives to Adobe Lightroom. While it lacks Lightroom’s built-in cataloging and cloud-based ecosystem, Affinity Photo excels in detailed, layer-based editing, making it an excellent choice for photographers who want full creative control and a one-time purchase model. Its versatility also makes it ideal for those who regularly work with advanced retouching, compositing, or graphic design elements alongside photography.
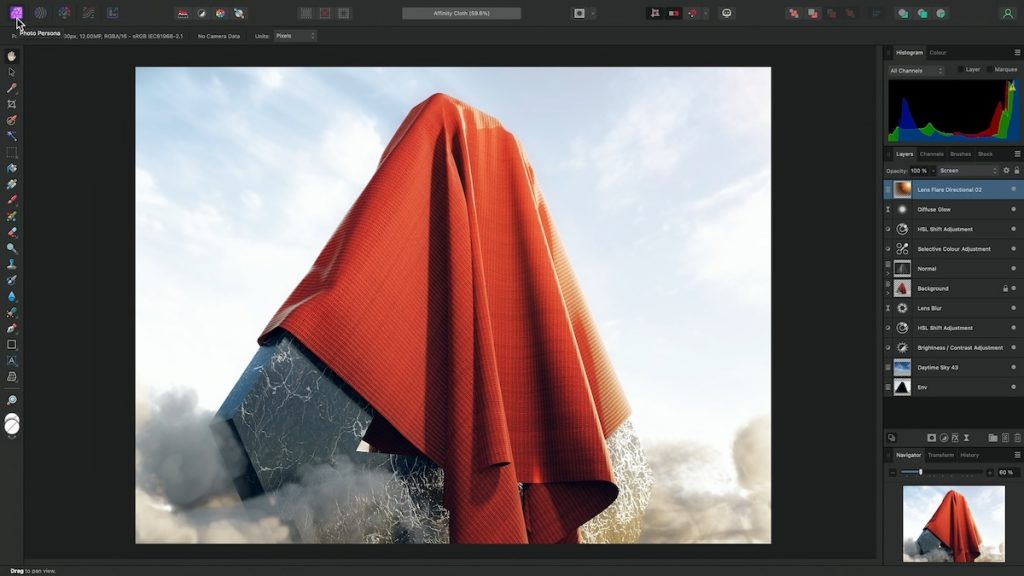
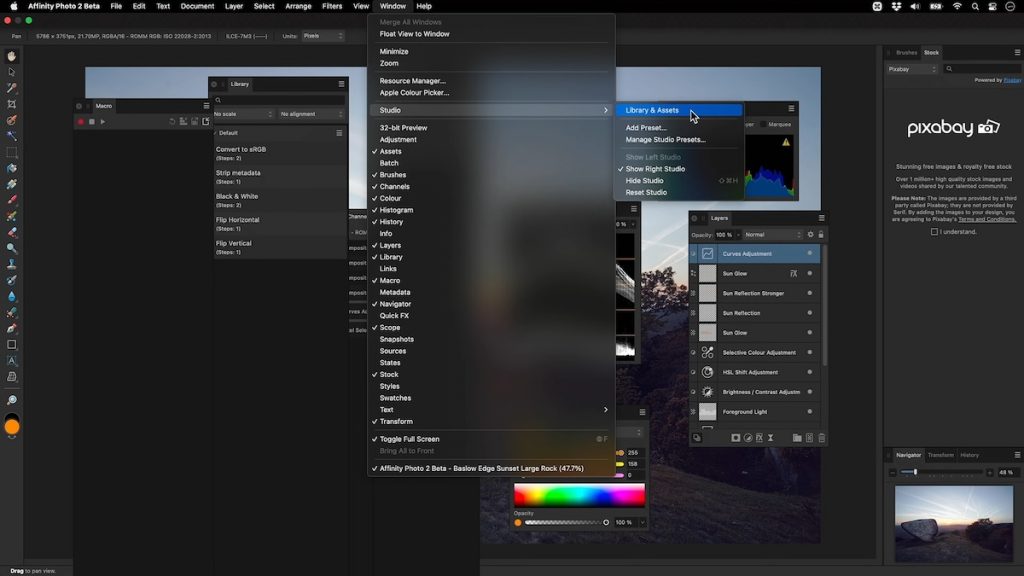
While Affinity Photo is often compared to Lightroom, it functions more as a Photoshop alternative than a direct replacement for Lightroom’s workflow. As a pixel-based photo editor, it offers powerful tools like layers, masking, blend modes, and advanced retouching—making it ideal for detailed, hands-on image manipulation. However, it lacks Lightroom’s organizational features such as a photo library, tagging, rating, and metadata filtering, which are essential for managing large volumes of images. If your focus is on creative editing rather than cataloging and workflow management, Affinity Photo delivers impressive capabilities at a one-time cost.
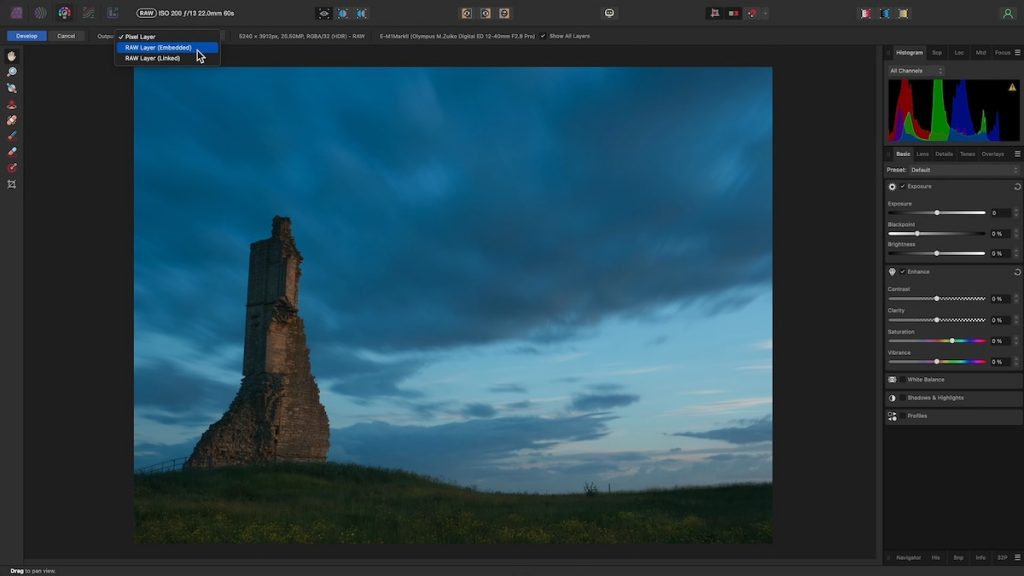
Both Affinity Photo and Adobe Lightroom support RAW editing and offer non-destructive workflows, allowing photographers to make changes without permanently affecting the original image. In terms of editing capabilities, Affinity Photo provides you with a wide range of tools that closely mirror Lightroom’s, especially when it comes to color correction and tone adjustments. From exposure and contrast to highlights, shadows, and white balance, users can achieve professional-grade results in either software. While their overall approaches differ, Affinity still delivers much of the same core functionality that Lightroom users rely on for everyday photo editing.
Affinity Photo stands out when it comes to adjustments and layers. With a full layer-based editing system similar to Photoshop, it gives you access to masks, blend modes, and non-destructive adjustment layers for highly flexible editing. This allows for complex compositing and precise control over each element in an image. In contrast, Lightroom does not support layers and offers only limited masking tools—such as linear, radial, and brush-based masks—making it less suited for detailed, multi-layered edits. If you are booking for more granular control and creative flexibility, Affinity Photo offers a clear advantage in this area.
Lightroom clearly excels with its extensive preset ecosystem, offering a wide variety of built-in options, support for third-party presets, and even AI-powered adaptive presets that intelligently adjust based on the photo’s content. This makes it easy for photographers to achieve consistent looks and streamline their editing workflow. In comparison, Affinity Photo offers only limited preset support, making it less convenient for users who rely heavily on one-click edits or batch editing across multiple images.
One of Affinity Photo’s biggest advantages is its affordable, subscription-free pricing model. Unlike Adobe’s Creative Cloud plans, Affinity Photo is available for a one-time purchase of just $69.99 for both Mac and Windows, with a separate iPad version priced at $18.49. For those who want access to the full suite of creative tools, the Affinity Universal License includes Affinity Photo, Affinity Designer, and Affinity Publisher across all operating systems—including iPad—for only $164.99. This makes it an incredibly cost-effective option for creatives who want professional-grade software without the ongoing monthly fees.
Conclusion
In conclusion, Affinity Photo stands out as a powerful and affordable alternative to Adobe Lightroom, especially for photographers who prioritize advanced editing tools over image organization and cloud-based workflows. While it lacks Lightroom’s library management and robust preset system, it more than makes up for it with layer-based editing, precise retouching tools, and a one-time payment model that offers exceptional value. Whether you’re a hobbyist or a professional looking to break free from subscriptions, Affinity Photo delivers a comprehensive set of features that can handle everything from detailed retouching to creative compositing with ease.
Aftershoot
Aftershoot is widely recognized for its AI-driven culling and editing tools. The process begins with creating an AI profile that mirrors your personal editing style, enabling the software to process large batches of images automatically while keeping the results consistent and true to your vision.
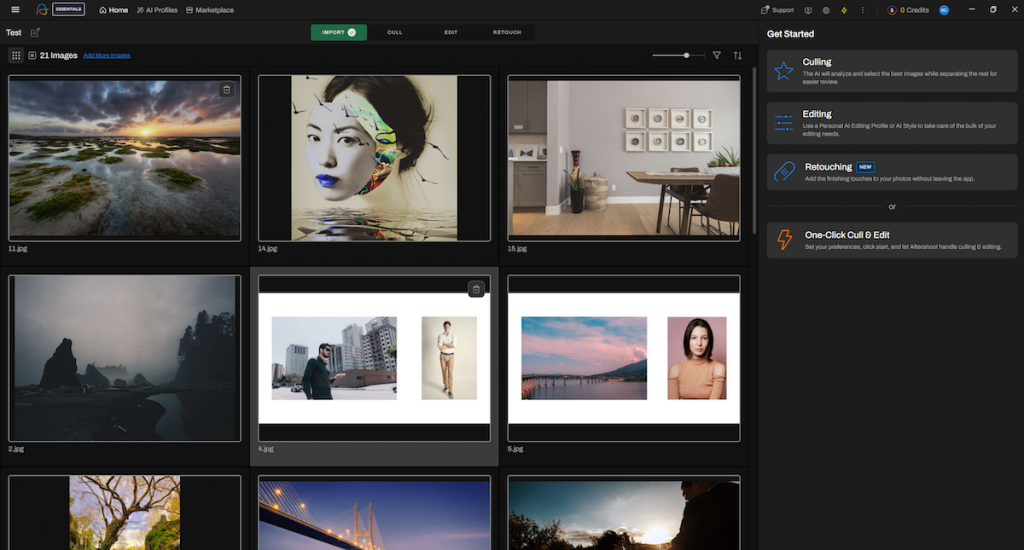
Aftershoot offers flexibility in building your AI profile. You can upload a minimum of 2,500 previously edited photos from Lightroom or Capture One to train the software on your unique style, or instantly create a profile based on one of your Lightroom presets. There’s also a marketplace of AI styles created by renowned professional photographers like Cassidy Lynne, Esteban Gil, Lily Red and more. Right out of the box, it includes an AI crop-and-straighten profile, giving your images a consistent foundation before further edits.
The retouching side is equally packed with AI features. You can use subject selection to specify which person to focus on, which is especially useful in group portraits. Aftershoot offers its own preset library, and you can also create your own to cover different scenarios.
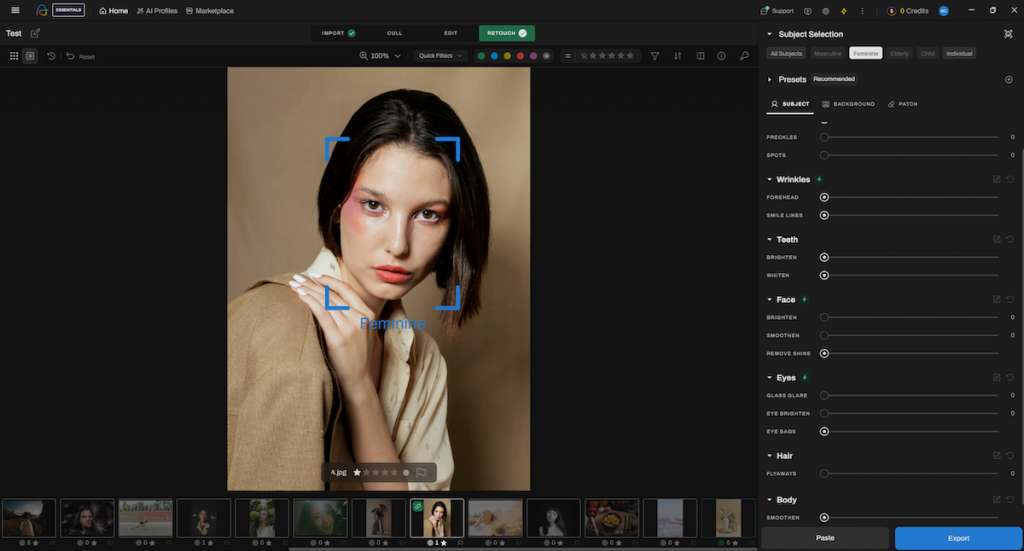
One example is the Wedding Radiance preset, designed to brighten and smooth skin, reduce blemishes, and tame flyaway hair. Manual sliders give you full control over each adjustment, while the AI reliably targets the right areas to refine. It’s particularly valuable for wedding and portrait photographers who need fast, flattering edits without extensive retouching. Even with minimal adjustments, the results appear natural and polished, saving significant time in post-production.

Beyond portraits, Aftershoot includes an object removal tool for cleaning up distractions in post. In testing, the AI did an impressive job handling edges and filling in backgrounds. A dedicated background editing feature is also in development, which should make the tool even more versatile once it’s released.

Aftershoot starts at $10 per month when billed annually, but the Pro plan at $40 per month is the stronger choice for professionals. It includes unlimited culling and editing along with a personal AI editing profile, as well as AI cropping, straightening, and masking. For studios or high-volume photographers, the balance of speed, flexibility, and automation makes Aftershoot Edits a compelling addition to the toolkit.
Conclusion
With its quick imports, customizable AI profiles, and advanced retouching tools, Aftershoot positions itself as a complete post-production partner. Background editing is still in development but the platform is already strong enough to meet most professional demands. For photographers looking to save time while maintaining creative control, Aftershoot Edits is a compelling option.
ACDSee Photo Studio
ACDSee Photo Studio stands out as a robust all-in-one platform that blends advanced photo editing with powerful organizational tools, making it a compelling Lightroom alternative for photographers who prefer to manage everything in one place.
Users can organize their image libraries using ratings, color labels, and metadata tags, while also accessing professional-grade editing tools such as color grading, layering, and masking within the same interface. This dual approach eliminates the need to switch between separate programs for editing and file management, streamlining the overall workflow.
As a digital asset management (DAM) tool, ACDSee is optimized for speed, allowing photographers to browse and manage large image collections without the lag often associated with cloud-based solutions. Unlike Lightroom, ACDSee lets you access folders directly from your computer without the need to import them first. This feature makes the transition between file management and editing seamless, particularly for event and commercial photographers working with high volumes of images.
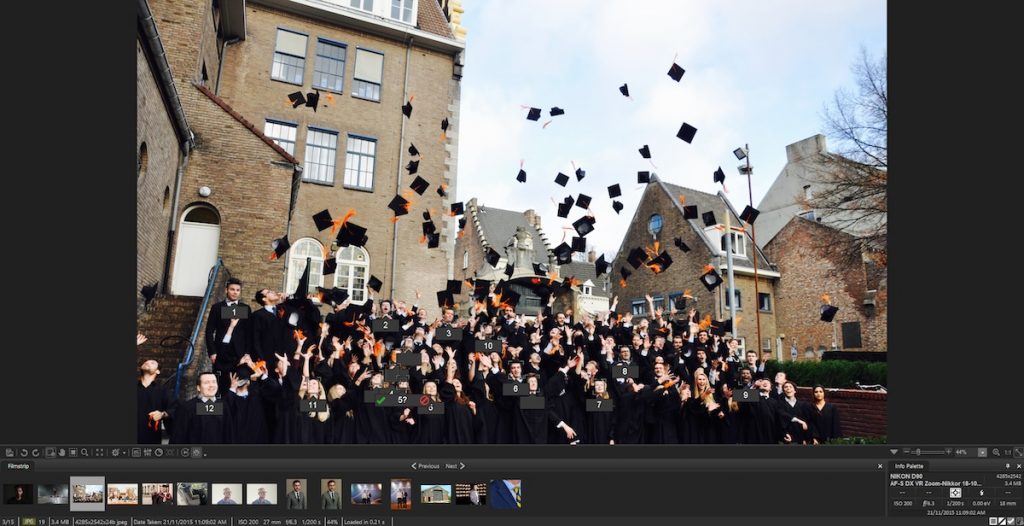
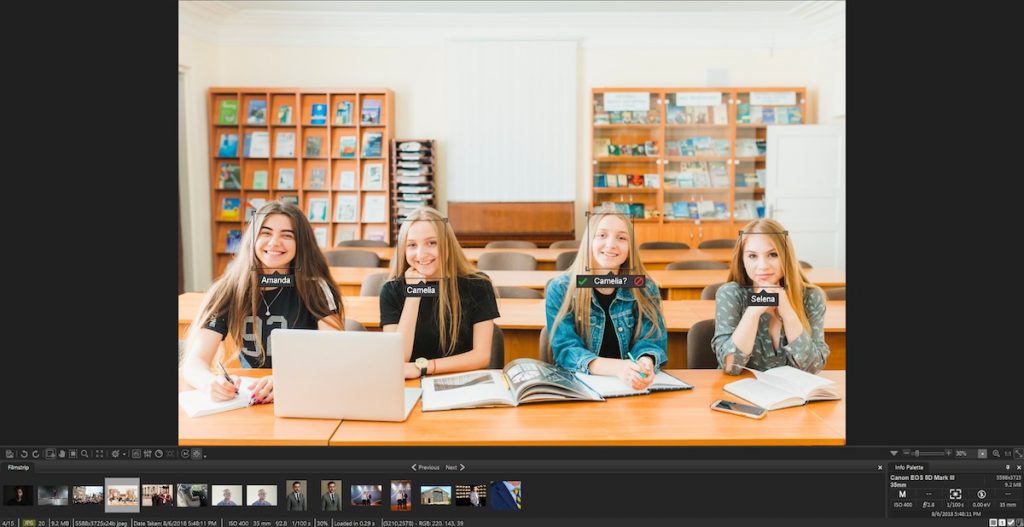
ACDSee also integrates a range of AI-powered tools that enhance both organization and editing. Its facial recognition feature is particularly useful for sorting portraits and tagging subjects across large libraries. However, it can struggle with accuracy in group photos, especially when faces overlap or are captured at different angles. In these cases, manual intervention is often needed to verify and correct tags.
Beyond facial recognition, ACDSee includes practical AI tools such as denoising, upscaling, sky replacement, and quick photo enhancements which offer more built-in options than Lightroom in some areas, especially for automated corrections.
Another highlight is ACDSee’s strong user community. The platform offers a wealth of tutorials and active forums, giving both beginners and professionals access to tips, troubleshooting, and creative inspiration. For photographers looking for a one-stop alternative to Lightroom that balances organization, speed, and editing power, ACDSee Photo Studio is a strong contender.

One key difference between ACDSee and Lightroom lies in how they handle your files. Lightroom relies on a catalog system, so you need to import your photos into its library before you can work on them. ACDSee, however, lets you work directly with the folders already on your computer. Any edits, renaming, or ratings you make are instantly applied to the original files, which feels more like using your computer’s file explorer. This approach gives you more flexibility and skips the extra steps required by Lightroom’s system.
Conclusion
If you’re searching for a true Lightroom replacement, ACDSee Photo Studio is a worthy option. It delivers a balance of speed, organizational power, and advanced editing bolstered by robust AI tools that can easily support both hobbyists and professionals.
Beyond the software itself, ACDSee invests heavily in user education through official resources, including a library of free courses on their YouTube channel as well as regular free online workshops that help users sharpen their skills and fully unlock the platform’s potential. These learning opportunities make the transition from Lightroom even smoother, ensuring photographers are well supported every step of the way.
Cyberlink PhotoDirector
PhotoDirector by CyberLink is a free desktop photo editor that strikes a great balance between usability and creative power. Available for both Windows and macOS, it offers a surprisingly wide range of tools for a free version, making it an attractive option for hobbyists and casual photographers who want polished results without committing to a paid subscription. Its feature set bridges the gap between simple one-click editors and more complex software like Lightroom, positioning it as a solid entry-level alternative.
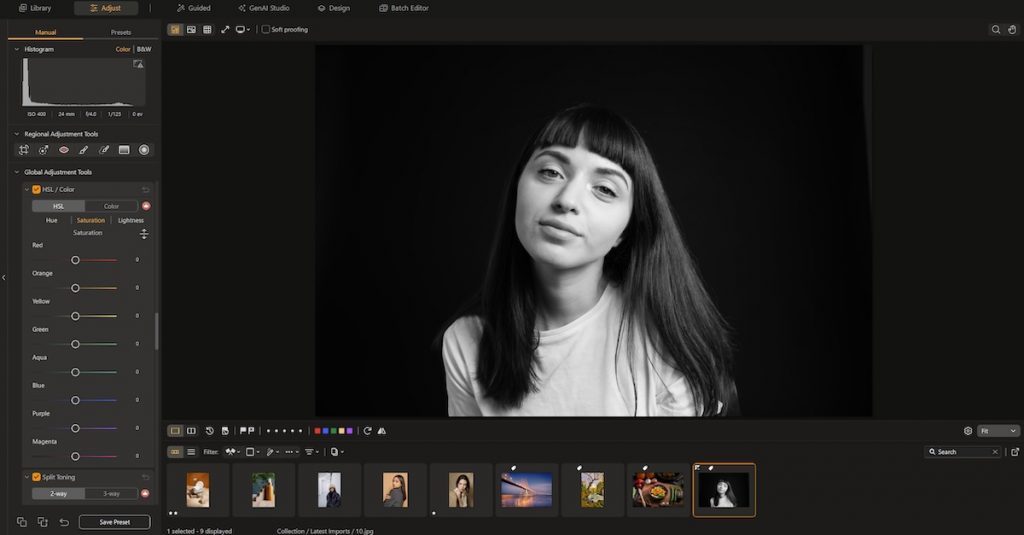
The software combines traditional adjustment tools such as brightness, contrast, HSL, and curves with creative effects like overlays, bokeh, and AI-powered enhancements. One standout feature is its guided edits, which walk users through effects step by step, making it easy to achieve professional-looking results without needing deep editing knowledge. While it does support RAW files, the editing options for RAW images in the Essential version are more limited than in its paid upgrade, making it best suited for photographers who mainly work with JPEGs or who need basic RAW adjustments.
PhotoDirector also integrates a growing set of AI tools designed to speed up complex edits. Users can access AI-powered sky replacement, denoising, object removal, and content-aware editing, all with minimal manual work. Compared to Lightroom, these tools are often more automated and beginner-friendly, prioritizing speed and ease of use over fine control. This makes PhotoDirector especially appealing for casual users who want quick transformations without learning every technical detail.
When it comes to workflow, PhotoDirector takes a different approach from Lightroom’s catalog system. Instead of requiring you to import images into a central library, it lets you open and work on files directly from your computer. This keeps the editing process straightforward and familiar, especially for users who prefer a simpler file-based workflow. While it lacks Lightroom’s more advanced asset management capabilities, the tradeoff is a cleaner, more lightweight experience that doesn’t overwhelm new users.
Another feature that deserves attention is the Design module, which gives PhotoDirector a creative versatility that’s rare among free photo editors. It offers a simplified layer-based workspace, allowing users to combine text, graphics, and images in a way that feels somewhat reminiscent of Photoshop but with a much gentler learning curve. It’s perfect for photographers who occasionally need to create social media visuals, promotional posters, or composites without switching to another program. The interface feels light and approachable, encouraging experimentation without the intimidation of professional design software.
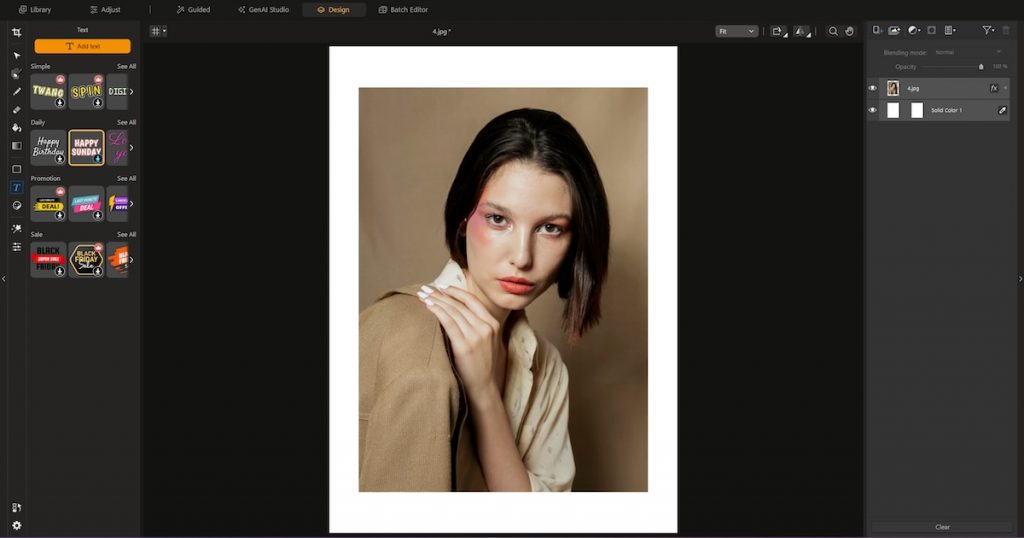
However, one limitation worth noting is how PhotoDirector’s AI features are tied to a credit-based system. To use advanced AI tools, including the ones in its GenAI Studio for background generation and object removal, users need AI credits even if they have already purchased the full software. While this approach allows CyberLink to manage server-side AI processing, it can become restrictive for those who plan to use these tools frequently. Heavy users may find themselves needing to buy additional credits, which adds an ongoing cost that contrasts with Lightroom’s all-inclusive subscription model.
Conclusion
PhotoDirector Essential is a strong free alternative to Lightroom for photographers who want to enhance their images with minimal fuss. It blends intuitive tools, AI-powered edits, and guided workflows in a way that’s accessible to beginners yet capable enough for creative experimentation.
While some premium features are locked behind a paywall and its RAW editing is limited, the free version still offers excellent value. CyberLink also provides plenty of official learning resources, including tutorials and step-by-step guides, which help new users get up to speed quickly. For anyone looking to explore photo editing without committing to a paid plan, PhotoDirector Essential is a worthy starting point.
Corel AfterShot Pro 3
Corel AfterShot Pro 3 is a lightweight yet capable photo editor and organizer that provides a solid alternative to Adobe Lightroom. The installation process is smooth, and the software opens quickly, making it a good fit for photographers who value speed and efficiency. However, the layout can feel a little confusing at first. Its interface has a learning curve, especially for those new to photo editing, but once you get the hang of it, navigating becomes much easier.
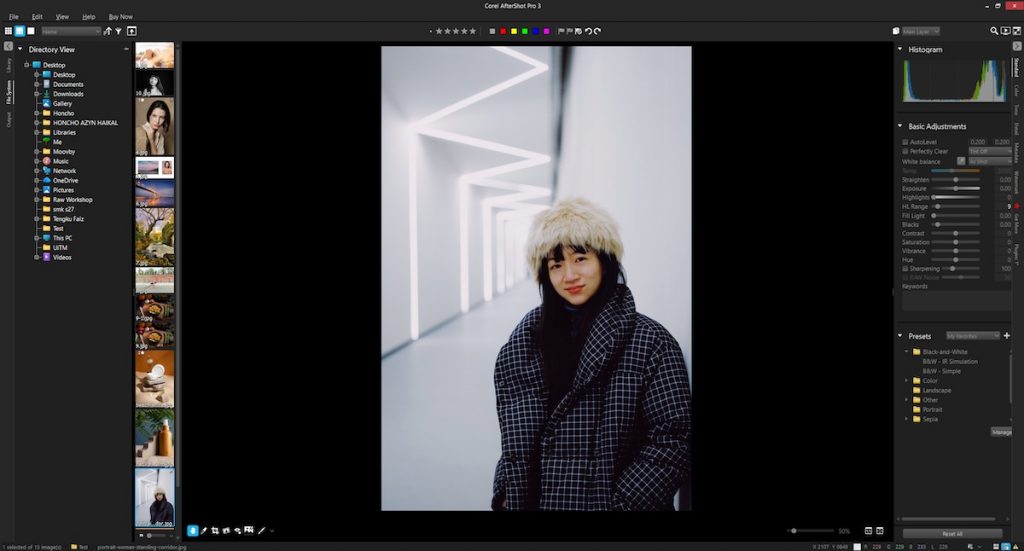
From the File System module, users can instantly access essential editing tools without needing to import photos into a catalog. Core features like exposure, color balance, sharpness, and white balance are readily available, giving you a quick way to make adjustments right after opening your images. For organization, AfterShot Pro 3 includes practical sorting options such as star ratings, color labels, and flags, helping photographers manage large image collections more effectively.
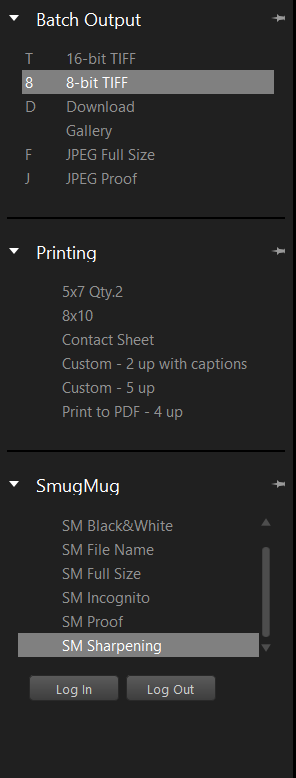
The software also comes with an Output module that lets users export photos in multiple formats or prepare them for printing directly from the interface. One of its standout features is its integration with SmugMug, which allows users to upload edited photos directly to their SmugMug account. This makes it easy to share final images with clients or even sell them online. The inclusion of SmugMug presets further streamlines the process for photographers who rely on online portfolio platforms.
AfterShot Pro 3 also integrates seamlessly with Photoshop where you can process and manage your RAW files in AfterShot, then send them directly to Photoshop in TIF format for more detailed editing with just one click using the “Edit with External Editor” option.
When it comes to pricing, AfterShot Pro 3 offers a one-time license rather than a subscription. The full version is typically priced around USD 79.99, while the upgrade costs about USD 59.99. This pay-once model is one of its biggest advantages, especially for photographers who prefer to avoid ongoing monthly fees. It’s a budget-friendly option that still delivers professional-level features. However, because it’s a perpetual license, updates and support may not arrive as frequently as with subscription-based tools. Some users also note that occasional discount pricing can make the base price feel inconsistent, so it’s worth checking for promotions before purchasing.
While Corel AfterShot Pro 3 is a strong alternative to Lightroom, it does take some time to get comfortable with the workflow. Its interface and tool layout may feel unintuitive for beginners or casual users. That said, for photographers who want a cost-effective, one-time purchase option without subscribing to Adobe’s ecosystem, AfterShot Pro 3 offers a compelling balance of editing and organizational tools once you overcome its initial learning curve.
Conclusion
Corel AfterShot Pro 3 stands out as a practical and affordable Lightroom alternative for those who value flexibility and ownership. Its combination of solid editing tools, SmugMug integration, and one-time pricing makes it especially appealing to budget-conscious photographers. While it may lack the polish and depth of Lightroom’s interface and cataloging system, it rewards users who invest time in learning its workflow. For hobbyists, freelancers, or anyone looking to avoid subscriptions without sacrificing quality, AfterShot Pro 3 is a worthy option to explore.
digiKam
For photographers seeking a free, open-source alternative to Adobe Lightroom, digiKam is a strong contender that combines robust photo management with capable editing tools. Available for macOS, Windows, and Linux, it offers cross-platform flexibility and a feature set that rivals some paid software. Users can organize massive image collections efficiently using tags, star ratings, and color labels, all while maintaining full control over their file system without a subscription.
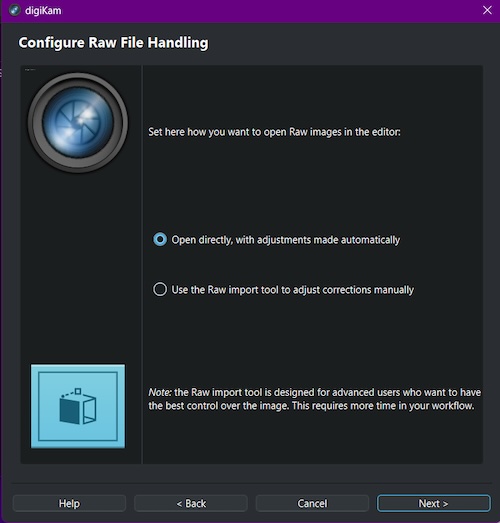
When setting up digiKam, users can choose how RAW files are processed, whether through automatic adjustments for quick previews or manual import settings for greater control. The built-in RAW handling tool allows for fine-tuning during import, giving professionals a degree of flexibility similar to Lightroom’s Develop module. For photographers who demand precision in their post-processing workflow, this capability makes digiKam more than just a cataloging tool; it’s a complete RAW management platform.
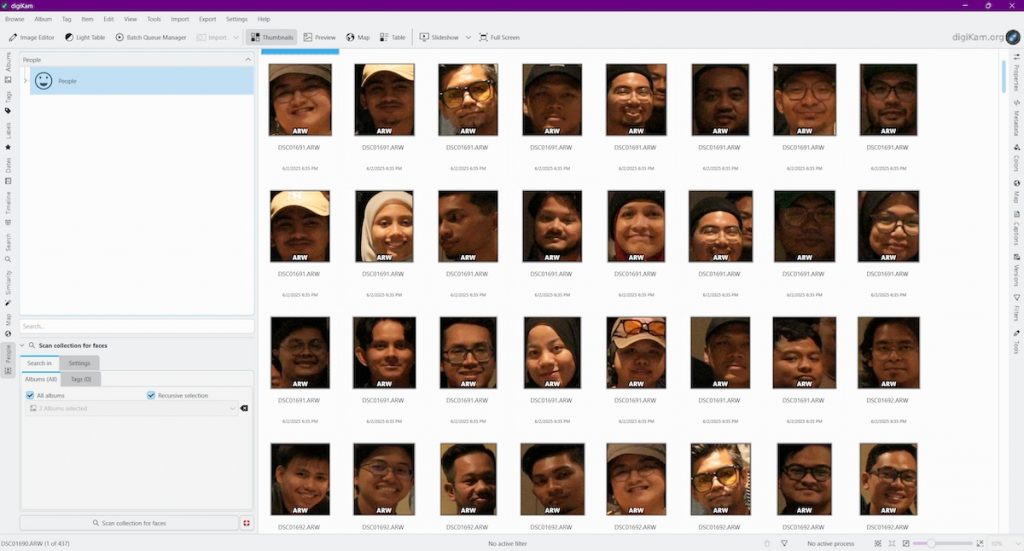
digiKam also integrates facial recognition through its People View feature, which scans your library and groups images by detected faces. You can tag individuals by name and easily search or filter portraits later on. While the recognition isn’t as polished as Adobe’s Sensei-powered system and may need manual adjustments, it’s an impressive inclusion for free software and adds valuable organization support for portrait or event photographers.
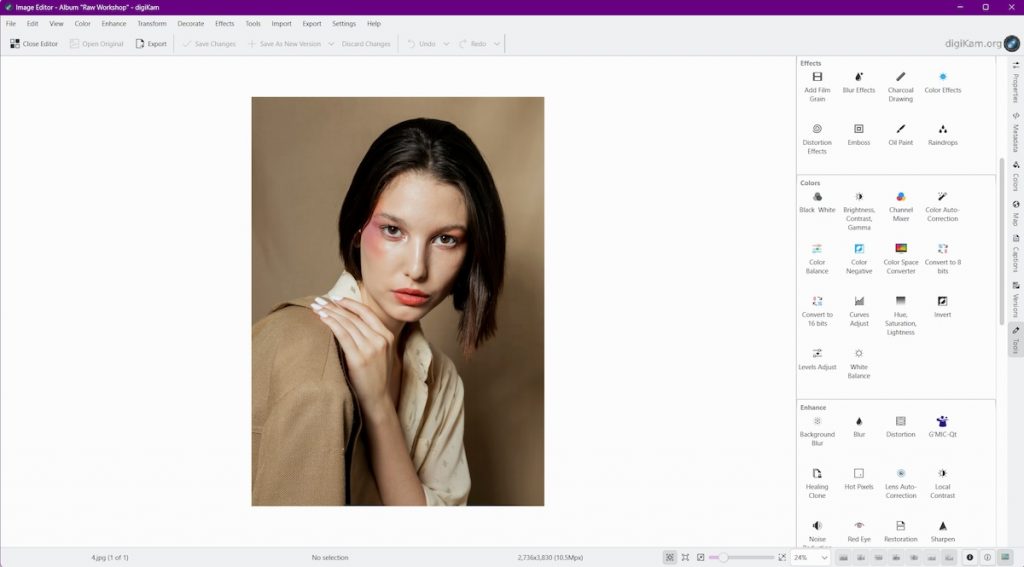
The editing tools inside digiKam go beyond simple touch-ups. Users can make color corrections, retouch images, and apply transformations directly within the same platform, eliminating the need to export to another editor. While it doesn’t match Lightroom’s depth of local adjustments or AI masking, digiKam’s editing suite still provides enough control for everyday post-processing and creative work.
Compared to Lightroom’s polished interface, digiKam’s layout can feel dated and cluttered at first. The learning curve is steeper, especially for those new to open-source software. However, the tradeoff is flexibility. There are no locked features, subscriptions, or cloud dependencies. Once you’re familiar with its workflow, digiKam proves to be a remarkably capable alternative for those who prioritize freedom and performance over design aesthetics.
Conclusion
digiKam stands as one of the most comprehensive free Lightroom alternatives available today. Its combination of powerful catalog management, RAW editing capabilities, and flexible import/export options makes it ideal for photographers who want full control of their image library without ongoing costs. With features like SmugMug and Dropbox integration, it bridges the gap between casual and professional workflows, offering exceptional value for a completely open-source solution.