Part of our Creativity guides
Explore more ideas, inspiration, and visual techniques in our Creativity section.
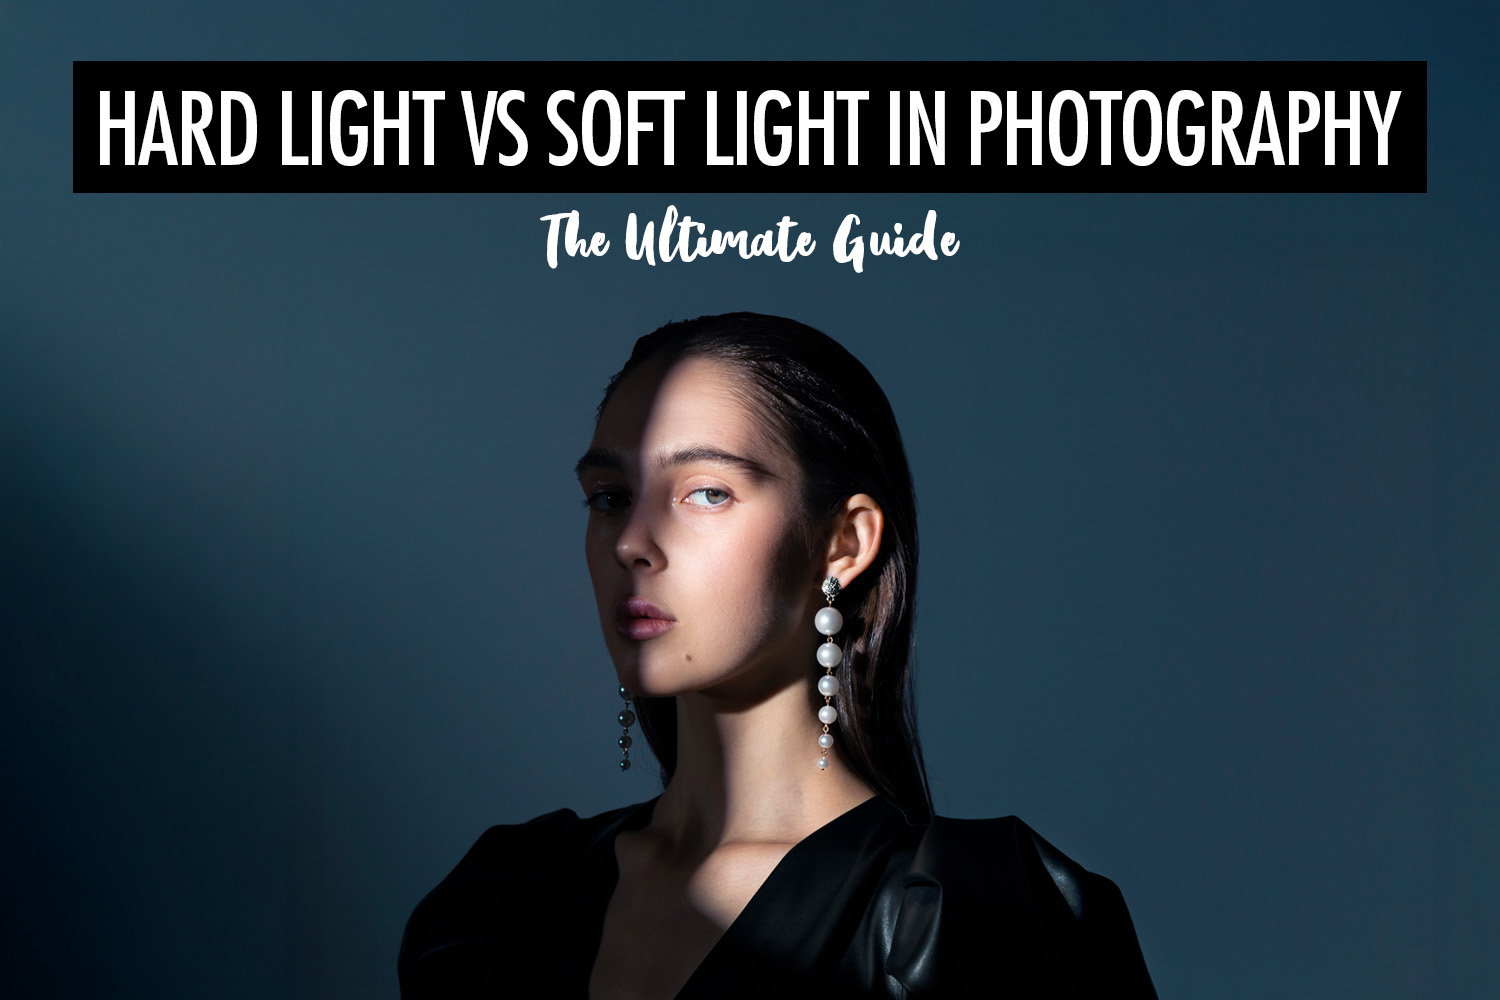
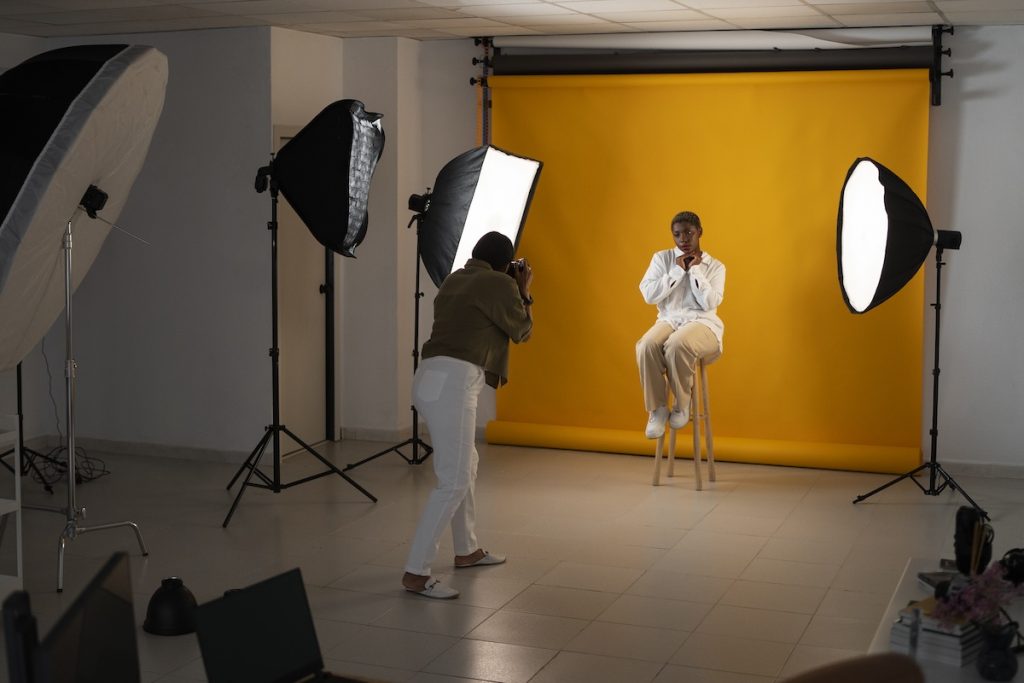
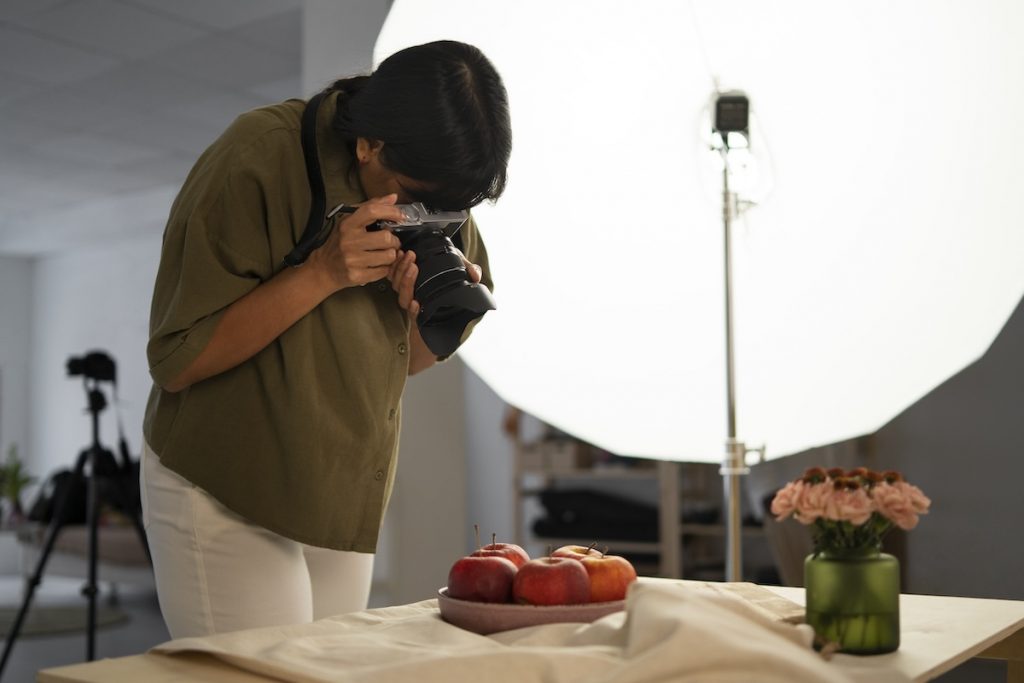
Lighting is one of the most fundamental elements in photography. It doesn’t just illuminate your subject—it defines the mood, enhances details, and influences the entire visual narrative of your image. Among the most important concepts to grasp when working with light is the difference between hard light and soft light. These two types of lighting each bring their own distinct qualities to a photograph and knowing when to use one over the other can significantly elevate your portfolio.
Whether you’re shooting in natural sunlight, working with artificial lighting in a studio, or using portable gear on location, understanding how hard and soft light behave will give you greater creative control. In this article, we’ll explore what sets them apart, examine real-world use cases for each, and offer practical tips on how to choose and modify light to suit your photographic goals.
The Science Behind the Quality of Light
To understand the difference between hard and soft light, it helps to know a little about how light behaves. Don’t worry—this isn’t a physics lesson! Just a simple concept that can really improve your photography.
The quality of light—whether it’s hard or soft—mostly depends on the size of the light source compared to your subject. If the light source is small or far away, it creates hard light with sharp, defined shadows. But if the light source is large or close, it produces soft light with gentle, blurry shadows.
Think about the sun. It’s actually huge, but because it’s so far away, it acts like a small point of light in the sky. That’s why it creates such harsh shadows on a clear day. Now think about a cloudy day. The clouds spread the sunlight out across the whole sky, turning it into one big, soft light source. That’s why shadows soften and everything looks evenly lit.
The same idea applies in photography. A flash with no modifier is a small light source—so it gives you hard light. But if you add a softbox or bounce it off a wall, you’re making the light source bigger. That’s what makes the light soft.
So the key takeaway is this: The bigger and closer your light source, the softer your light will be. The smaller and farther away it is, the harder the light will look. Once you understand this, you can start shaping your light like a pro—even with basic gear.
How Distance Affects the Quality of Light
Besides the size of your light source, the distance between the light and your subject also plays a big role in how soft or hard the light looks. It’s a simple trick, but it can completely change the feel of your photo.
Here’s the rule of thumb: The closer your light is to your subject, the softer the light becomes. The farther away it is, the harder the light will appear.
Why does this happen? Because when the light is close, it acts like a bigger light source in relation to your subject. It wraps around the subject more, filling in shadows and creating a smooth, even look. But when you move the same light farther back, it starts behaving more like a small point source—casting sharper, deeper shadows and creating more contrast.
Let’s say you’re using a softbox. If you place it right next to your subject’s face, it will give you buttery soft light with smooth transitions between light and shadow. But if you move that same softbox a few meters away, the shadows become more defined, and the light starts to look harsher—even though your equipment hasn’t changed.
This is especially useful to know when you’re working in tight spaces. You don’t always need a huge light source to get soft light—you can just bring your light closer. Likewise, if you want a little more edge or drama in your shot, try backing it up.
So remember—closer is softer, farther is harder. Use that to your advantage depending on the mood or style you want to create.
What is Hard Light?
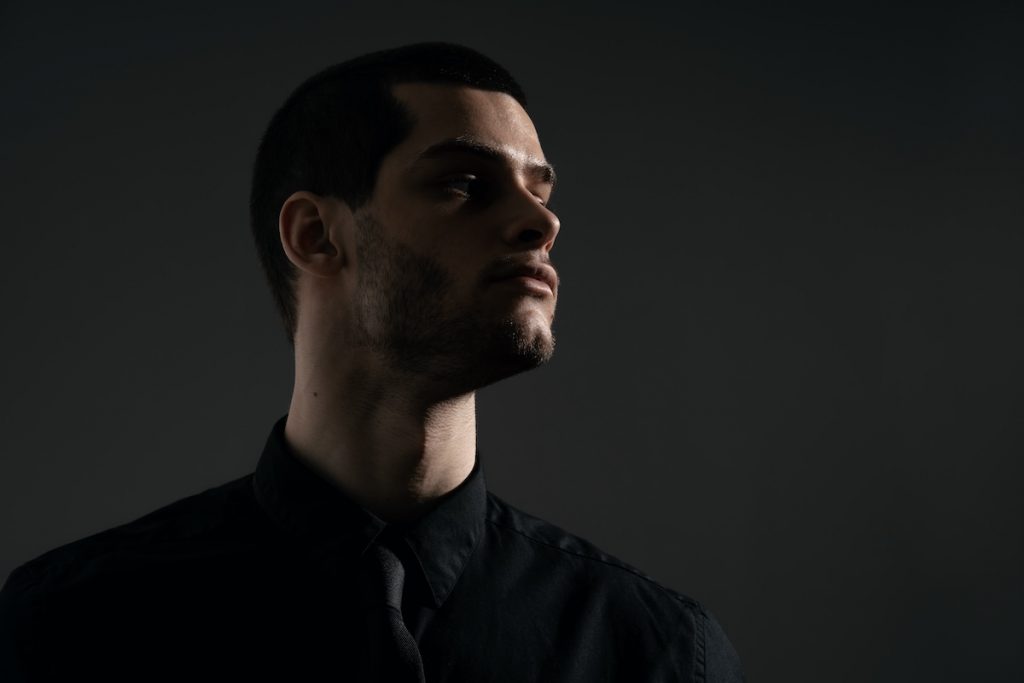
Hard light refers to lighting that comes from a direct and focused source, resulting in sharp, clearly defined shadows. This type of light often creates a high level of contrast between the illuminated areas and the shadows in your frame. Because it travels in a straight line from a small or distant source, it does not wrap around the subject. Instead, it highlights surface texture and structure in a very pronounced way.
A classic example of hard light is the sunlight on a bright, cloudless day. When the sun is high and unobstructed, it casts hard-edged shadows and reveals intricate textures—especially on skin, fabric, and rough surfaces. Similarly, a bare-bulb flash or spotlight without a modifier can produce the same effect in a studio setting.
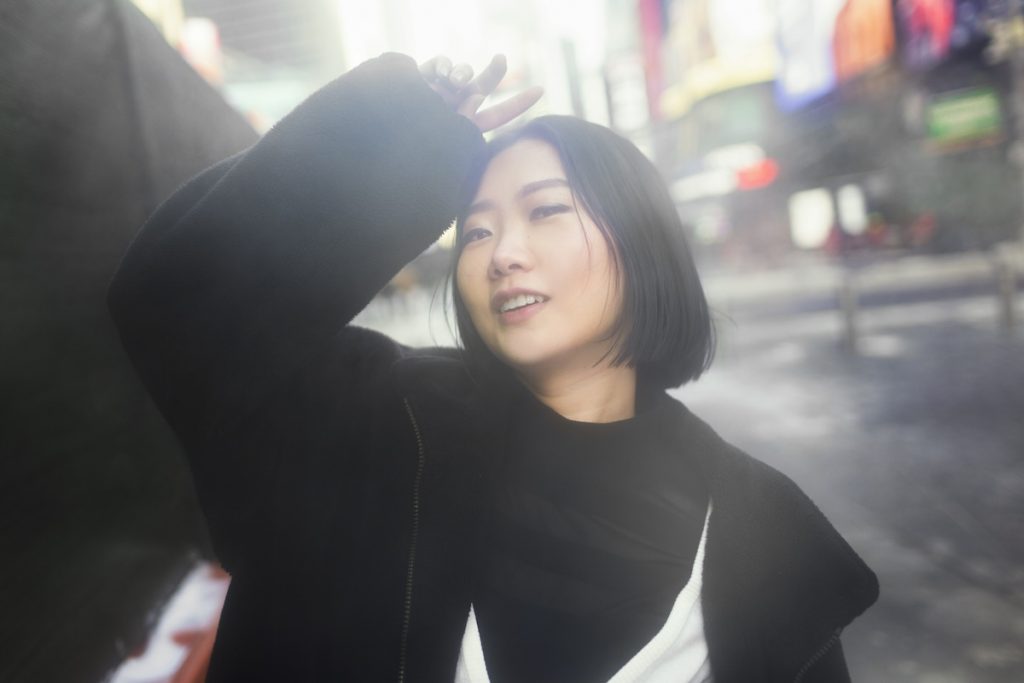
Hard light is often used intentionally to evoke drama, intensity, or a sense of realism. It works particularly well in genres like street photography, editorial fashion, and moody portraiture, where a bold and graphic look is desired. When used creatively, hard light can be a powerful tool for storytelling, adding energy and tension to an image.
Pros and Cons of Hard Light
Hard light often gets a bad reputation for being too harsh or unflattering, especially for beginners. But in the right situation, it can create powerful and eye-catching results. Like any tool in photography, it’s not about whether hard light is “good” or “bad”. It’s about knowing when and how to use it effectively. Let’s look at the pros and cons.
Pros of Hard Light
Dramatic and Bold Aesthetic
Hard light creates strong contrast and sharp shadows, which can add intensity and depth to your photos. This makes it great for fashion, fitness, street, or editorial photography where drama and definition are key.
Emphasizes Shape and Texture
Because hard light doesn’t wrap around a subject, it highlights edges, textures, and details. This is ideal when you want to show off muscle tone, facial features, or the texture of objects like metal, brick, or fabric.
Works Well in Black and White
Hard light creates high contrast, which is perfect for black and white photography. The clear separation between highlights and shadows adds punch and makes monochrome images more dynamic.
Easy to Create with Simple Gear
You don’t need fancy equipment to produce hard light. A single bare flash or even direct sunlight can give you that classic, crisp look. It’s accessible, especially when you’re just starting out.
Cons of Hard Light
Can Be Unforgiving in Portraits
Hard light exaggerates imperfections—like skin texture, wrinkles, or blemishes. That’s why it’s often avoided in beauty or casual portraits unless you’re going for a specific effect.
Harsh Shadows Can Be Distracting
The shadows created by hard light are very defined. If not controlled properly, they can fall in unwanted places—like across someone’s face or background elements—and pull attention away from your subject.
Requires Careful Placement
With soft light, you have more flexibility in light placement. But with hard light, positioning becomes more critical. A small change in angle can result in completely different highlights and shadows, so it takes more practice to get it right.
Final Thoughts
Hard light isn’t just for dramatic portraits or editorials—it’s a creative tool that can add impact when used intentionally. Once you understand its strengths and limitations, you’ll find ways to use hard light to enhance your storytelling and style.
What is Soft Light?
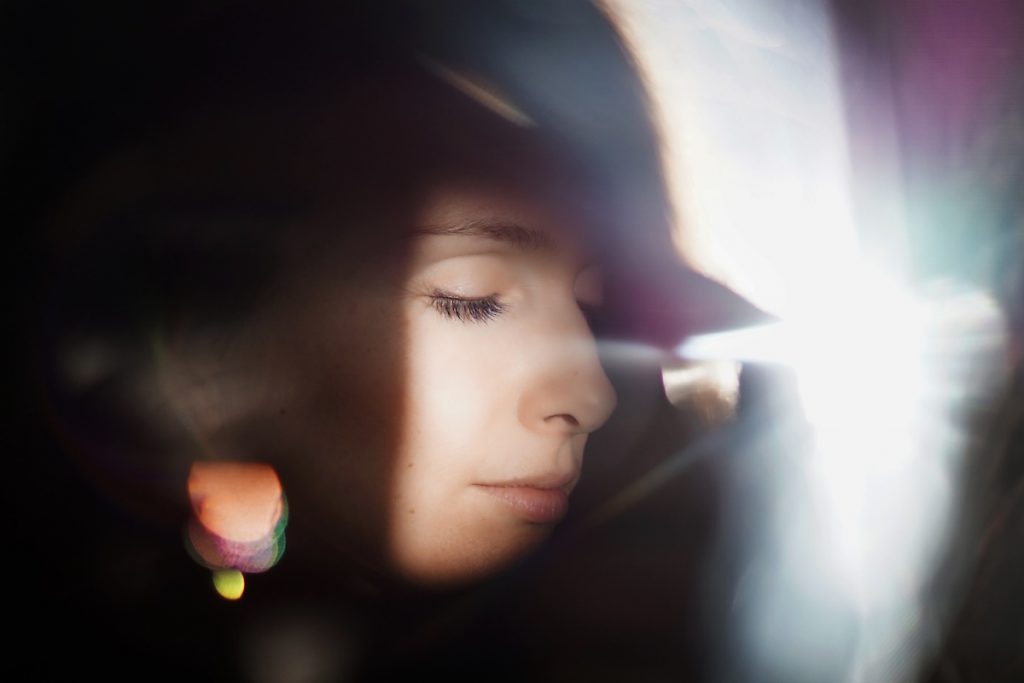
In contrast, soft light is diffused and gentle, producing smooth transitions between highlights and shadows. Instead of creating harsh edges, it wraps around the subject more evenly, reducing contrast and minimizing imperfections. This results in a more flattering and natural appearance, particularly when photographing people.
Soft light is typically created by using a large light source or by diffusing a smaller light source through a modifier such as a softbox, umbrella, or even a sheer curtain. Natural light on a cloudy day is one of the most accessible forms of soft light, as clouds act as a giant diffuser that spreads the light evenly.
This kind of lighting is especially popular in portraiture, wedding photography, product shoots, and lifestyle imagery, where a softer, more polished look is preferred. The gentle quality of soft light makes it ideal for highlighting emotion, enhancing skin tones, and creating a sense of intimacy in your photos. It helps eliminate harsh shadows, making the overall image more balanced and pleasing to the eye.
Pros and Cons of Soft Light
Soft light is often seen as the go-to lighting style for many photographers, especially beginners—and for good reason. It’s easy to work with, flattering for most subjects, and generally more forgiving than hard light. But while soft light has many benefits, it’s not always the best choice for every situation. Let’s break down its strengths and weaknesses so you can decide when to use it effectively.
Pros of Soft Light
Flattering for Portraits
One of the biggest advantages of soft light is how gentle it looks on people’s faces. It smooths out skin tones, reduces the appearance of wrinkles or blemishes, and minimizes harsh shadows. That’s why it’s so popular in portrait, wedding, and beauty photography.
Creates a Natural Look
Soft light closely resembles the kind of light we see during cloudy days or near large windows. It feels calm and organic, making it ideal for lifestyle, family, or candid photography where you want the viewer to feel at ease.
Easy to Control and Modify
Soft light is typically easier to manage because its transitions between light and shadow are more gradual. Even if your light placement isn’t perfect, the results are often still pleasing. Plus, it’s simple to modify using tools like umbrellas, softboxes, diffusers, or reflectors.
Works Well in Small Spaces
Because soft light can wrap around your subject, it’s great for indoor shoots or tight environments. You don’t need a big studio—just a window and a sheer curtain can do wonders.
Cons of Soft Light
Can Look Flat or Boring
While soft light is safe and flattering, it can sometimes lack drama or contrast. If used without intention, it may make your photos feel dull or lacking in visual interest—especially in scenes that need bold storytelling or strong emotional impact.
Less Texture and Definition
Soft light reduces shadows, which means less texture and shape. This might not be ideal if you’re trying to highlight specific features—like muscle tone, surface detail, or angular structures. Your subject might appear too smooth or washed out.
Requires Larger or Closer Light Sources
To create soft light, you need a relatively large light source or one that’s positioned close to your subject. This can be limiting if you’re outdoors with only the sun, or if you’re using small flashes without modifiers.
Final Thoughts
Soft light is a powerful and versatile choice that works well in many photography styles. It’s especially great when you want a clean, polished, or emotional feel. However, it’s important not to rely on it by default. The best photographers know how to use soft light when it fits the story—and when to switch it up for something more dramatic.
Visual Comparison
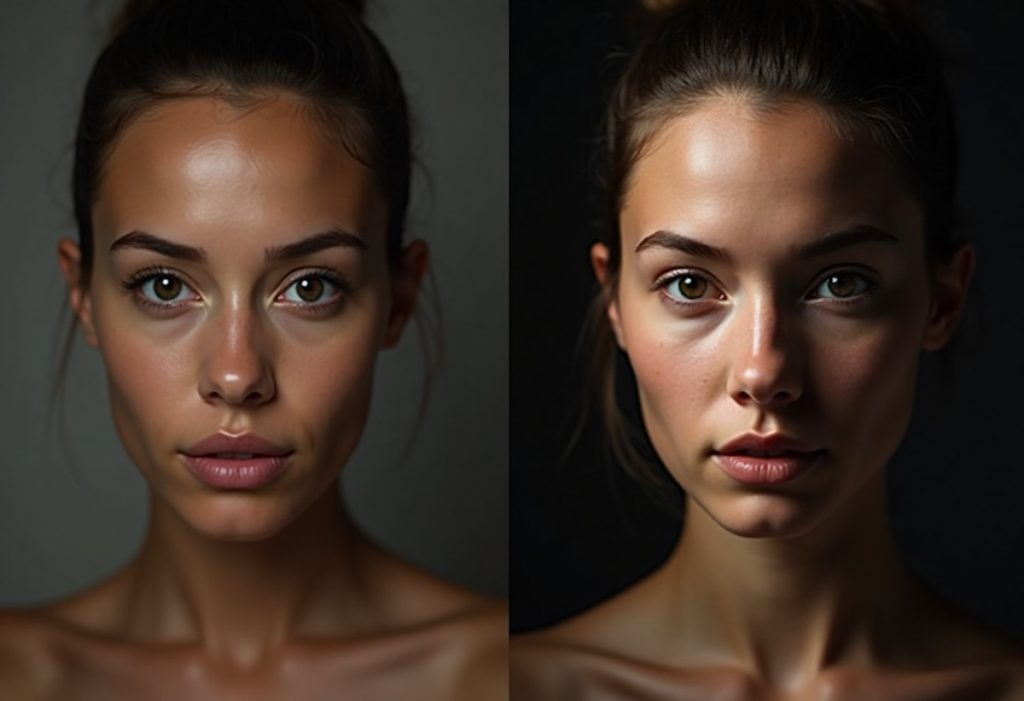
Understanding the practical differences between hard and soft light is essential, and one of the best ways to learn is to compare them side by side. When you use hard light, the image will often have deep shadows, crisp lines, and stark contrast. Details such as skin texture, wrinkles, or the grain in wood will become much more pronounced. Soft light, on the other hand, produces a smoother look, where shadows are lighter and fade gradually into the surrounding areas. The mood created by soft light is often more serene, tender, or romantic.
To see this in action, try photographing the same subject in two different lighting conditions: one under direct sunlight and the other under shade or using a diffuser. The difference in tone and emotion will be instantly noticeable. Hard light tends to be bolder and more striking, while soft light feels warmer and more approachable.
You can also control the transition between hard and soft light by using tools like reflectors, diffusion panels, or bouncing your flash off nearby surfaces. The versatility of light is what makes photography such a creative discipline—subtle changes can completely alter your final image.
Choosing the Right Light for Your Shoot
Selecting between hard and soft light depends on several factors, including your subject, the story you want to tell, and the environment in which you’re shooting. There’s no one-size-fits-all approach; rather, it’s about choosing the quality of light that best serves your creative intent.
If you’re shooting a gritty street portrait or a product where you want to emphasize texture, hard light might be your best option. It draws attention to shape and structure and creates a sense of immediacy. However, if you’re photographing a newborn, a couple on their wedding day, or a client in a beauty shoot, soft light is likely the better choice. It flatters the subject and creates an atmosphere of calm and comfort.
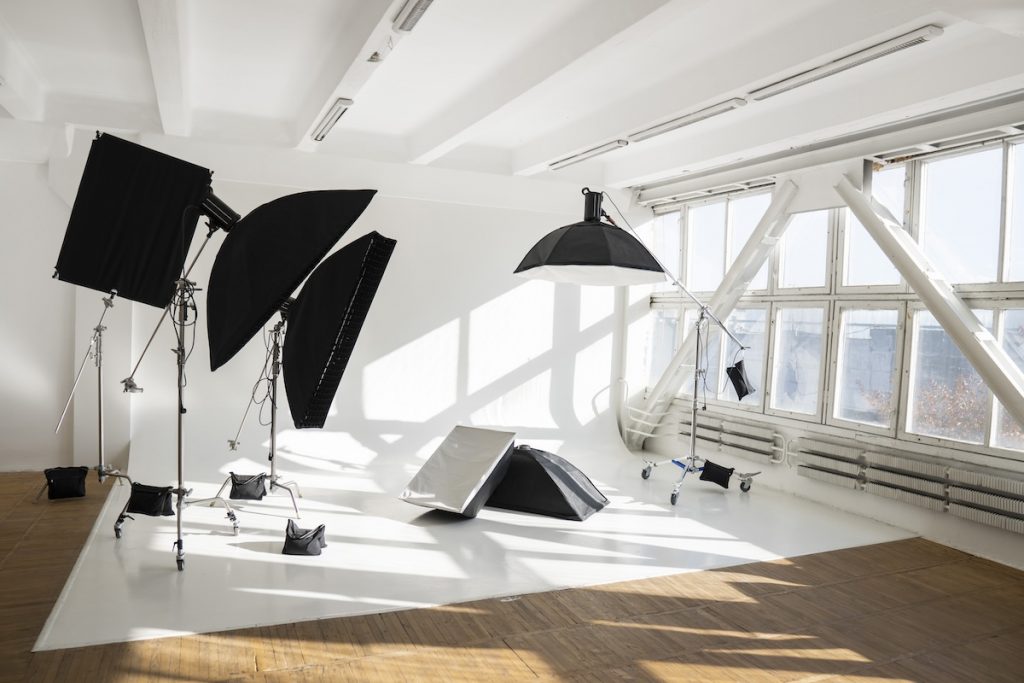
In situations where you have control over your lighting—such as in a studio or indoor location—modifiers like softboxes, umbrellas, and diffusion sheets allow you to switch between hard and soft light as needed. On location, using natural reflectors like white walls or portable diffusion panels can help you shape available light to your advantage.
Ultimately, the more you understand how light behaves, the more intentional your photography will become. You’ll be able to read a scene, envision the final image, and adjust your lighting accordingly—even before you press the shutter.
Natural Light vs Artificial Light
In photography, the quality of light—whether hard or soft—doesn’t depend solely on whether the light is natural or artificial. Instead, it comes down to how that light is shaped, modified, and used. Both types of light can create beautiful results in the right hands. Let’s explore how natural and artificial light each influence the look and feel of your photos.
Natural Light
Natural light comes from the sun, and it’s the most accessible lighting source for photographers, especially beginners. However, it can be unpredictable, constantly changing with the time of day, weather, and location. These shifts directly affect whether the light appears hard or soft in your photos.
On a bright, sunny afternoon, the sun acts like a small, intense light source. When its rays hit your subject directly, they create deep shadows and sharp contrasts—hallmarks of hard light. That’s why portraits taken at midday often look harsh, with strong shadows under the nose, chin, or eyebrows.
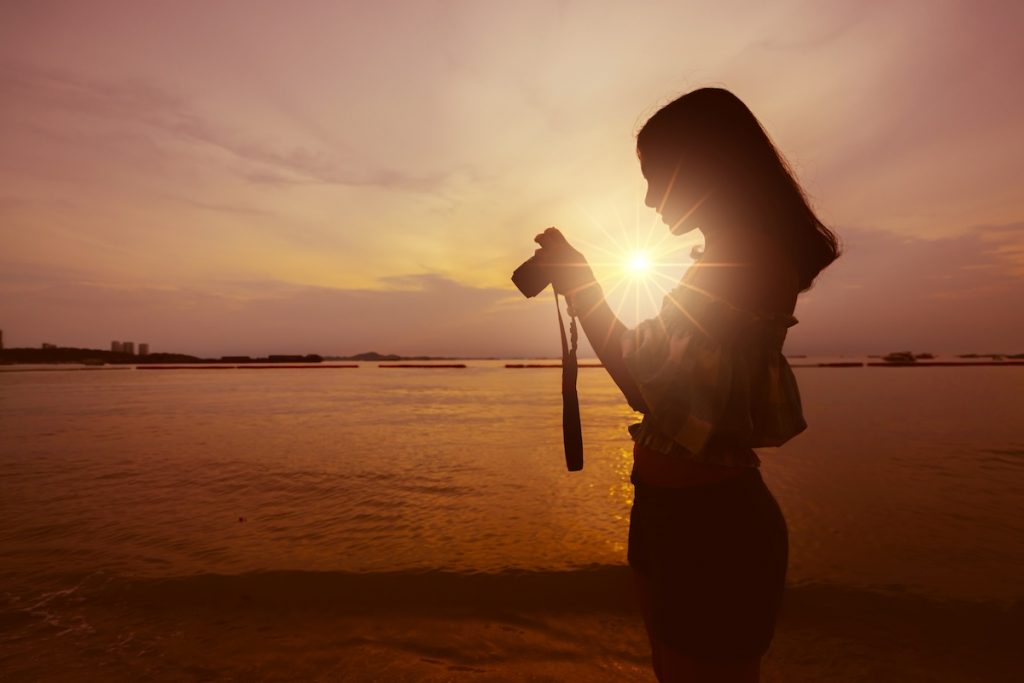
In contrast, cloudy or overcast skies naturally diffuse the sunlight. The clouds spread the light more evenly across the scene, eliminating sharp shadows and lowering contrast. This creates soft, flattering illumination that’s ideal for portraits, nature photography, and scenes where you want a more balanced exposure. Similarly, during the golden hour—just after sunrise or before sunset—the sun is low in the sky and its light is filtered through more of the atmosphere. This makes it less intense and adds a beautiful warmth and softness to your images.
Natural light can also be modified to better suit your needs. Shooting next to a window with sheer curtains, using a white wall to bounce light, or moving into the shade are all simple ways to soften sunlight without any special gear. These techniques are especially helpful for beginners starting their photography businesses with limited equipment.
Artificial Light
Artificial light refers to any man-made light source used in photography, such as flash units, LED panels, or studio strobes. Unlike natural light, which changes constantly, artificial lighting gives you full control. You decide how bright it is, where it comes from, and how it interacts with your subject.
When used without modification, artificial light typically behaves like a hard light source. For example, a bare speedlight or flash will create strong shadows and pronounced highlights, similar to the look of direct sunlight. This can be useful for high-drama portraits or fashion photography where you want to emphasize texture and structure.
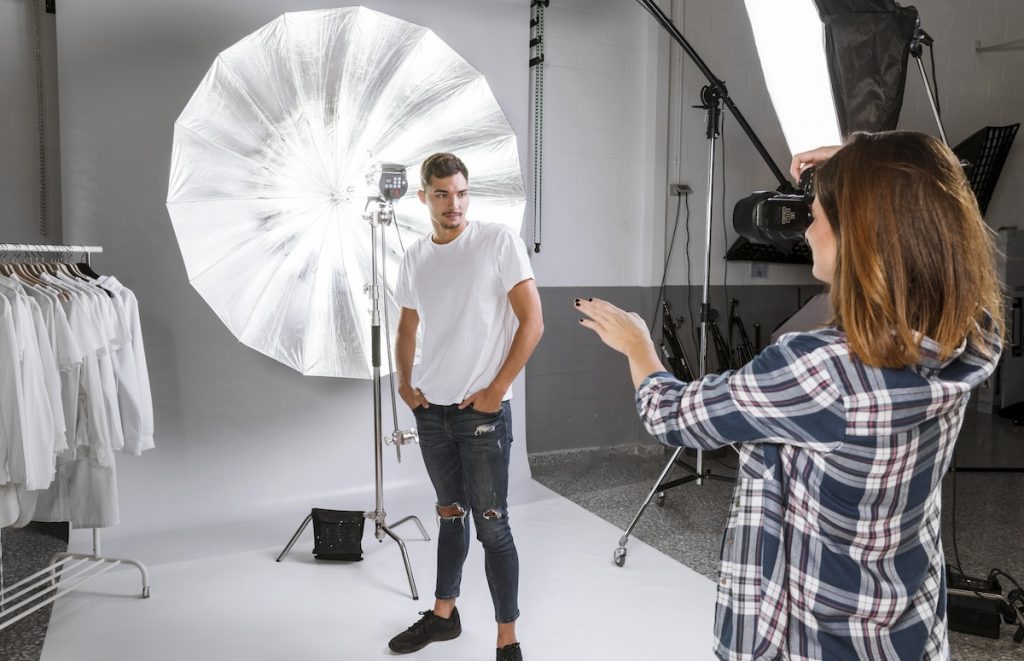
However, one of the main advantages of artificial light is its flexibility. By attaching a softbox, umbrella, diffuser, or bouncing it off a surface, you can transform hard light into soft light. These modifiers enlarge the light source and spread it more evenly, reducing contrast and softening shadows. The result is a more natural, flattering light that closely resembles what you might get from a cloudy day or during the golden hour.
Artificial lighting is also valuable for its consistency. You can recreate the same lighting conditions day or night, indoors or outdoors, without worrying about clouds, sunsets, or changing angles. This makes it ideal for product photography, studio portraits, and any situation where repeatable results are important.
Light Modifiers and Their Impact on the Quality of Light
Whether you’re working with natural light from a window or using a studio strobe, one of the most powerful ways to shape the look of your photographs is by using light modifiers. These are tools designed to control the direction, spread, and intensity of your light source. They play a crucial role in determining whether your image ends up with hard shadows and high contrast, or soft light and smooth transitions.
Why Do Light Modifiers Matter?
At its core, the difference between hard and soft light comes down to one key principle: the size of the light source in relation to your subject. A large light source creates soft light, while a small, concentrated light source produces hard light. Light modifiers help you alter the apparent size of your light source by spreading, diffusing, or redirecting the light. This allows photographers to tailor the mood, texture, and emotion of a scene with precision.
Types of Modifiers and What They Do
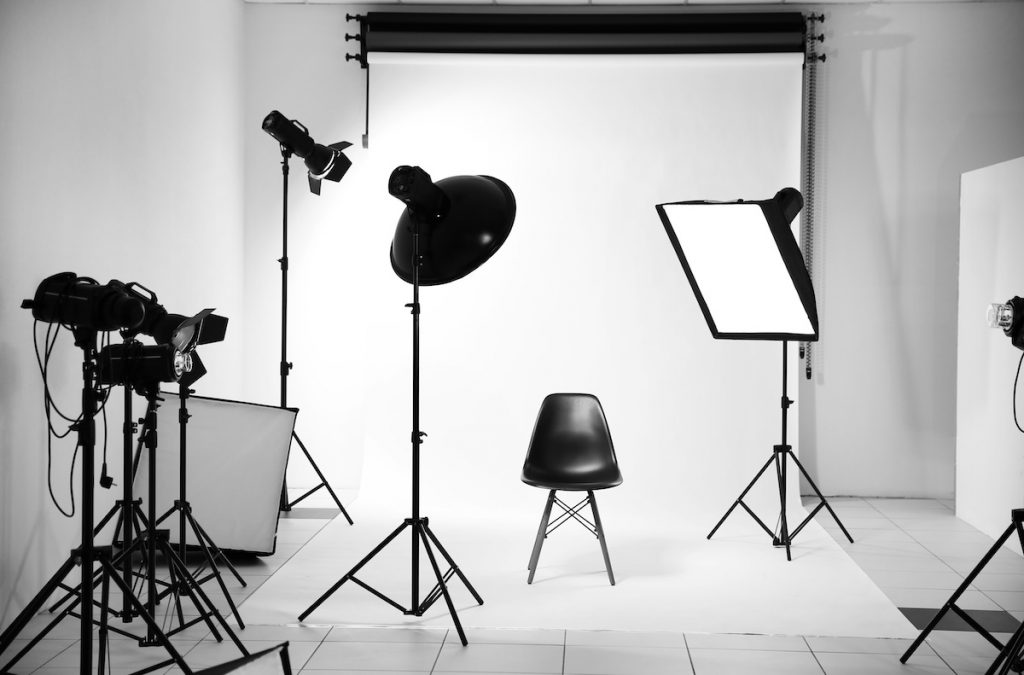
One of the most commonly used modifiers is the softbox. This modifier fits over a flash or strobe and spreads the light through a translucent fabric. The result is a broader, more even light that wraps gently around the subject—perfect for portraits, product shots, or anything where you want flattering detail and smooth shadows.
Another popular option is the umbrella, which can be used in two ways. A shoot-through umbrella diffuses light in all directions, creating a very soft effect, while a reflective umbrella bounces the light back toward the subject, offering more control and focus. Umbrellas are lightweight, affordable, and great for beginners who want to experiment with soft light setups.
For those who want more directional control while maintaining softness, beauty dishes and octaboxes are excellent choices. A beauty dish, for instance, creates light that is softer than a bare flash but more defined than a softbox—ideal for fashion or beauty photography where you want detail and dimension.
On the opposite end of the spectrum, tools like snoots and grids help you create hard, focused light. These modifiers restrict the spread of light to a narrow beam, which increases contrast and sharpness. They’re perfect for dramatic portraits or highlighting specific parts of a scene with intense precision.
Even when shooting with natural light, you can use modifiers. A diffuser panel placed between the sun and your subject acts like a cloud, softening the light. A reflector, often white, silver, or gold, helps bounce light back into the shadows to balance exposure or add warmth.
Creative Freedom Through Control
Learning how to use light modifiers gives you more control over your photography, regardless of your subject. Want a soft, dreamy portrait? Use a large softbox or shoot through a curtain. Need bold contrast for an edgy editorial? Strip the modifiers away and use direct light or a snoot.
Ultimately, modifiers are tools that let you shape light the way a sculptor shapes clay. By understanding their effects, you’ll be able to choose the right one for the story you want to tell through your images.
Editing Tips for Hard and Soft Light Images
Capturing beautiful light in-camera is a great start, but editing can take your photos to the next level. No matter if you’re working with hard or soft light, knowing how to adjust your edits to suit the lighting style will help you bring out the best in your images. Here are some beginner-friendly tips for editing photos based on the light quality used—whether you’re using Lightroom or its alternatives.
Editing Hard Light Photos
Control the Contrast
Hard light creates naturally high contrast with deep shadows and bright highlights. In editing, it’s important to preserve that bold look without losing detail. Use the tone curve instead of just adjusting the contrast. This gives you more control over the tones.
Use Clarity and Texture to Enhance Edginess
Hard light emphasizes edges and details, so feel free to lean into it. In your photo editor, increase “Clarity” or “Texture” slightly to enhance definition, especially in portraits, product shots, or architecture. Just don’t overdo it, or your subject might start looking too harsh.
Watch Out for Overexposed Highlights
Because hard light creates strong directional lighting, parts of your image might be very bright—especially skin or reflective surfaces. Use the “Whites” slider or local adjustments to recover blown-out areas if needed.
Black and White Works Wonders
Hard light often looks stunning in black and white. Convert your image, increase the contrast, and play with the black and white mix to highlight shadows and patterns. It’s a great way to add intensity and mood.
Editing Soft Light Photos
Enhance the Softness
Soft light already has gentle shadows, so you don’t need to push the contrast much. In fact, too much contrast can take away the natural, delicate feel. Focus on midtone adjustments and subtle edits that preserve the soft transitions.
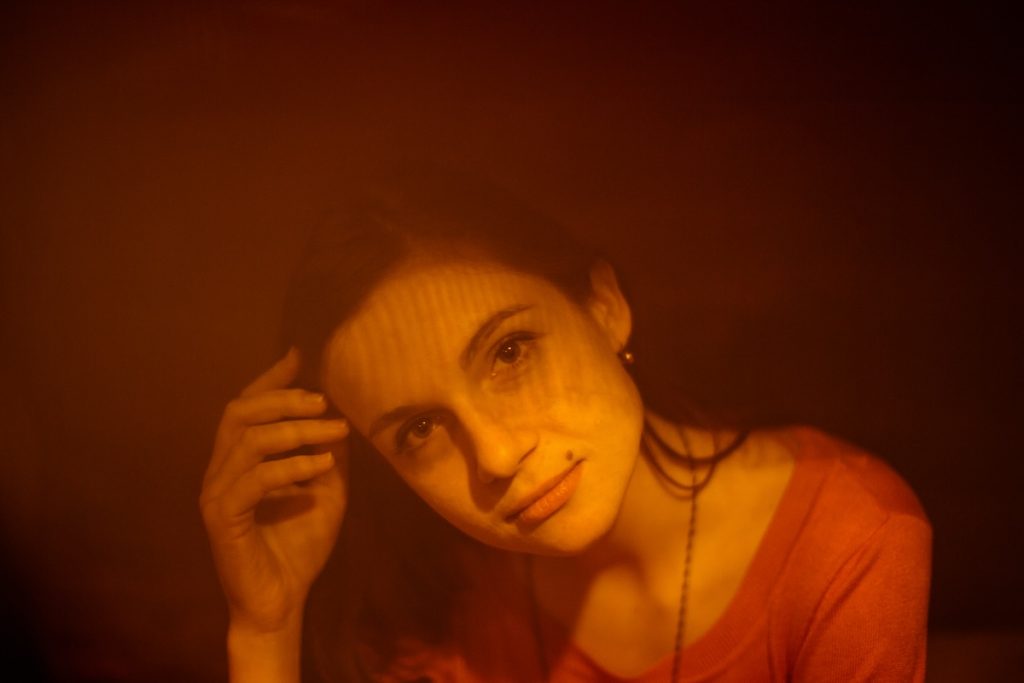
Warm It Up for a Cozy Feel
Soft light often looks best with warm tones. Slightly increasing the color temperature can give your image a cozy, golden-hour vibe. Add a bit of warmth to skin tones and backgrounds to evoke emotion and intimacy.
Add Depth with Local Adjustments
Since soft light doesn’t create much shadow, your photo can sometimes feel too flat. Use local adjustments like radial filters or dodging and burning to guide the viewer’s eye and add gentle depth where needed—like the subject’s face or around the edges of the frame.
Keep Skin Tones Natural and Smooth
Soft light already flattens skin, so your edits should enhance that rather than correct it. Use tools like skin smoothing or noise reduction sparingly to maintain natural texture while cleaning up any minor distractions.
Common Mistakes with Lighting
One of the most common mistakes photographers make is using hard light in situations that call for a softer approach. For example, firing an unmodified flash at close range during a wedding ceremony might create harsh shadows on the subject’s face, disrupting the soft, emotional feel of the event. Similarly, over-relying on soft light in editorial or commercial shoots might make your image feel flat or lifeless if you’re trying to showcase depth, form, or detail.
Another error is forgetting that lighting doesn’t only affect your subject, it also changes how the background appears—this applies even to white backgrounds. Hard light can cast shadows or highlight unwanted elements behind your subject, while soft light may wash out the separation between subject and scene, making the image feel less dynamic.
To avoid these pitfalls, always assess your light source in relation to your subject, background, and the story you’re trying to tell. A good rule of thumb is to take a few test shots and make micro-adjustments until you find the balance that feels right. Small tweaks—such as repositioning the light, adding a bounce card, or introducing fill light—can dramatically improve the final outcome.
Conclusion
Mastering light is one of the most empowering steps you can take as a photographer. The difference between hard and soft light may seem technical at first, but once you understand how each type behaves, you’ll gain the confidence to use them deliberately and creatively. Whether you’re capturing raw emotion, clean product photos, or tender moments, your choice of lighting will shape how your story is seen and felt.
Hard light offers edge, intensity, and clarity. Soft light brings warmth, subtlety, and elegance. Neither is inherently better than the other—it’s all about matching the light to your intention.
So, the next time you’re on a shoot, take a moment to consider your light. Embrace the shadows, play with diffusion, and experiment with different setups. In the end, it’s not just about how you light your subject—it’s about how your light tells the story.
FAQ
Hard light comes from a small or undiffused light source, producing sharp, well-defined shadows, high contrast, and strong texture.
Soft light is diffused light that reduces harsh shadows. It creates gradual transitions from light to dark, giving a flattering, gentle appearance.
Look at shadow edges and contrast:
• Sharp, crisp shadow edges and high contrast = hard light.
• Soft, gradual shadow fall-off and lower contrast = soft light.
Use hard light when you want drama, texture, and strong form (e.g. editorial, architectural, high-contrast portraits). Use soft light when you want flattering images, especially for skin tones, and emotional or gentle moods (e.g. portraits, weddings, lifestyle).
Yes. You can modify the light quality by:
• Changing light source size (bigger = softer)
• Adding diffusion materials (diffusers, softboxes, scrims)
• Using bounce (e.g. reflecting light off walls or ceilings)
Absolutely. A light placed closer to the subject acts “bigger” relative to the subject and thus yields softer shadows. Move the light away, and it becomes more directional/harder.
Neither is better universally. The choice depends on your creative intention, subject, and mood. Hard and soft light each have unique strengths and trade-offs.
Hard light accentuates texture and detail (skin pores, fabric fibers, surface irregularities). Soft light tends to smooth and minimize them.
No, it’s a continuum. Many real-world light sources fall somewhere between. You can adjust or mix them to get the look you want.