Part of our Workflow guides
Explore more articles on working faster, managing volume, and delivering efficiently in our Workflows section.
One of the biggest reasons why we built Honcho was to make our own lives easier, by eliminating the manual tasks involved in providing our event photography service.
In this article, we’ll show you how to eliminate 90% of the workflow for your own business.
This frees you up to do what you do best at events—taking great photos.
But before we do that, let’s talk about how we had to do things before we built Honcho.
It might sound familiar to you.
Life Before Honcho
When we first started our event photography business, it felt ridiculously complicated to do things that we thought should be simple—especially in this day and age.
We wanted to do the following:
- Easily and quickly transfer photos from camera to laptop
- In order to print the photos on-site, without delay
- Display the photos in a live slideshow, which could be projected to a large screen at the venue
- Share the photos with clients and guests right away
Sounds simple, right?
Well, not quite.
Meet Frankenstein
We realized that we had to piece together different software—all designed for different purposes—into a Frankenstein-esque solution that felt like it was held together with duct tape.
Talking to other photographers made us realize that we were not alone.
Here was what a typical workflow looked like:
- Swap SD cards with the photographer, every 10 to 15 minutes
- Insert the SD card into our laptop
- Import the photos into Lightroom, making sure not to create duplicates
- Cull the photos by selecting only the acceptable ones
- Rate the selected photos to filter them
- Add a watermark to the selected photos
- Print the selected photos
- Export the selected photos
- Upload them to Dropbox
- Use a slideshow software that could create a live slideshow from a Dropbox folder
- Import the photos into a photo booth software to enable instant sharing
That’s 11 steps and—if you were counting—4 different pieces of software.
All of these steps had to be done manually during the heat of the event, with everything else vying for our attention.
There had to be a better way.
Building Honcho
We were on a mission and the mission was simple.
Put Frankenstein out of its misery.
We wanted to eliminate as many steps as we could, and do everything with a single piece of software.
It took us over a year to build Honcho. While we were building it, we were also using it for our own events.
It was like building a plane while flying it.
We tested features and redesigned them if they were not good enough, until we were satisfied.
Finally, we had a sleek solution that eliminated almost every manual task in the process.
With Honcho, we could finally focus on what was important at our events—taking great photos and providing great service.
Let’s look at what Honcho has made possible.
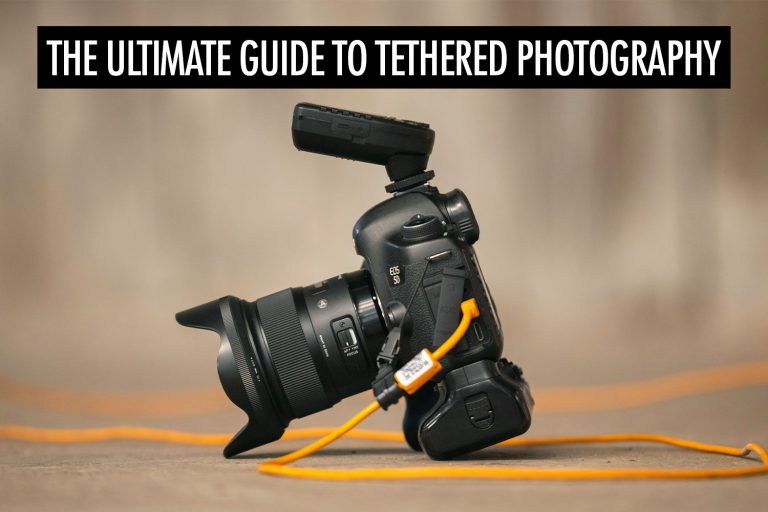
Upload Your Photos to the Cloud, While You’re Shooting
Before Honcho, transferring photos from camera to laptop meant swapping SD cards with the photographer.
It felt like sending messages by carrier pigeon, but we did it because it worked.
However, it was extra legwork for the photographer, and we could only get the photos after a 10 to 15 minute delay.
The alternative was wireless tethering, which was great for studio work.
But it wasn’t so great if we had to cover events happening at large venues—for example, with multiple halls and rooms.
To make it work for large venues, we fell down the rabbit hole of getting wireless transmitters—which still had limited range—or creating a WiFi network large enough to cover the whole venue.
It’s a nightmare we hope to never have to relive again.
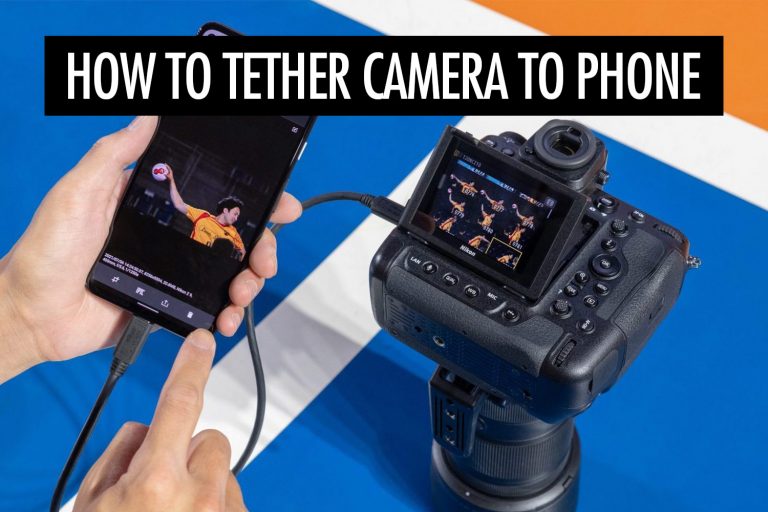
With Honcho, you just have to connect your camera to your phone with a USB cable.
That’s it.
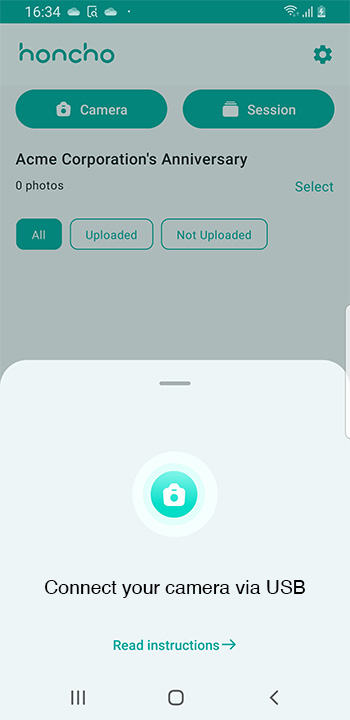
The photos are pulled into the Honcho app, which uploads them to the cloud.
That basically means that you get unlimited range, because you’re uploading the photos straight from your phone.
With our lightning fast upload speeds, you see the photos on the Honcho website within seconds.
Print Wirelessly From the Honcho Website
Before Honcho, we had to import the photos to Lightroom to print them.
That involved multiple steps—inserting the SD card into the laptop, importing the photos, and taking out the SD card.
It didn’t sound like much, until we realized that we had to do this every 10 to 15 minutes.
It really added up.
It also meant that someone had to sit at the laptop for the whole event—just going through the same process, over and over again.
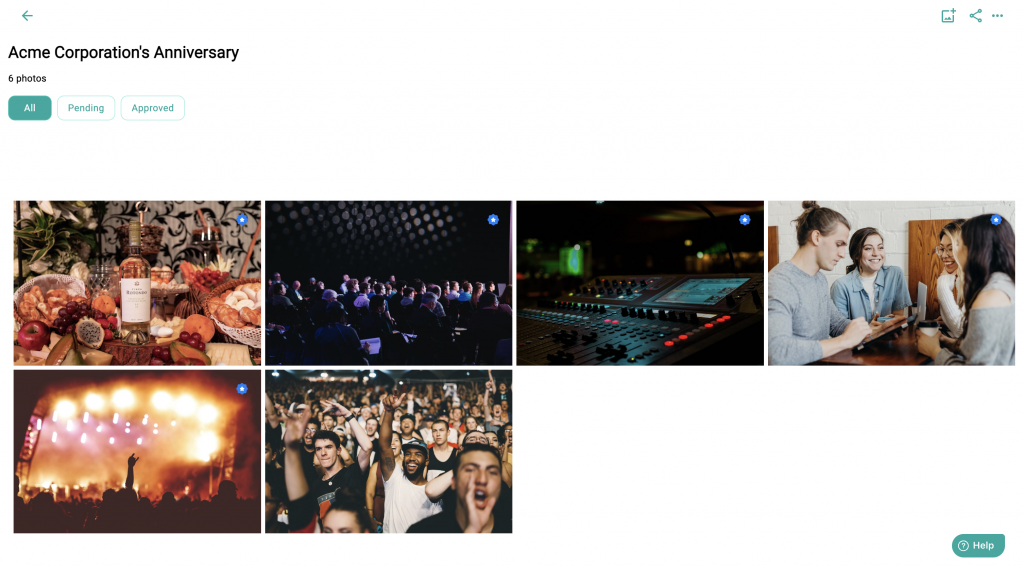
With Honcho, you can print right from the website—where you can already see all your uploaded photos from the last step.
First, download and install the CloudPrint app, which comes free with Honcho.
Next, launch the CloudPrint app, select your printer and click on Connect Now.
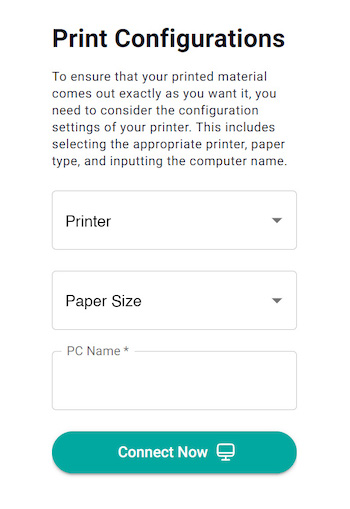
That’s it!
Your printer is now connected to the cloud, and acts like a wireless printer you can access from anywhere.
Now, you can simply select any photo in the Honcho website, click on the Print icon, and print that photo.

You can print from any device. For example, you can open up the Honcho website on your phone, and print from there.
This provides much greater flexibility, because you’re no longer tied down to your laptop.
Start a Live Slideshow With One Click
Before Honcho, creating a live slideshow meant working with additional software—which we had to pay for.
Even worse, it meant additional steps—adding to our already long list of manual tasks.
First, we had to select the photos to add to the live slideshow.
Then, we would export them from Lightroom to a local folder, and upload them to a folder in Dropbox.
Next, we had to use a live slideshow software which could read the photos from the Dropbox folder.
It created an even heavier mental load, because we had to juggle multiple photos, folders in different places, and software that did different things.
It was a real challenge to stay focused during an event, keeping ahead of all of the tasks.
With Honcho, all you have to do is click on the Slideshow icon, and it starts a live slideshow right in the browser.

Because the slideshow has its own URL, you can easily share and display it on any screen.
And you have full control because only approved photos show up in the slideshow.
The first method is to set all photos to be approved by default.
The second method is to set all photos to be unapproved by default, and to approve only the ones you want in the Honcho website.
Share the Photos Instantly With Clients and Guests
When we started our event photography business, we thought that it didn’t make sense that clients and guests couldn’t get their photos right away.
Even worse, most guests would never get their photos.
That’s because the photos had to take such a long journey to get to them.
Typically, the photographer would get home, edit the photos and deliver them to the client—a few days or weeks after the event.
The client would then have to post the photos in a public gallery or social platform (like Facebook) and share that with the guests (many didn’t).
Then, the guests would have to look through hundreds or thousands of photos, to find their own.
It’s no wonder that many of us have the experience of getting our photo taken at an event or wedding, but never actually getting the photo.
We thought that had to change.
The problem?
There wasn’t any software designed to solve that.
Before Honcho, we would have to import the photos into a photo booth software, so that guests could enter their email addresses to get their photos right away.
Again, that meant more steps in our workflow, and one more piece of software to struggle with.
All of that goes away with Honcho.
Since all of the photos are already in one place—the Honcho website—you can simply select the photos to share, click on the Share icon, and get the URL for the photos.
Even better, you can generate a QR code for the photos, so that guests can simply scan it to download their photos right away.

Conclusion
With Honcho, we were able to eliminate 90% of the manual tasks involved in providing our event photography service.
Just as importantly, we were now able to do everything with just 1 software—instead of 4 different pieces of software.
It massively improved our workflow and allowed us to focus on what was important for our business—taking great photos and providing great service.