A live slideshow automatically updates with new photos while an event is still happening, with images appearing on screen within minutes of being taken. It’s part of a photography workflow designed for fast delivery and adds to the overall event experience by making photography visible and interactive in real time, rather than something delivered days later.
At weddings, it adds energy during cocktail hour and reception, letting guests relive moments almost instantly. At corporate conferences, it keeps screens dynamic and reinforces brand presence throughout the venue. At roadshows and product launches, it draws attention and keeps crowds engaged. And at headshot booth activations, it gives participants immediate visual feedback, often prompting them to scan a QR code and find their own photos on the spot.
I’ve run live slideshows across all of these environments. Each comes with its own pressures, from unpredictable WiFi and AV coordination to tight timelines.
In this guide, I’ll break down when live slideshows make sense, what you need before offering them, and the different ways professional event photographers set them up in real-world conditions.
Benefits of Offering Live Slideshows

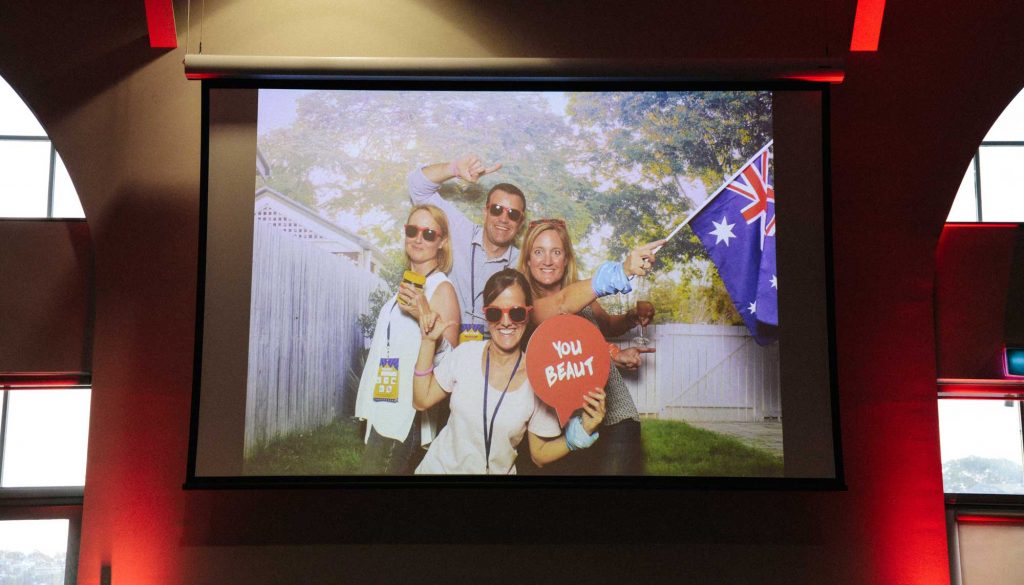
People love seeing great photos of themselves. When images appear on a large screen just minutes after they’re taken, it creates a different kind of energy at the event. Guests gather around the screen, point at photos, and wait to see if theirs shows up next.
Beyond the guest experience, live slideshows also make practical sense from a business perspective. They can increase your revenue per event, generate enquiries and referrals while you’re still on-site, and help you stand out from other photographers offering similar coverage.
Increase Revenue Per Event
One of the simplest ways I’ve increased my income from events is by raising my average revenue per job rather than trying to book more events. Adding a live slideshow made that much easier to do.
Instead of offering a single flat photography package, I started creating tiers, which also changed how I approach pricing. There’s the standard coverage, then coverage with a live slideshow, and then a higher-tier option that includes both a live slideshow and real-time photo delivery. Framing it this way makes the upgrade feel natural rather than pushy.
I know photographers who charge a few hundred dollars extra just for adding a live slideshow, and I’ve done the same. Once your workflow is dialled in, the extra effort during the event is manageable, but the perceived value to clients is high because it clearly enhances the experience. Over the course of a year, that additional fee per event adds up and can make a noticeable difference to overall revenue.
Generate Enquiries and Referrals During the Event
When your photos are being displayed on a large screen in front of a room full of guests, you are effectively showcasing your work to a highly relevant audience. People are paying attention because they are looking for themselves or their friends, and in the process, they are also noticing your style and quality.
At events where I’ve run live slideshows, it’s common for guests to approach me to ask for my contact details. Sometimes it’s someone planning their own wedding. Other times it’s a corporate attendee organising the next conference or company event. Having your work visible during the event creates natural opportunities for conversations that wouldn’t happen if the photos were only delivered privately after the fact.
Differentiate Yourself From Other Photographers
Even now, I’m surprised by how few event photographers offer live slideshows. Some assume the setup is too complicated, and others simply stick with the way they’ve always worked. When I started offering it consistently, I realised it changed how clients perceived my service.
Instead of being seen as someone who just delivers photos after the event, I was positioning myself as someone who thinks about the entire experience.
Most photographers promise quality coverage and fast delivery. Adding a live slideshow gives me something concrete and visible that sets my package apart. It makes the overall offering feel more complete, and in some cases, it has been the deciding factor in closing the job.
How Live Slideshows Complement Real-Time Photo Delivery
When I run live slideshows at events, I see them as one part of a broader real-time workflow.
Real-time photo delivery allows guests to instantly receive their photos on their phones, usually by scanning a QR code and accessing an event photo sharing gallery. A live slideshow, on the other hand, displays those same images publicly around the venue. The same workflow can also power instant printing, where guests receive a physical photo just minutes after it’s taken.
They complement each other very well. The slideshow creates shared excitement in the room. Guests see photos appear on the screen and naturally start looking for themselves or their friends. That often prompts them to scan a QR code, find their own images, and share them straight away.
If you’re not familiar with how the delivery side works, I’ve written a detailed guide on real-time photo delivery that breaks down the full workflow, from camera uploads to guest access, face recognition, and instant sharing. That article focuses on how photos get into guests’ hands, while this guide focuses on how they’re displayed around the venue.
The slideshow builds the atmosphere, while real-time delivery makes the experience personal.
How to Set Up a Live Slideshow
There are a few ways photographers create live slideshows at events. Some rely on a laptop-based setup, others use browser platforms, and newer workflows are built specifically for real-time photo delivery. The right option depends on the venue, your mobility, and how automated you want the process to be while you’re shooting.
Before looking at the setups, it’s worth addressing a common question. Lightroom and Capture One both support tethered shooting, so why not just use their built-in slideshow features?
The issue is that their slideshows do not automatically update as new photos are captured. When you start a slideshow, it only includes the images that exist at that moment. Any new photos taken afterward will not appear unless you stop and restart the slideshow, which defeats the purpose of running a live, continuously updating display at an event.
Option 1: Camera-to-Cloud Workflow (Fully Automated)
This is the most streamlined way I’ve found to run a live slideshow while shooting an event. Instead of exporting files manually or managing a hot folder on a laptop, I use a camera-to-cloud workflow where my images upload automatically, and the slideshow pulls from the gallery in real time. The result is a continuously updating display that doesn’t interrupt my shooting.
Over the years, I’ve found that the biggest friction was moving photos between devices and deciding which ones should appear on screen. That’s why I prefer using tools designed specifically for event photography workflows. With Honcho, for example, camera upload, image approval, live slideshow, and gallery access are all connected in a single system.
As I shoot, the photos upload automatically. I can approve or unapprove images from my phone or laptop, which ensures that only selected photos appear in the slideshow. The slideshow runs from a unique gallery link that I can open in any browser, making it easy to display on venue screens without complicated setup.
Setting up is straightforward. I create a gallery for the event, connect my camera to my phone using a cable, and start shooting. I open the gallery link in a browser, start the slideshow, and it updates automatically as new approved photos are added.
This works especially well at events where I’m doing roaming photography and need to move freely around the venue. As long as I have a stable internet connection, I can eliminate manual exporting and range limitations. Integrating the slideshow into the same real-time delivery workflow creates the least friction and the most polished experience.
Pros
- Fully automated upload and slideshow workflow
- Control over which images appear on screen
- Can be managed solo or with an assistant
- Slideshow and guest access are integrated in one system
Cons
- Requires a stable internet connection
Option 2: Laptop + Hot Folder Workflow
Before I moved to a camera-to-cloud setup, this was how I ran live slideshows at events.
I tethered my camera to a laptop so that images transferred automatically as I shot. If you’re not familiar with how tethering works, I’ve written a detailed guide on tethered photography that breaks down the setup, compatibility, and common pitfalls.
A hot folder application would then monitor the import folder and update the slideshow whenever new photos appeared. Once everything was connected to the venue screen via HDMI, the slideshow would continue refreshing in the background while I focused on shooting.
To run this setup, I used standard tethering tools such as Canon EOS Utility or digiCamControl, along with hot folder software like Breeze Hotfolder or Darkroom Hot Folder to automate the slideshow updates.
The biggest advantage of this approach was that it did not require an internet connection. Everything ran locally, which made it dependable in venues with poor WiFi. Because the photos were imported automatically, I did not need to manually transfer files during the event.
The limitation for me was mobility. Even when I switched to wireless tethering, the range was still restricted. In smaller rooms it was manageable, but in larger ballrooms or conference halls, I could not move freely without worrying about the connection dropping. I was still effectively operating within the laptop’s range.
If I needed to remove a photo from the slideshow, I had to walk back to the laptop to manage it. And since the slideshow had to run from that specific computer, it was not always convenient in venues that already had their own AV systems.
Pros
- Photos are automatically imported while I shoot
- Works completely offline
- Reliable in venues with poor internet
Cons
- Slideshow must run from the laptop where the software is installed
- Wireless tethering still has limited range, especially in larger venues
- Removing photos requires access to the laptop
Option 3: Browser-Based Slideshow Platforms
I’ve also experimented with browser-based slideshow platforms that generate a unique link and automatically update as new images are uploaded.
On the surface, these platforms are appealing. They allow you to create a slideshow that runs in any browser, which makes it easy to display on multiple screens. In venues with existing AV setups, this flexibility can be useful.
Some examples include Slidesome and Kululu. These tools are designed specifically for creating live, web-based slideshows that refresh as new images are added.
The challenge for me was not the slideshow itself, but getting the photos into the system efficiently. Unlike a tethered hot folder setup or a camera-to-cloud workflow, these platforms typically require manual uploads. That means I first had to transfer images from my camera to a phone or laptop, then select and upload them to the slideshow platform.
At slower events, this can be manageable. But at fast-paced weddings or corporate functions, stopping to transfer and upload files pulls attention away from shooting. Even if the upload process is quick, the extra step adds friction.
Pros
- Unique slideshow link that works on any device
- Can be displayed on multiple screens
Cons
- Requires manual photo transfer and upload
- Interrupts shooting flow at busy events
- Requires internet connection
- Separate from delivery or guest access workflow
Choosing the Right Setup and What I Check Before Committing
If I’m shooting in a venue with unreliable internet, I prefer a laptop and hot folder workflow. It runs completely offline and gives me dependable performance, as long as I’m comfortable working within the laptop’s range.
If the internet is stable, I choose a camera-to-cloud workflow. It gives me full mobility around the venue, control over what appears on screen, and a direct connection between the slideshow and guest access without juggling separate systems.
Before I commit to either setup, I make sure a few basics are covered.
First, I confirm the upload speed if I’m running a cloud-based workflow. In most cases, 10 to 20 Mbps upload is more than enough for fast updates. If I don’t trust the venue WiFi, I bring my own hotspot as backup.
Next, I clarify the display setup with the venue or AV team. I confirm screen resolution, orientation, and exactly how the slideshow will be connected, whether through HDMI or a browser-based feed.
Finally, I decide how approvals will be handled. At smaller events, I might approve images myself while shooting. At larger ones, I may have an assistant managing approvals from another device. Having a clear plan ensures that only selected images appear on screen.
Conclusion
A live slideshow turns photography into part of the event experience. Guests see moments play out in real time, and clients see the immediate engagement and attention it generates.
There isn’t a single right way to run one. If you’re working in a venue with unreliable internet, a laptop and hot folder workflow can do the job reliably. But if you want mobility, automation, and a direct connection to real-time photo delivery, a camera-to-cloud setup removes much of the friction.
What matters most is that the workflow is reliable and controlled. Once that’s in place, a live slideshow becomes another tool that elevates your service and differentiates you from photographers who only deliver after the event.
For me, integrating live slideshows into a broader real-time workflow has made events more dynamic, more engaging, and ultimately more valuable. And once clients experience it, it’s hard to go back to doing things the old way.