Part of our Business guides
Explore more articles on marketing, pricing, and growth in our Business section.
Whether you’re just starting out or have an established photography business, Google Ads are a great way to bring in more clients.
For our own photography business, Google Ads contribute to approximately 10% of our revenue.
Since we know that almost 50% of our clients will come back or send a referral our way, Google Ads help us to kickstart that virtuous cycle.
In addition, we believe it’s important to build up different channels for growing your business, so that you’re never overly dependent on one for your livelihood.
When investing in different channels, you can think in terms of the speed of getting results.
Channels like Google Ads can give you quick wins, while you invest in long-term plays like SEO and social media.
Hence, a key part of your business strategy is deciding on the mix of channels to invest in, to give you both quick wins and long-term results.
Are Google Ads Right for You?
To answer this question, you need to have a clear picture of your average deal size.
That is, how much are you getting paid per booking, on average?
If you’re an established photographer, you can figure this out by looking at your past bookings. For example, if you have been tracking your deals with a CRM (which you should be doing), this is data that you can easily pull out, by dividing your total revenue by the number of bookings.
If you’re just starting out, you’ll need to make a best guess. For example, you can look at how much you’re charging per hour, and make a guess at the duration of each assignment.
If you’re unsure of how to price your services, read this guide.
Don’t worry too much about getting it exactly right—this is just for a back-of-the-envelope calculation to see if Google Ads can even make sense for your business.
Next, we’ll use a simple formula to see if we can be profitable running Google Ads.
Here’s the formula.
Maximum spent on Google Ads per deal = Average gross profit per deal = Average deal size – Cost of service
Let’s walk through an example.
Say you have an average deal size of $1000. That’s pretty good, but hold on—not all of that money goes into your pocket.
You’ll need to spend money to provide your service—that’s your cost of service. Let’s say you spend an average of $300 on transportation, renting equipment, hiring an assistant and other expenses.
That means you have an average gross profit per deal of $700.
Hence, you cannot spend more than $700 on Google Ads per deal, if you want to be profitable.
If you’re spending more than that, you’re basically doing more work just to lose money.
Obviously, the higher your average gross profit per deal, the more leeway you have in running Google Ads.
Hence, we only recommend this channel if you have a large enough average deal size. If not, the math just doesn’t work out.
Research Your Keywords
So, you have done the math and decided that Google Ads could work for you.
The first step in the process is to do your keyword research.
Keywords are basically search terms—that is, what people type in the Google search bar. For instance, someone might enter “event photographer near me” when they’re looking to hire a photographer.
Google Ads will auction off this keyword, “event photographer near me”, so you’re bidding against other photographers for the right to show your ads. The higher you bid, the higher your position in the search results page.
Since you’re spending your money on this auction, you want to make sure you’re bidding on the right keywords. Hence, the importance of keyword research.
Within Google Ads, you will find a powerful tool to research your keywords, called Keyword Planner.
With Keyword Planner, you can get suggestions for keywords to bid for, and forecasts of the search volume for each keyword—that is, how many people will search for that keyword per month.
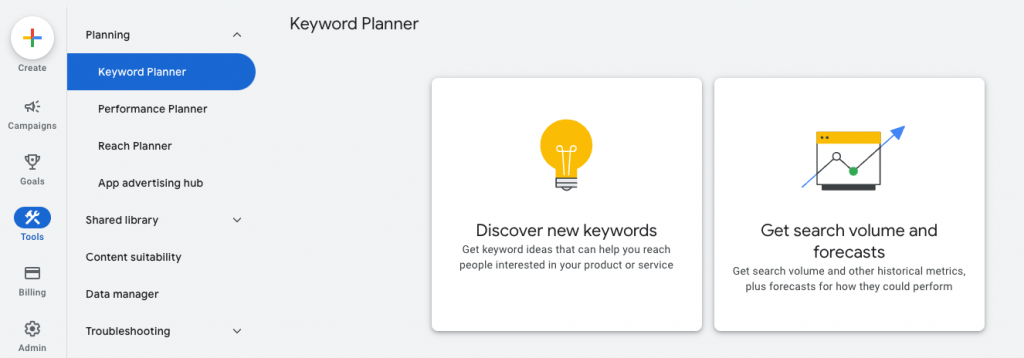
Let’s start by finding suggestions for keywords—click on “Discover new keywords”.
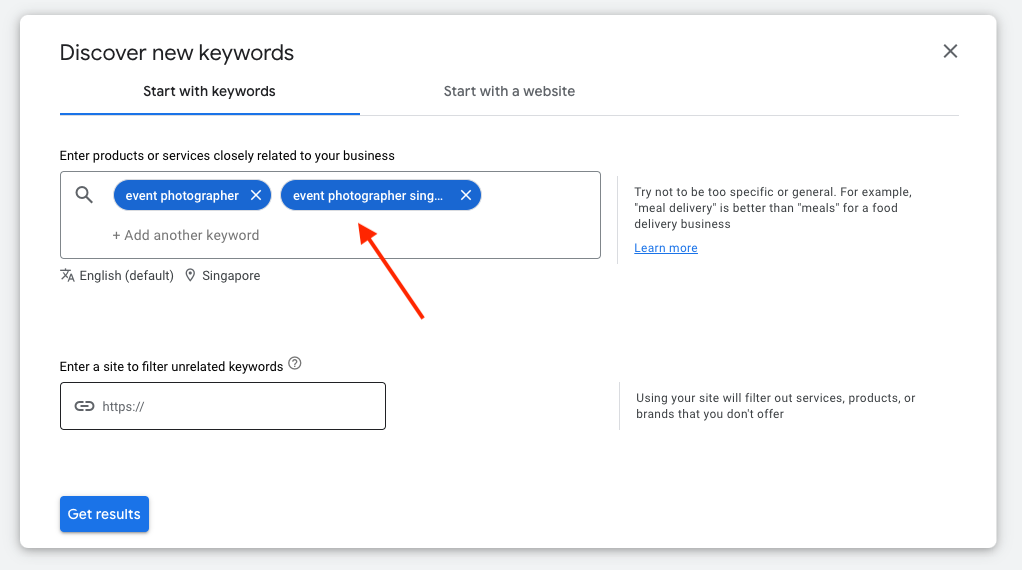
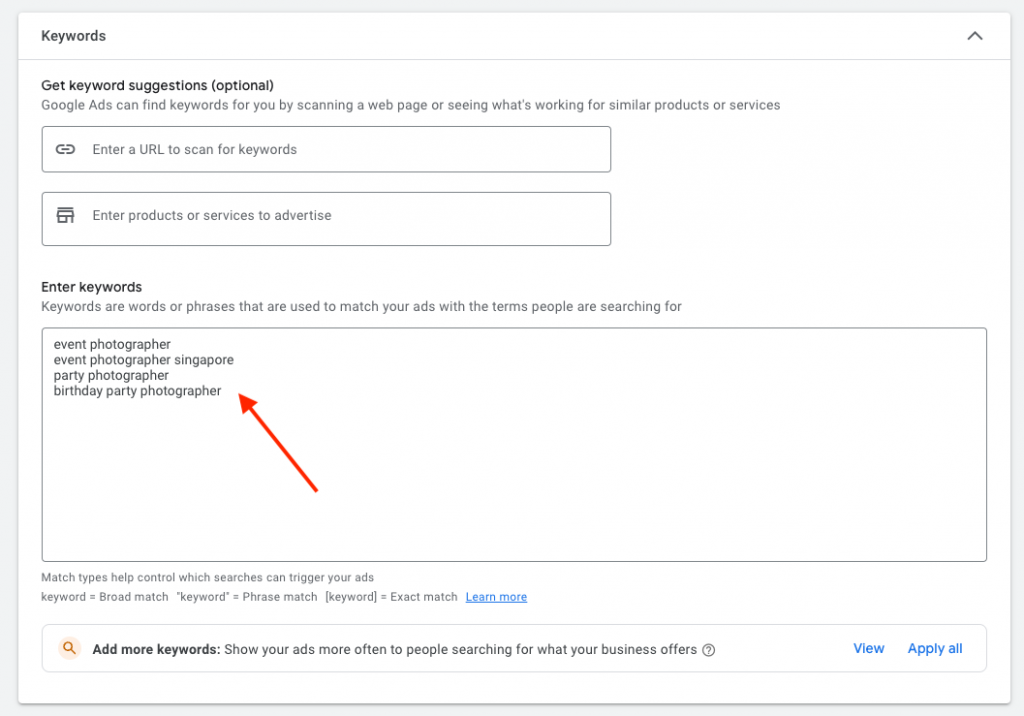
You’ll want to enter keywords that are closely related to your photography business. In our example, we’ll enter “event photographer” and “event photographer singapore”, where our business is based.
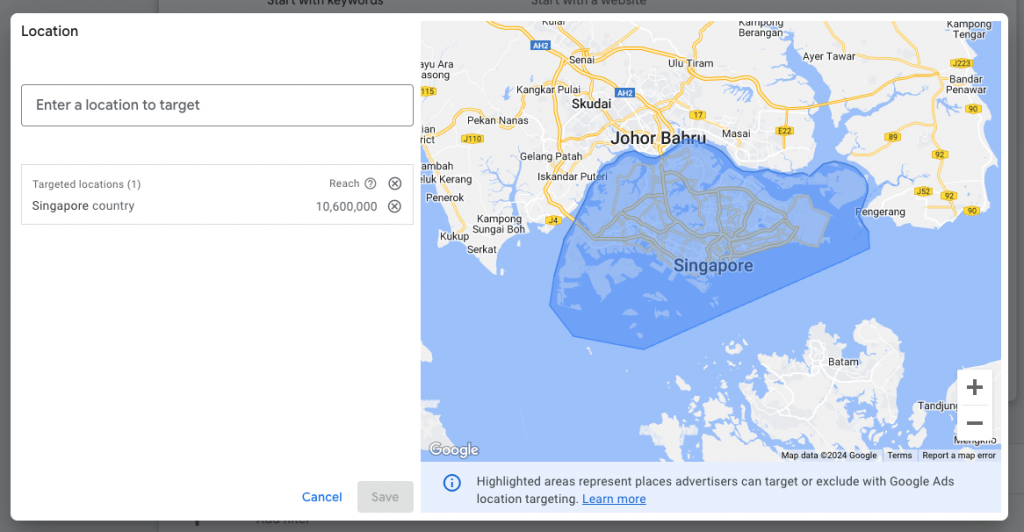
Since photography is a local service, you also want to restrict the results to just your city. You can do that by clicking on the location icon just below the search field.
Now, let’s see the results!
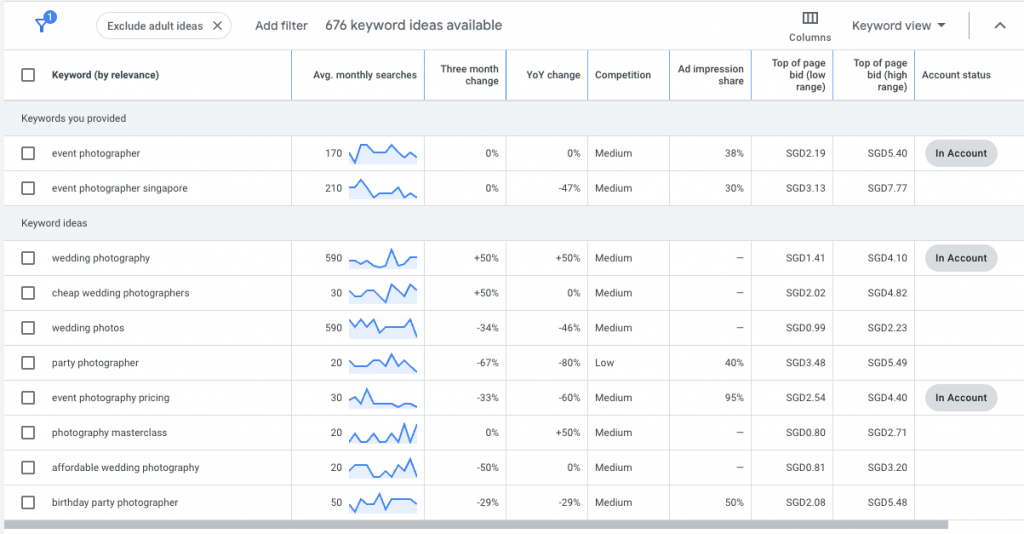
The Keyword Planner will generate a whole list of related keywords—some will be relevant to you, while others you should leave out.
In our example, we can see many suggestions for wedding related keywords. Now that’s smart, because many event photographers do weddings too, and vice versa.
We’re not interested in weddings right now, but we’ll keep that in mind for next time.
On the other hand, we’re getting interesting suggestions like “party photographer” and “birthday party photographer”. Yes and yes, these are specific types of events that we do—and we can see some search volume for them. So we’ll want to keep these keywords.
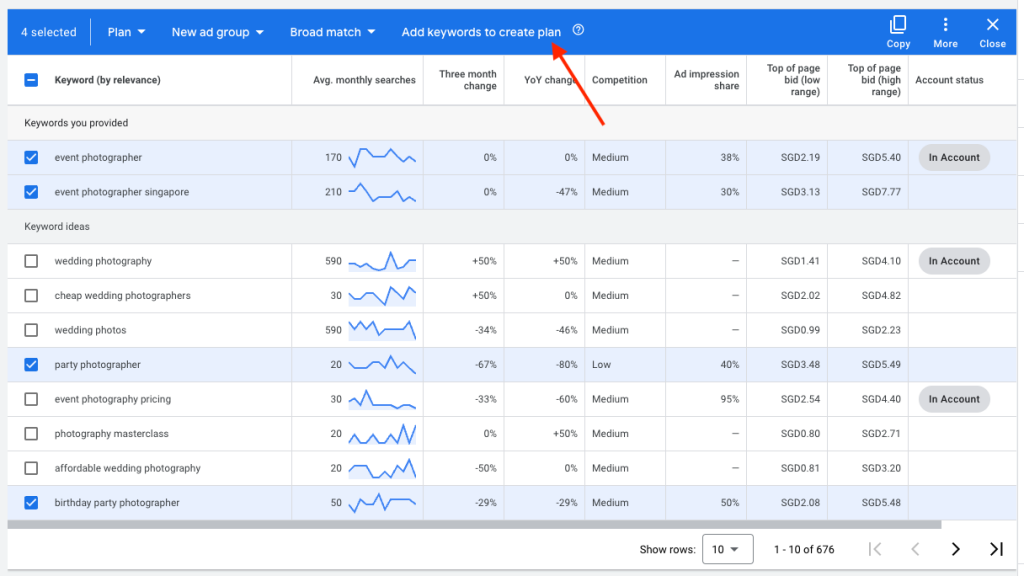
There is a convenient way to do this—just select the keywords you’re interested in, and click on “Add keywords to create plan”. That way, these keywords will be saved in a list that you can access later.
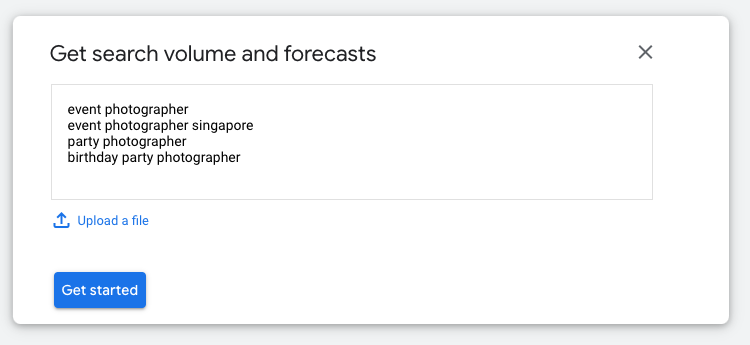
Great, now let’s get a forecast of the search volume by going back to the main Keyword Planner page. This time, click on “Get search volume and forecasts”, and enter the keywords you just researched.
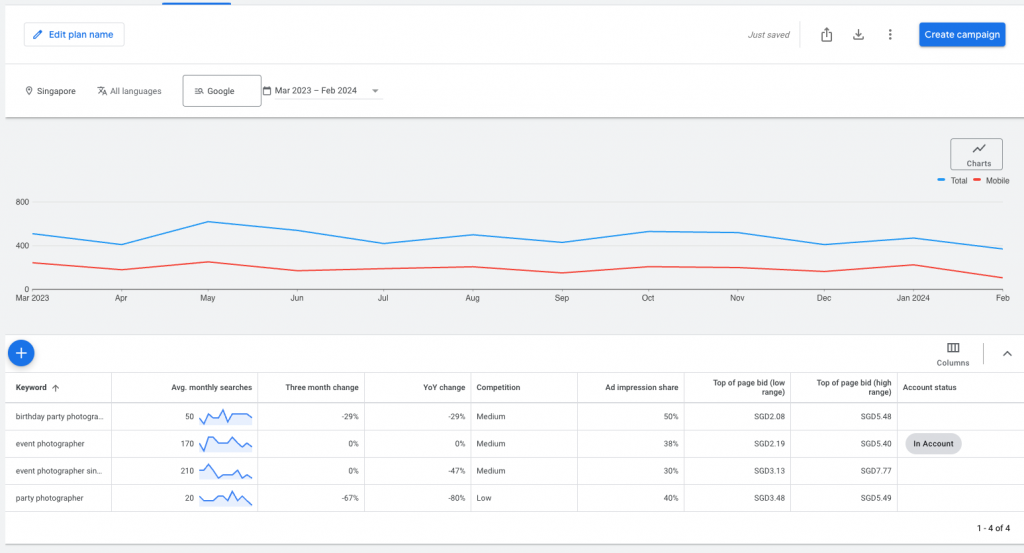
We’ll get a chart showing us the monthly search volume for each keyword. Sometimes, you can see interesting trends—for example, peak periods in certain months. It lets you know when to ramp up your campaigns.
You also want to pay attention to the total search volume for all of your keywords combined. If it’s low, which it is in our case, you will want to add in more relevant keywords. That’s because with a low search volume, you’re not going to get many chances to show your ads—so it will take longer for you to get results from Google Ads.
Set Up Your Campaigns
Now that you have your list of keywords, let’s create a new campaign.
You’ll want to create separate campaigns for every service that you provide.
For instance, you might provide event photography, portrait photography and real estate photography.
Each service should have its own campaign, since you can assign different budgets and create different ads for each campaign.
This gives you better control, because you can adjust the budget according to how much each service contributes to your business. Let’s say wedding photography contributes to the majority of your revenue—it makes sense to give it the largest ad budget.
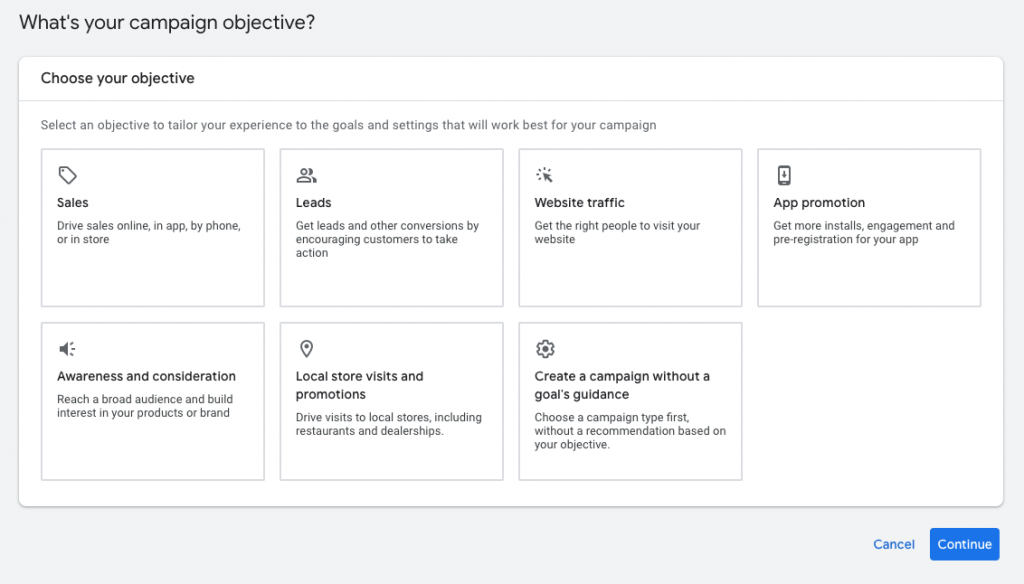
The first thing to do is select your campaign objective. In our case, we’ll select “Leads”, since we want to get visitors on our website and get them to submit a contact form.
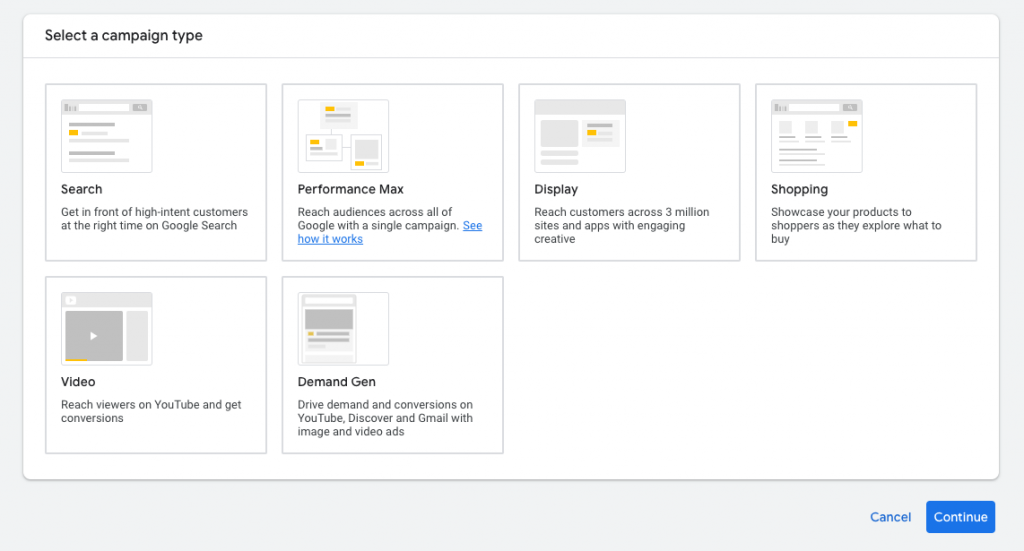
For the campaign type, we’ll just go with “Search”, so that our ads show up when people search for the keywords in Google.
Search tends to give us the best quality leads, because of the high search intent—that is, when people search for “event photographer near me”, it usually means that they’re actually looking to hire one.
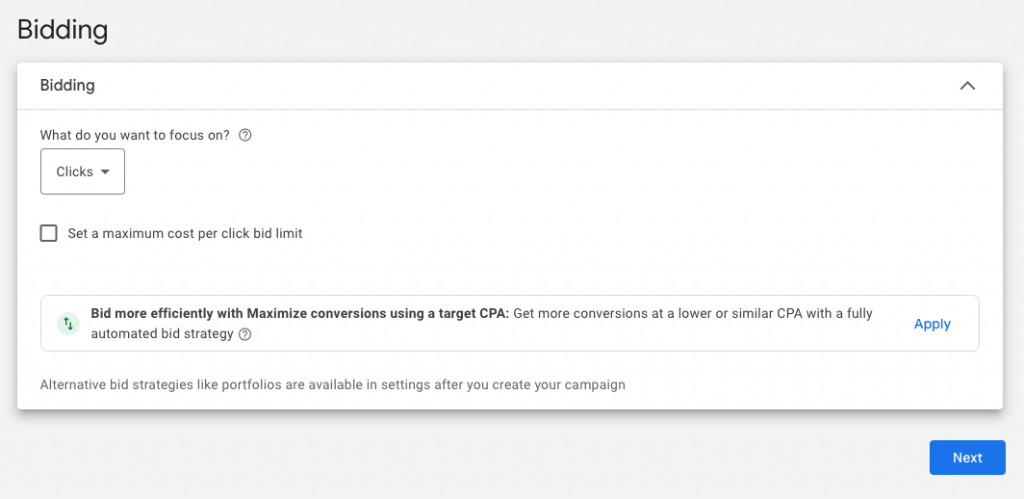
Next, you can decide on what to focus on for your bidding. You can opt for “Conversions”, but that will require you to set up the proper tracking on your website.
We’re going to keep it simple and opt for “Clicks”.
Remember, the point right now is to get your campaigns up and running as quickly as possible. We can leave the optimization—of which there are many possibilities—for later.
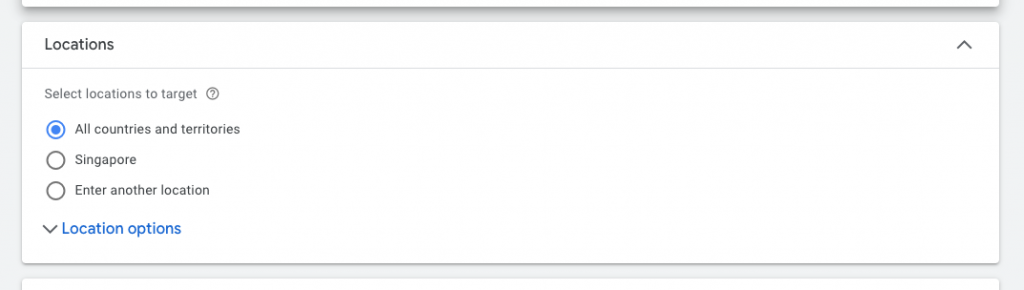
Next, you’ll want to make sure you’re showing the ads only in your local area. This ensures that you’re not wasting your budget showing ads to people halfway across the world.
Build Your Ad Groups
Now that you’re done creating your campaign, you’ll need to build ad groups within the campaign.
Ad groups are one level below campaigns in the hierarchy. Hence, each campaign can have multiple ad groups within it.
What is the purpose of ad groups?
Each ad group allows you to target a different list of keywords, set different bids for those keywords and run different ads.
That said, all of the ad groups inside a campaign will share the campaign’s budget.
Staying with the same example, we’re going to enter the keywords that we researched previously, related to “event photographer”.
Since we want to keep things simple at the beginning, we’re going to work with just one ad group inside our campaign.
Create Your Ads
Finally, it’s time to create your ad.

The first thing to enter is the “Final URL”, which is where visitors will be directed to after they click on your ad.
That could be your website or landing page.
Landing pages are essentially single-page websites that are created for the sole purpose of converting visitors. They tend to convert better than a normal website, because they’re highly optimized.
For example, there might be no option to navigate to any other page, so visitors can only click on the main call-to-action (CTA) button—like a Contact Us button.
The other advantage is that you can easily track the conversion rate of each landing page. We’ll talk about conversion rates a bit later.
Next, you can enter different headlines and descriptions, which Google Ads will automatically rotate depending on their performance.
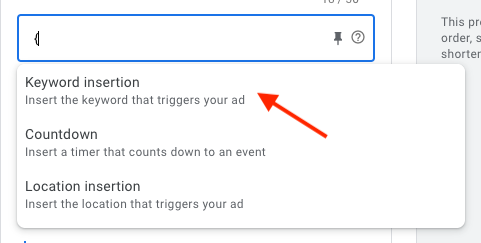
Here’s a pro-tip: when entering a headline, type “{“ to get the option for “Keyword insertion”.
That means that when your ads show up, it will show the search term that a person used.
For example, if the person searched for “birthday photographer”, that is the headline that your ad will show. That makes your ad even more relevant, which improves the click-through rate (CTR).
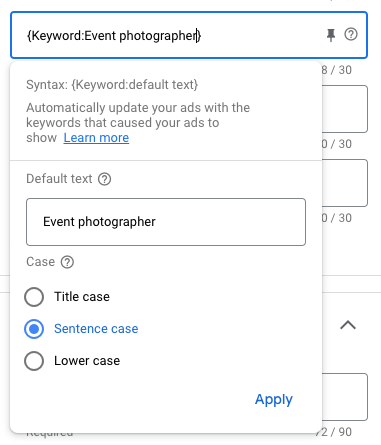
You can set a default text in case the search term can’t be used. In this case, our default option is “event photographer”.
Great, you’re done setting up your ad, which is ready to run!
Keyword Match Type and Negative Keywords
Google Ads offer 3 different keyword match types, and it’s important to understand how each works.
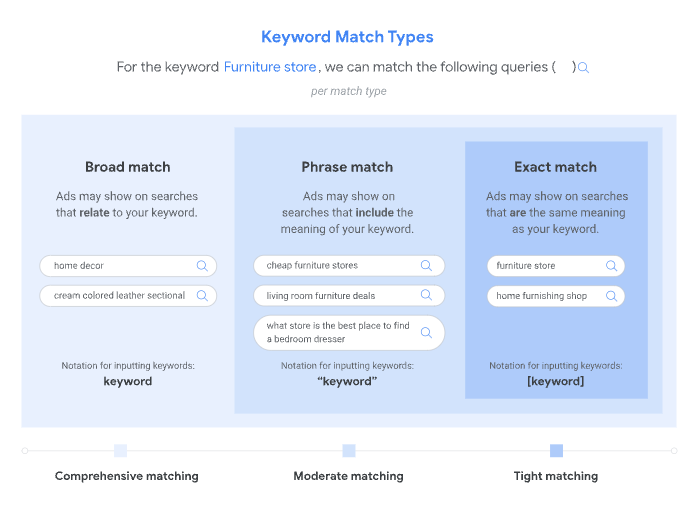
Broad match allows Google to include searches that don’t contain the direct meaning of your keywords. It means that Google is casting a wide net, to try to catch as much traffic as possible.
On the other hand, exact match means that your ads will only show on searches that have the same meaning or same intent as the keyword. It’s casting a much smaller net this time, and being a lot more selective in who it catches.
For us, we prefer to work with broad match or phrase match, so that we get more people seeing our ads. This is especially the case if the search volume isn’t large—using exact match might slow our ads down to a trickle.
That said, if we’re spending money on these ads, we want to make sure they’re well targeted, and not showing for irrelevant searches.
How can we do that with broad match or phrase match?
That’s where negative keywords come in.
Negative keywords allow you to exclude specific search terms that you know are not relevant to your photography business.
For example, we provide our services in Singapore. If someone searches for “event photography in London”, we don’t want our ads to show up because it’s wasting our budget.
How do you know which negative keywords to add to your campaign?
By going to “Search terms” under “Campaigns”.
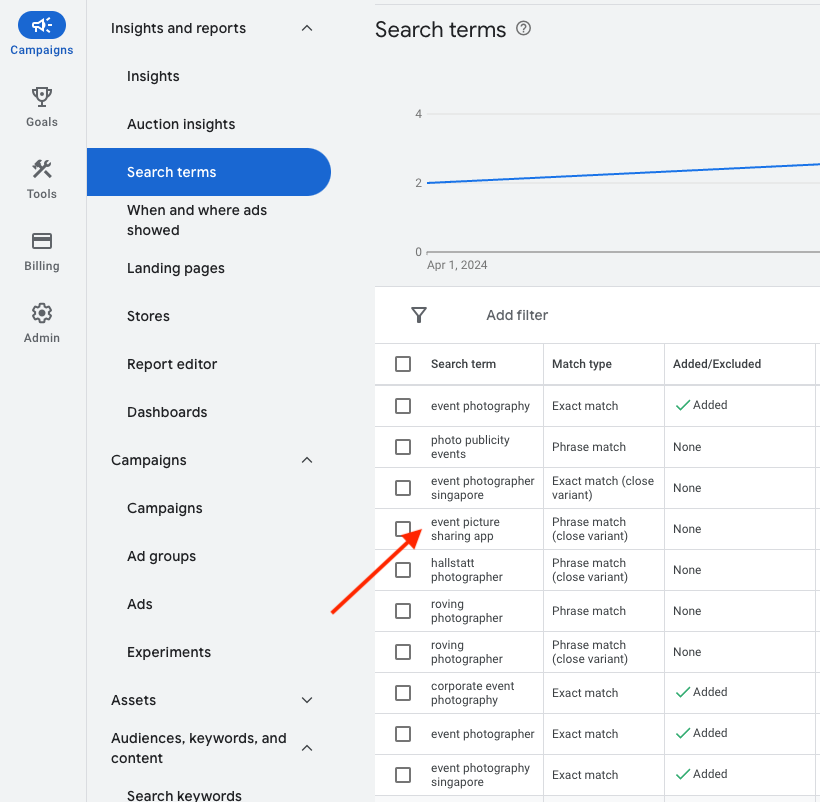
There, you can see the search terms that your ads are showing up for.
In this example, we know that “event picture sharing app” is definitely not what we want. We’re providing a service, not selling an app.
Hence, we’ll add that as a negative keyword, so we never waste our precious budget on it again.
Understand Your Funnel and Conversion Rates
Now that you have Google Ads set up, you need to understand your marketing funnel, and the conversion rates of each stage in the funnel.
What is a marketing funnel?
In short, these are the steps that anyone has to take before finally becoming a client.
Here’s an example funnel that should apply to most photographers:
- A person is looking for photography services and sees your ads while searching on Google. They click on it.
- They are directed to your website or landing page. They click on the button to submit their enquiry or bounce out.
- They are directed to your form, where they fill out their contact information or bounce out.
- You contact them directly, by email or phone call. They convert into a client or bounce out.
At every stage, a person can either progress to the next stage or bounce out of the funnel.
That’s why there’s a conversion rate for each stage.
Here’s the formula.
Conversion rate for each stage = Number of people who progress to the next stage / Total number of people in the stage
To get the overall conversion rate for the whole funnel, just multiply the conversion rates for each stage.
For example, if you have 3 stages and each stage has a conversion rate of 20%, the overall conversion rate is 0.2 x 0.2 x 0.2 = 0.008.
It means that for every 1,000 people who enter your funnel, 8 will become your clients.
This will finally allow you to calculate the amount you’re spending on Google Ads, per deal.
Amount spent on Google Ads per deal = Cost per click (CPC) ÷ Overall conversion rate
Let’s say you have a CPC of $2, and an overall conversion rate of 0.008. That means you’re spending $250 to get each new client.
That can be good or bad, depending on your average gross profit per deal.
This explains why it’s so important to understand your funnel and conversion rates, because it allows you to determine if you should keep on running your ads.
It also gives you an idea of how you can continuously improve the performance of your ads, by improving the conversion rates of each step in the funnel.
Taking the example above—if you improve the conversion rate of a single step by 50%, you increase your overall conversion rate by the same amount. Now, out of every 1,000 people who enter your funnel, 12 will become your clients, instead of 8. And you’re now spending $166.67 to get each new client, instead of $250.
Obviously, this will make a huge difference to your business.
Conclusion
Just like any other marketing channel, you’re not going to get Google Ads exactly right the first time.
It’s an iterative process, and there are so many ways you can continue to improve the performance of your ads.
For example, you can experiment with different bidding strategies. You can create multiple ads to test which converts the best. You can create multiple landing pages for each ad.
It’s a deep rabbit hole.
Just remember the law of diminishing returns. At some point, it just doesn’t make sense to invest more time just to squeeze a little more juice from that lemon.
This is especially true if you’re working with relatively small ad budgets, which I’d expect for most photographers.
If you’re a large e-commerce company with a 7-figure budget—by all means, keep optimizing. That 2-3% improvement can make a significant difference.
But if you’re working with a budget of a thousand dollars, maybe that time is better spent building your other marketing channels.
Nevertheless, it’s crucial to get started with Google Ads now, rather than later—so that you can start your path to mastery.