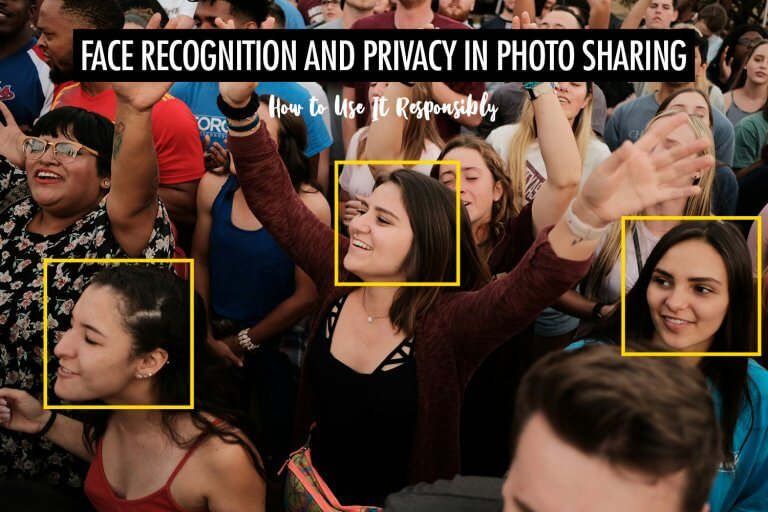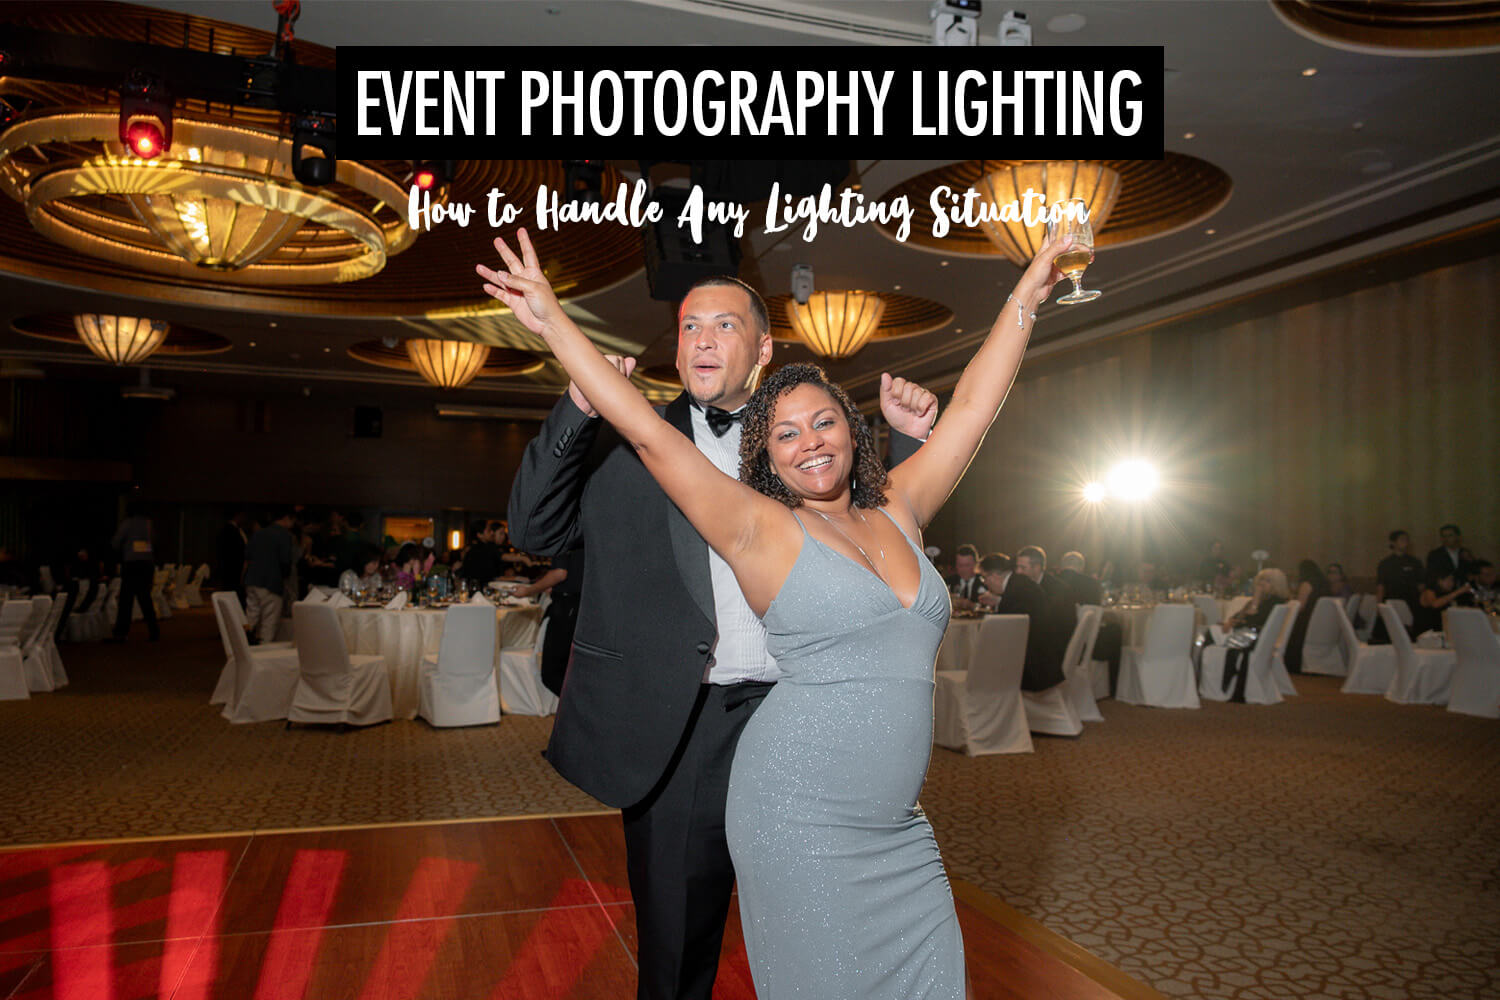
At most of the events I shoot, lighting is the one thing I can’t control. Venues are often dim, mixed lighting is common, and the conditions can change quickly throughout the day. At the same time, there’s no opportunity to adjust the lights or redo a shot if something doesn’t work.
I’ve been shooting events since 2016, covering conferences, corporate functions, weddings, and large-scale productions. Over time, I’ve learnt lighting techniques that work reliably across different environments.
In this article, I’ll break down a simple way to think about event photography lighting so you can handle any situation you walk into. We’ll look at the few lighting scenarios that come up repeatedly at events and how to approach each one. If you’re looking for how to approach event coverage more broadly, I’ve broken that down with my event photography tips.
A Simple Way to Think About Event Lighting
Every lighting situation you encounter at an event will fall into one of these three scenarios:
1. Ambient Light Only
The available light is good enough to shoot without flash, and the goal is to preserve the natural look of the scene.
2. Flash as Fill
There’s usable ambient light, but you add flash to lift your subject while keeping the atmosphere.
3. Flash as Primary Light
Ambient light isn’t reliable, so flash becomes your main light source to ensure consistent results.
Once you recognise which scenario you’re in, your decision making process becomes clearer.
If you’re unsure what equipment to use, I’ve covered my setup in a separate guide on event photography equipment.
In the rest of this article, I’ll break down how to handle each scenario.
Scenario 1: Using Ambient Light Only

When This Happens
This is most common at conferences, corporate events, and outdoor daytime shoots where the available light is sufficient to work with. Some venues are designed to be well-lit, especially for talks, networking sessions, or exhibitions, so adding flash isn’t necessary.
What You’re Trying to Achieve
The goal here is to preserve the natural look of the event. You want the photos to reflect what the scene actually looked like, including the direction, intensity, and mood of the light. When it works well, ambient light gives you images that feel authentic, especially for candid moments.
How to Shoot It
Shooting with ambient light is mostly about making the best use of what’s already there. That usually means working with higher ISO, wider apertures, and keeping your shutter speed just fast enough to avoid motion blur.
Instead of shooting from anywhere, I’m often looking for better light, whether that’s a subject facing a window, standing under stronger overhead lighting, or avoiding harsh shadows.
Scenario 2: Using Flash as Fill

When This Happens
This is common at indoor events where there’s still some usable ambient light, but not enough to rely on it completely. Think networking sessions, dinners, and receptions where the lighting has mood but isn’t strong or consistent.
If you shoot with ambient light only, images can start to look noisy. But if you rely entirely on flash, you lose the atmosphere of the scene. This is where using flash as fill makes sense.
What You’re Trying to Achieve
The goal here is balance. You want to keep the ambient light so the background still feels natural, while using flash to properly expose your subject. When done well, the flash blends into the scene rather than standing out.
How to Shoot It
Most of the time, I’m using bounce flash rather than pointing the flash directly at the subject. Bouncing off a ceiling or wall gives you a softer and more natural-looking light. Instead of bouncing straight up, I’ll usually angle the flash toward a wall or ceiling behind me or to the side, so the light comes back with some direction rather than falling flat.
That said, bounce flash doesn’t always work, especially if the ceiling is too high, too dark, or strongly coloured. In those situations, I switch to direct flash. Using a light modifier can help here, and something like a MagMod softens the light slightly so it doesn’t look as harsh.
The key is that I’m not trying to overpower the ambient light. I let the ambient exposure define the background, then use flash to properly expose the subject. That usually means using a slower shutter speed to bring in more ambient light, while keeping flash power controlled so it doesn’t dominate the scene.
In venues with strong ambient lighting, especially warm indoor lighting, your flash can look very different from the scene if left unmodified. This results in mixed lighting, where the background and subject have different colour tones. One way to handle this is to gel your flash to match the ambient light. For example, adding a warm gel in tungsten-lit environments helps your flash blend in more naturally.
You can also use gels creatively to introduce colour into the scene, for example by using complementary colours to the ambient light. But in most cases, I’m using gels to match it.
Scenario 3: Using Flash as Primary Light
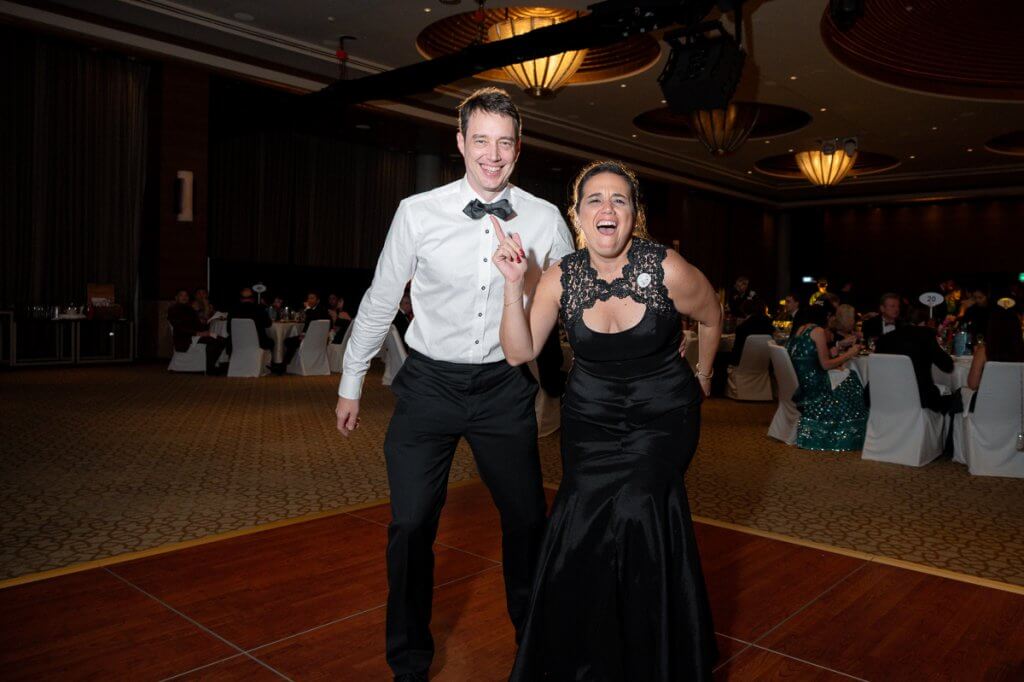
When This Happens
This is most common in dark environments where ambient light isn’t usable on its own. Think ballrooms, dance floors, night events, or venues with very low and inconsistent lighting.
What You’re Trying to Achieve
The goal here is consistency. Instead of trying to preserve the ambient light, you’re using flash as your main light source to ensure your subjects are properly exposed in every frame. The background becomes secondary, and the priority is getting clean and usable images.
How to Shoot It
In this scenario, I’m no longer trying to balance ambient and flash. Instead, I set my exposure so that ambient light has minimal impact, and let the flash do most of the work. That usually means using a faster shutter speed and lower ISO compared to ambient or fill scenarios.
One limitation of on-camera flash is that the background can fall into darkness, especially in larger spaces. This is where off-camera strobes can help.
If I have the option, I’ll place one or two lights around the room, usually at the edges of the dance floor or pointing across the space. Even a single off-camera light can make a big difference. Placing a light behind your subjects creates a subtle rim or edge light that separates them from the background. With two lights placed diagonally across a space, you can introduce more depth and dimension.
The key is to keep your ambient light slightly underexposed so the room still exists, but doesn’t compete with your subjects. From there, your on-camera flash handles the subject, while the off-camera lights shape the scene around it.
Conclusion
To master event photography lighting, you have to recognise the situation you’re in and choose an approach that works reliably.
At most events, the conditions won’t be ideal. What matters is being able to assess the scene quickly and switch between ambient light, flash as fill, and flash as your primary light when needed.
Once you start thinking this way, lighting becomes much simpler. You’re no longer guessing or constantly adjusting settings. You’re making deliberate decisions based on the situation in front of you.
Once you understand lighting, the next step is knowing what to shoot. I’ve broken that down in my event photography shot list guide.