
Part of our Workflow guides
Explore more articles on working faster, managing volume, and delivering efficiently in our Workflows section.
For most client galleries, a strong starting point is JPEG, Quality 90, sRGB, Resize to Fit at 4200 px on the long edge, and Screen sharpening at Standard. That keeps files much smaller than a full-resolution export while still leaving plenty of resolution for screen viewing and many common print sizes. If you specifically want to deliver every available pixel, leave Resize to Fit off. For online viewing, don’t worry about PPI because it doesn’t make a difference for screens.
Those settings work well for most client galleries. A few of them are worth understanding before you save the setup as a preset.
Which Lightroom export settings are best for client galleries?
For a normal online client gallery, the goal is simple: keep image quality high without making the files larger than they need to be. The table below is a practical starting point, not a rule you must follow.
| Setting | Recommended starting point | Why |
|---|---|---|
| File format | JPEG | Easy for clients to view, download, print, and share |
| Quality | 90 | Very high image quality with much smaller files than Quality 100 |
| Color space | sRGB | The safest choice for consistent viewing on browsers, phones, and apps |
| Resize to Fit | Long Edge, 4200 px | Keeps files smaller, leaves plenty of resolution, and gives cropped photos a more consistent size |
| Resolution | Any value for online-only delivery | PPI matters for print sizing, not screen sharpness |
| Output sharpening | Screen, Standard | A good default for photos mainly viewed on screens |
| Metadata | Copyright & Contact Info Only, or your preferred minimal set | Keeps useful ownership details without adding extra private information |
| Watermark | Off for final client downloads | Clients usually expect clean final files unless your agreement says otherwise |
What JPEG quality should you use in Lightroom?
Quality 90 is a good default for most client galleries. It keeps image quality very high without the much larger files you get near the top of Lightroom’s Quality scale. Quality 100 can still make sense when file size does not matter, but it is usually unnecessary for normal gallery delivery.
Lightroom’s Quality slider controls JPEG compression, and Adobe confirms that JPEG is still lossy even at Quality 100. As you move closer to 100, the files can get much larger while the visible improvement gets smaller. In other words, you get diminishing returns.

For this example photo, our exports were 2.58 MB at Quality 70, 3.78 MB at 80, 5.72 MB at 90, and 9.95 MB at 100. Moving from 90 to 100 made the file 74% larger, yet the two versions were very hard to tell apart, even when we looked closely at hair, jewelry, skin, and text at 100%. This shows why pushing the slider all the way to 100 often adds a lot of file size for very little visible gain.
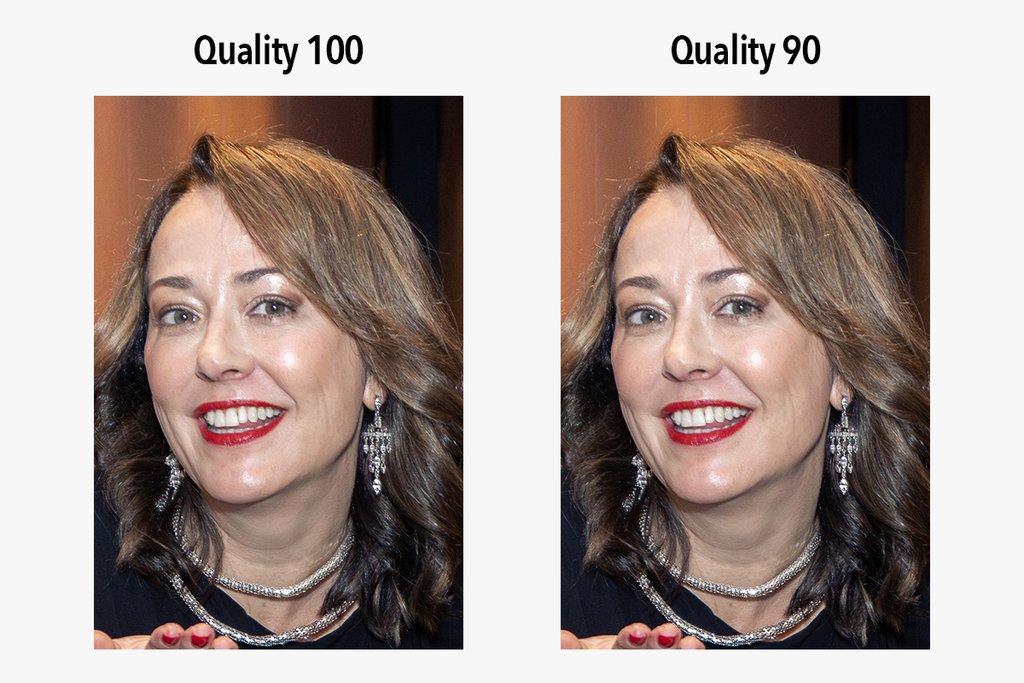
For galleries with hundreds or thousands of photos, those savings add up. Quality 90 keeps plenty of image quality while making the files much smaller. It is more than enough for normal viewing, sharing, and printing. If a commercial client asks for the highest-quality JPEGs, or the files are for a special use, you can still move to 100.
Should you resize photos before uploading them to a client gallery?
For most client galleries, turn on Resize to Fit and set the Long Edge to 4200 pixels. That is much larger than most screens need. It also keeps files smaller than a full-resolution export while leaving plenty of resolution for many common print sizes. Turn on Don’t Enlarge so Lightroom does not make a photo bigger if it is already smaller than 4200 pixels.

Resizing also makes the delivered photos more consistent. Without it, an uncropped photo may export at the camera’s full resolution while a cropped photo exports smaller. Setting a 4200 px long edge gives every photo that is large enough the same maximum size, even when some photos were cropped more than others.
Leave Resize to Fit off when you want to deliver every available pixel. That can make sense for commercial work, very large prints, or clients who expect full-resolution files. For normal gallery delivery, those extra pixels often make the files much larger without changing what the client sees on screen.
What resolution should you use when exporting from Lightroom?
For online galleries, PPI does not affect how sharp the photo looks on screen. What matters is the photo’s pixel dimensions. A 6000 × 4000 image has the same amount of detail whether Lightroom is set to 72, 240, or 300 PPI.
PPI only matters when the photo is printed because it determines how those pixels are spread across the print. For example, a 6000-pixel-wide photo at 300 PPI prints at 20 inches wide. Changing the PPI does not add or remove detail from the image. Adobe treats Resolution as a print setting, so follow your print lab’s requirements when preparing files for print.
For an online gallery, you can leave the setting at 300 PPI or any other value without affecting quality.
Which color space should you choose in Lightroom?
Use sRGB for normal client galleries because it is the safest choice for consistent color. Adobe describes sRGB as a web-friendly color space and recommends it for photos shared online.
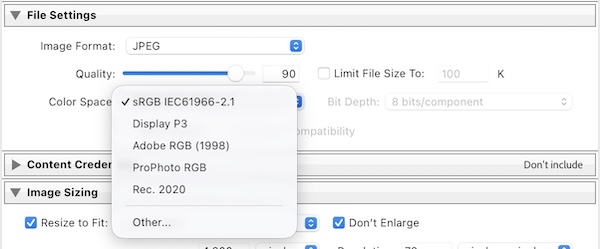
A color space controls the range of colors a file can hold. Adobe RGB and ProPhoto RGB can hold a wider range than sRGB. That can help in some editing and print workflows, but a wider color range does not automatically make a client JPEG look better.
For a client gallery, compatibility matters more. Your photos may be opened in a browser, downloaded to a phone, emailed, posted to social media, or viewed in apps you do not control. sRGB is the safest choice across that mix of devices and apps.
Choosing sRGB also does not mean you edited the photo in a “lower quality” color space. Lightroom manages color while you edit, then converts the exported file to the color space you choose. The export setting is mainly about where the photo will be viewed next.
Use another profile only when the client, designer, or print lab asks for one. They may request Adobe RGB, Display P3, or a specific custom profile. If there are no special color instructions, use sRGB. You are not “throwing away quality” by choosing it for a normal client gallery.
Should you use output sharpening when exporting from Lightroom?
For client-gallery JPEGs that will mainly be viewed on screens, use Sharpen For Screen with Amount set to Standard. Adobe says export sharpening is added on top of the sharpening from the Develop module, and Standard works well in most cases.

Output sharpening is different from the sharpening you use while editing. Develop sharpening is part of the edit. Output sharpening adds a final amount based on how the photo will be viewed or printed.
That makes Screen and Standard a good default for online galleries, especially when the photos have been resized. Choose Low if your edits are already very sharp or you prefer a softer look. Use High only when you have a reason to, because too much sharpening can make edges and noise look harsh.
For print files, choose Matte Paper or Glossy Paper based on the paper type, or follow the print lab’s instructions.
What should change when clients plan to print the photos?
A 4200 px long edge is enough for many common print sizes, so you do not need full resolution just because a client may print the photos.
| Print resolution | Approx. maximum size | Common print sizes it comfortably covers |
| 300 PPI | 14 × 9.3 in | 8×10, 8×12 |
| 240 PPI | 17.5 × 11.7 in | 10×15, 11×14 |
| 200 PPI | 21 × 14 in | 12×18, 14×20 |
These figures assume a 3:2 photo at 4200 × 2800 px. 300 PPI is a common high-quality print target, but larger prints can still look good at lower PPI because they are usually viewed from farther away. For larger prints, follow the printer or lab’s requirements.
This is where pixel dimensions and PPI work together. If a lab asks for 300 PPI at a certain print size, check that the file has enough pixels for that size. Changing the Resolution field by itself does not add more detail.
If you often use the same print lab, save a separate preset with that lab’s settings instead of changing your normal gallery preset each time.
Should you export JPEG or RAW files for clients?
JPEG is the standard choice for client delivery. RAW files are much less commonly delivered because they are unfinished source files that are meant to be edited before use.
Many photographers prefer not to give clients RAW files at all. A RAW file does not show the photographer’s finished color, exposure, cropping, and other edits, so it may not represent the final work they want associated with their name. RAW files are also much larger and require special software to edit properly.
Some photographers will provide RAW files if a client asks, while others will refuse or charge an extra fee. There is no single rule you have to follow. It is ultimately a business decision based on what you are comfortable delivering and what you agreed with the client.
If you want to learn more, our guide to RAW and JPEG differences explains how the two formats differ.
TIFF can be useful when a designer, retoucher, or print workflow asks for it. For a normal client gallery, it is rarely needed. The files are much larger and give the client no benefit for everyday viewing.
How should you save these settings for future jobs?
Save one main client-delivery preset once you settle on the settings you want to reuse. A simple preset could be called Client Gallery – 4200 px Long Edge and use JPEG, Quality 90, sRGB, Resize to Fit at 4200 px on the long edge, Screen sharpening at Standard, your chosen metadata setting, and no watermark.
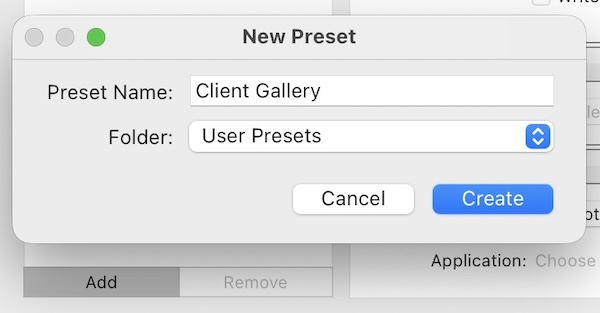
If you sometimes need every available pixel, make a second preset called Client Gallery – Full Resolution with Resize to Fit off. You can also make a smaller web preset when a site has its own limit. Most jobs do not need a long list of nearly identical presets.
Lightroom Classic lets you save export settings as presets and use more than one preset when you need several versions. For large event galleries, this saves you from setting up the same export again and again.
If you use Honcho, you can export straight into a folder watched by Honcho Uploader. New files added to that folder can upload automatically. This connects your Lightroom export folder to the online gallery without needing a Lightroom plug-in.
Frequently asked questions
Quality 100 uses the least JPEG compression, but it is still not lossless and is rarely needed for a normal client gallery. Quality 90 is a better option because it keeps image quality very high while making the files much smaller.
Avoid Limit File Size To unless the site or client gives you a maximum file size. Lightroom may have to add more compression to hit that limit. If there is no file-size rule, using a fixed Quality setting gives you more control.
You do not need to remove all metadata, but you also do not need to send everything. Lightroom can keep only copyright and contact details, and you can remove location data separately. That is a good starting point if you want to keep ownership details without sharing extra camera or GPS information.
Final client downloads usually look better without a watermark unless your agreement or business model calls for one. Watermarks make more sense on proofs, public previews, or photos where the clean file is delivered only after purchase.